Showing posts with label gluten-free. Show all posts

17 March 2022

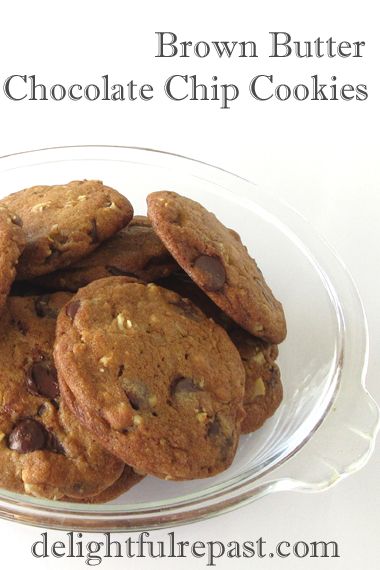
Brown Butter Chocolate Chip Cookies

Brown Butter Chocolate Chip Cookies / www.delightfulrepast.com

Chocolate Chip Cookies seem to be at the top of every "favorite cookie" list I see. I developed my other Chocolate Chip Cookies recipe years ago, with a few additions/changes to the usual ingredients.

Cutting back on the sugar makes that cookie a bit more "adult," but I wanted to make them even more so. So I experimented with the greater variety of chocolate chips available today and favored the 60% cacao bittersweet chips.

Brown butter is one of my favorite ways to add depth to certain recipes, and they certainly add depth to these, so much so that I had to put it in the name: Brown Butter Chocolate Chip Cookies.

If you're among the one in three people who prefer a crisper cookie, bake the maximum time. But if you're like the two out of three people who favor a chewy chocolate chip cookie, take them out of the oven while they're still a bit underbaked; also, try adding 2 tablespoons of milk to the dough.

If you're gluten-free, I've included directions for one of my favorite homemade gluten-free blends. How do you like your chocolate chip cookies: gluten-free or regular, crisp or chewy, semisweet or bittersweet chips, big or small?

PS My favorite type of chocolate chip of all time is the mini chocolate chip. If you know of a mini bittersweet chip, please tell me!

Brown Butter Chocolate Chip Cookies / www.delightfulrepast.com

If you like it, please Pin it and share it!


Brown Butter Chocolate Chip Cookies


(Makes 41 3-inch 30-gram cookies)

2 sticks (8 ounces/227 grams) unsalted butter
1 cup (4 ounces/113 grams) chopped walnuts or pecans
2 dip-and-sweep cups (10 ounces/283 grams) unbleached all-purpose flour*
1/4 cup oats (1 ounce/28 grams), ground to coarse meal in food processor
1 teaspoon baking soda
1/2 teaspoon salt
3/4 firmly packed cup (5.25 ounces/149 grams) dark brown sugar
1/2 cup (3.5 ounces/99 grams) sugar
2 large eggs 
1 tablespoon Kahlua or strong coffee
1 1/2 teaspoons vanilla extract
1 teaspoon cider vinegar
1 3/4 cups (10 ounces/283 grams) 60% cacao bittersweet chocolate chips

For gluten-free, whisk together: 3/4 cup sorghum flour, 3/4 cup potato starch, 1/2 cup tapioca flour, 1 teaspoon xanthan gum to replace all-purpose flour.


1 In a 2-quart saucepan with a shiny interior so you can judge the color of the butter as it browns, melt the butter over medium heat. Continue cooking, stirring or swirling frequently, until butter gets foamy and bubbly and just starts to turn light tan and smell nutty. You cannot take your eyes off it; it can go from brown to black in a flash! Let cool to room temperature. You can set the pan in the refrigerator for 30 to 60 minutes.

2 In a skillet over medium heat, toast the chopped nuts, stirring constantly, until you can smell their aroma, about 4 minutes. As with the brown butter, you cannot take your eyes off the nuts; they burn easily.

3 In a 1.5- to 2-quart bowl, whisk together the flour (or gluten-free ingredients), ground oats, soda and salt. Note: Measure the oats before grinding.

4 In a large bowl using a spoon or an electric hand mixer, cream the butter and sugars until combined. Beat in eggs, one at a time, Kahlua or strong coffee, vanilla extract, and vinegar. By hand, stir in flour mixture, chocolate chips, and toasted walnuts. Cover and refrigerate for 24 hours. Remove dough from refrigerator about half hour (or more) before you want to make the cookies, or else the dough will be too stiff to scoop.*

* Which is how I happened to come up with the 30-gram weight of the dough balls!

5 Preheat oven to 375F/190C/Gas5. Drop #40 scoops (0.8 ounces or approximately 1.5 tablespoons) of dough 3 inches apart onto ungreased parchment-lined cookie sheets (I use a heavy-duty half sheet pan). With your fingers or something (I used to use a 2 1/4-inch diameter flat-bottomed 1/3-cup from my stainless steel measuring cup sets), press each scoop into a 2 1/4-inch round.* 

* If you don't, you will get domed cookies. Baking times and how much cookies spread or dome are affected by the type of baking sheet you use and your oven.

6 Bake for 9 to 11 minutes (11 minutes is perfect with my oven for a lightly crisp cookie), until lightly  browned. For crisp cookies, bake a bit longer, watching carefully so that they don't burn; for chewy cookies, underbake a bit, but not too much. Cool on baking sheet for 1 minute, then remove to wire racks to cool completely.

Disclosure: We are a participant in the Amazon Services LLC Associates Program, an affiliate advertising program designed to provide a means for us to earn fees by linking to Amazon .com and affiliated sites. We are a ThermoWorks affiliate, earning a small commission at no cost to you on purchases made through our links. This helps cover some of the costs of running the blog. Thank you for your support. 

Jean

If you liked this post, please Pin it and share it!

21 November 2018

Pumpkin Pie - Gluten-Free or Regular Crust - No Soggy Bottoms

Pumpkin Pie - Gluten-Free or Regular Crust - No Soggy Bottoms / www.delightfulrepast.com

Pumpkin pie is one of my favorite autumn and winter desserts. Sometimes I make Sweet Potato Pie instead, if the Southern is coming out in me that day. But I make pumpkin when the Pilgrim genes are coming out (my paternal grandfather's people came over on the Mayflower).

Usually I just make a regular unbleached flour crust, but back in 2010 I developed this gluten-free recipe for one of my growing number of gluten-free friends. It has passed muster with non-GF guests as well, so you can feel free to use it even if you have just one gluten-free guest coming.

But if you’re making two pies anyway, make one of each. I’ve given ingredients and directions for both below. Then the directions come together at Step 5 for either pastry. For a pumpkin, or other custard, pie I like to fully pre-bake the crust to avoid the all-too-common soggy bottom problem.


Pumpkin Pie - Gluten-Free or Regular Crust - No Soggy Bottoms / www.delightfulrepast.com


The problem with most pumpkin pie recipes is that they attempt to address the issue of high temperature needed for the crust and low needed for the custard by starting high and turning it down, and the compromise doesn’t always succeed. The filling is overcooked and, well, soggy bottoms!

The second greatest problem is cracks in the filling and/or a watery, curdled filling. Never fear, these can be avoided. And if you're having any other pie problems, just let me know and I'll do some troubleshooting for you.

Hope you’re having a wonderful week--and that this post didn't reach you too late (getting sick really put me behind schedule)! You might also like my Pecan Tart - Without Corn Syrup (for which I now always fully pre-bake the crust). 


Pumpkin Pie - Gluten-Free or Regular Crust - No Soggy Bottoms / www.delightfulrepast.com


Pumpkin Pie 


(Makes one 9-inch pie, 8 servings)

The Regular Pastry

1 1/3 dip-and-sweep cups (6.67 ounces/189 grams) unbleached all-purpose flour
1/2 teaspoon salt
1/8 teaspoon non-GMO baking powder
1 1/4 sticks (5 ounces/142 grams) unsalted butter, well chilled
1 tablespoon apple cider vinegar
3 tablespoons ice water
Additional ice water, a teaspoon at a time, if needed

The Gluten-Free Pastry

(food processor* method)

1/2 cup sorghum flour
1/2 cup potato starch
1/3 cup tapioca flour
1/2 teaspoon xanthan gum
1/2 teaspoon salt
1/4 teaspoon baking powder
1 stick (4 ounces) unsalted butter, cut into 1/2-inch cubes and frozen for 10 minutes
1 tablespoon apple cider vinegar

Ice water to make 1/2 cup

The Filling

2/3 cup (4.67 ounces/132 grams) sugar
1 tablespoon non-GMO cornstarch
1 teaspoon cinnamon
1/2 teaspoon ginger
1/4 teaspoon salt

1/8 teaspoon allspice
1/8 teaspoon nutmeg
1/8 teaspoon ground cloves
3 large eggs
1 15-ounce (425 grams) can pumpkin (not pumpkin pie filling) or 1 3/4 cups pumpkin puree
1/2 cup (4 fluid ounces/118 ml) heavy cream

1/2 cup (4 fluid ounces/118 ml) milk

Regular Pastry Steps 1 to 4

1 In medium bowl, whisk together flour, salt and baking powder. With coarse grater, grate about 3/4 of the stick of butter into flour bowl. Cut the remaining butter into 1/2-inch cubes. With fingers, quickly work the grated butter into the flour until it looks like coarse crumbs. Add the cubed butter and work it into the crumbs, leaving some pieces the size of small peas. 

2 In small bowl, combine vinegar and 3 tablespoons ice water. Sprinkle over flour mixture while stirring with large fork. Add a little more water, a teaspoon at a time, if needed. 

3 Turn dough out onto a piece of plastic wrap and flatten slightly into a 5-inch round disk with smooth edges; double wrap; refrigerate for one hour or up to four days. May be frozen for up to a month; defrost, wrapped, in the refrigerator.

4 If dough is thoroughly chilled, let it stand at room temperature for 15 minutes before rolling. Very lightly butter a 9-inch glass pie plate; I usually just run the butter wrapper over it. On lightly floured surface, roll out disk to a 13-inch circle about 1/8 inch thick. Place pastry in pie plate, being careful to not stretch the dough. Leave a 1-inch overhang of dough. Crimp the edge. (Sometimes you need to chill the pastry a bit before crimping.) Flute the edge higher than usual to contain the filling. Cover loosely and place in freezer for 15 minutes. Preheat oven to 425F/220C/Gas7.


Pumpkin Pie - Gluten-Free or Regular Crust - No Soggy Bottoms / www.delightfulrepast.com


Gluten-Free Pastry Steps 1 to 3

1 With metal blade in place, add sorghum flour, potato starch, tapioca flour, xanthan gum, salt and baking powder to work bowl of food processor. Turn on for three seconds to combine. Add half the frozen butter and process for 10 seconds or until mixture has the consistency of coarse meal. Add remaining butter and pulse for six 1-second pulses, or until the frozen butter is the size of small peas.

2 In 1/2-cup measure, combine lemon juice or vinegar and ice water. Pour over all of flour mixture; pulse for six 1-second pulses or just until dough forms large clumps; do not over-process.

3 Do not refrigerate dough at this point as I do with regular all-butter pie crust. Turn dough out onto lightly floured (gluten-free, of course) surface--a piece of plastic wrap makes it easier. Form dough into a round disk, sprinkle lightly with gluten-free flour--topping it with another piece of plastic wrap makes it easier--and roll out to 12- to 13-inch circle. Transfer to a 9-inch Pyrex pie plate that has been sprayed with cooking spray. Crimp the edge in your favorite way, then pop the pie plate into the freezer for 15 minutes. Preheat oven to 425F/220C/Gas7.


Both Kinds of Pastry Steps 5 to 9

5 Fit a square of aluminum foil in the shell and fill with ceramic pie weights (baking beans). Set on a rimmed baking sheet (to catch butter drips). Bake the thoroughly chilled crust for 20 minutes, then remove the foil and pie weights and bake for another 10 minutes.

Note: I use two boxes of the ceramic pie weights, and they just fit nicely into a 200-gram tea tin!


Pumpkin Pie - Gluten-Free or Regular Crust - No Soggy Bottoms / www.delightfulrepast.com
Three must-haves for perfect pies: Pyrex 9-inch glass pie plate, ceramic pie weights (baking beans) and an aluminum pie crust shield


6 Remove fully pre-baked pie shell from the oven; let cool completely before filling, at least 30 minutes or hours ahead, whatever suits your schedule.

7 Once pie shell is cool, preheat oven to 350F/180C/Gas4. In medium bowl (using a 2-quart glass measure makes it easy to pour the filling into the crust), whisk together sugar, cornstarch, salt and spices. Whisk in the eggs, then the pumpkin and then the milk and cream. 

8 Pour the filling into the cooled pie shell. Put on a pie crust shield to prevent the edge of the crust from over-browning. Bake for about 60 to 70 minutes or until knife inserted midway between edge and center comes out clean or until it registers 185F/85C on an instant-read thermometer.

Note: After you've made pumpkin pie a few times, you can tell just by looking whether or not it's done. It will look darker and shinier and may have puffed up a bit and then fallen, and it should be fairly firm but still have a little jiggle left in the center.

9 Cool completely on wire rack for 2 hours, then lay a square of wax paper over the top and refrigerate for at least 3 hours. Serve with softly whipped cream. I sweetened and flavored 1 cup of heavy whipping cream with 4 teaspoons of real maple syrup and 1 teaspoon of vanilla extract.

Note: Leftovers can be stored in the refrigerator for up to 3 or 4 days. As if!

Disclosure: We are a participant in the Amazon Services LLC Associates Program, an affiliate advertising program designed to provide a means for us to earn fees by linking to Amazon .com and affiliated sites.

Jean

18 October 2018

Pumpkin Custards - Individual Crustless Pumpkin Pies

Pumpkin Custards - Individual Crustless Pumpkin Pies (this photo - custard baked in a half-pint jar for picnics or lunchboxes) / www.delightfulrepast.com

Pumpkin Custards are the solution when you’ve got gluten-free, wheat-free, grain-free or refined-starch-free people coming for dinner. As long as they’re not also sugar-free, egg-free or dairy-free, that is. 

I don’t do sugar-free desserts using stevia or artificial sweeteners, but those who do will know how to adapt the recipe for whatever they use. (Is anyone else having a hard time giving a dinner party these days?!) 

Of course, at this time of year we are bombarded with pumpkin recipes, so many readers will have already moved on. But I’m a year-round pumpkin fan and couldn’t resist putting another one out there.

This time I used a couple of little round half-pint jars, too, because that turns an individual pumpkin custard into a totable/toteable (?) lunchbox dessert. And there’s enough room in the jar for whipped cream!

Mr Delightful was missing the pie crust, so I crushed a couple of Walkers Pure Butter Shortbread Rounds to sprinkle on top. Loved it!

Baking these in a water bath is really easy and gives the custards such a wonderfully smooth texture. No need to get complicated, putting a tea towel in the bottom of the baking dish or anything; the ramekins won’t rattle around.

Are you ready for some pumpkin?


Pumpkin Custards - Individual Crustless Pumpkin Pies (this photo - custard baked in a ramekin for dining and in a half-pint jar for picnics or lunchboxes) / www.delightfulrepast.com


Pumpkin Custards – Individual Crustless Pumpkin Pies


(Makes 6)

1/2 cup (3.5 ounces/99 grams) sugar
1 tablespoon non-GMO cornstarch
1 teaspoon cinnamon
1/2 teaspoon ginger
1/4 teaspoon salt

1/4 teaspoon allspice
1/8 teaspoon nutmeg
1/8 teaspoon ground cloves
3 large eggs
1 15-ounce (425 grams) can pumpkin (not pumpkin pie filling) or 1 3/4 cups pumpkin puree
1 1/4 cup (10 fluid ounces/296 ml) milk


1 Preheat oven to 300F/150C/Gas2. Put the kettle on, heating water for the water bath. Place six 7-ounce ramekins or custard cups (or half-pint jars) in a 13x9x2-inch baking dish.

Note: These are similar but slightly larger white ceramic 8-ounce ramekins

2 In medium bowl (using a 2-quart glass measure makes it easy to pour the filling into the custard cups), whisk together sugar, cornstarch, salt and spices. Whisk in the eggs, then the pumpkin and then the milk. 

3 Pour the filling into the ramekins. Close to the oven, pour the hot water into the baking dish at least halfway up the side of the ramekins and nearly to the level of the custard. Place in oven, being careful not to slosh water into the custards.

Pumpkin Custards - Individual Crustless Pumpkin Pies (this photo - temperature taken, removed from water bath, cooling at room temperature for 1 hour before chilling) / www.delightfulrepast.com
My very favorite thermometer: ThermoWorks Super-Fast Thermapen MK4


4 Bake for about 60 minutes (maybe check at 55 minutes, all depends on your oven) or until it registers 175F/79C on an instant-read thermometer. The custards should still be slightly jiggly and will firm up as they cool. Forget about the old knife coming out clean thing; they would be waaay overbaked.

5 Cool completely, about 1 hour, on wire rack, then cover and refrigerate for at least 3 hours or up to 3 or 4 days. Serve with softly whipped cream. I sweetened and flavored 1/2 cup heavy whipping cream with 1 teaspoon of real maple syrup and 1/2 teaspoon vanilla extract.

Note: If you’re making these in the half-pint jars for a picnic or lunchboxes, whip the cream to a stiffer consistency so that it will hold up for a few hours. Top the custards with the cream (and shortbread crumbs, if you like) and put the lids on. Don’t forget to pack spoons!

Disclosure: We are a participant in the Amazon Services LLC Associates Program, an affiliate advertising program designed to provide a means for us to earn fees by linking to Amazon .com and affiliated sites.

Jean

20 September 2018

Turkey-Mushroom Meatloaf - Classic Comfort Food

Turkey-Mushroom Meatloaf - Classic Comfort Food / www.delightfulrepast.com

Turkey-Mushroom Meatloaf can also be made with ground beef, if you prefer. Either way, I use old-fashioned rolled oats instead of breadcrumbs, so this will work for those on wheat-free or gluten-free diets. 

I remember watching an episode of America’s Test Kitchen or Cook’s Country a long time ago about meatloaf. Their aim was a meatloaf without many vegetables “because it’s a meatloaf not a vegetable loaf.”

Well, I’m the opposite. I like lots of vegetables in my meatloaf. And I cook them well before they go into the mixture. It gives the meatloaf better flavor and better texture.

I’ve gone years without making a meatloaf, then I make one and wonder why I waited so long. Along with Perfect Mashed Potatoes, it’s such a true comfort food. Nothing complicated, just good and comforting.

Love having Pull-Apart Dinner Rolls with it, but not this time. And it makes the best meatloaf sandwiches! What do you like on your meatloaf sandwiches? I like lots of mayonnaise, a little mustard and just a tiny bit of ketchup. 


Turkey-Mushroom Meatloaf - Classic Comfort Food / www.delightfulrepast.com


Turkey-Mushroom Meatloaf


(Serves 8 to 10)

2 tablespoons extra virgin olive oil
1 cup chopped onion
1 cup finely chopped celery
1 cup finely chopped red bell pepper or carrots
1 6-ounce package crimini or white mushrooms, chopped
1 1/4 teaspoon salt, divided
1 teaspoon coarsely ground black pepper, divided
1 tablespoon Worcestershire sauce
1/2 cup finely chopped fresh flat-leaf parsley
1/4 cup ketchup (plus 1/4 cup for top, optional)
1 cup (3.5 ounces/99 grams) old-fashioned rolled oats
1/2 cup (4 fluid ounces/118 ml) milk
1 large egg, lightly beaten
2 pounds (0.91 kg) lean ground turkey
1 pound (0.45 kg) thin-sliced bacon (streaky bacon in UK), optional

1 In 12-inch skillet, heat oil and cook onion, celery and bell pepper or carrots until softened, about 10 minutes. Add mushrooms, 1/2 teaspoon salt and 1/2 teaspoon pepper and cook, stirring occasionally, until any liquid from the mushrooms is evaporated, about 10 minutes. Stir in Worcestershire sauce, parsley and ketchup. Set aside to cool.


Turkey-Mushroom Meatloaf - Classic Comfort Food (this photo of prep) / www.delightfulrepast.com


2 In large mixing bowl, stir together oats and milk; let stand 5 to 10 minutes. Stir in egg, then add vegetables. Add turkey and 3/4 teaspoon salt and 1/2 teaspoon pepper. Mix well. Cover and refrigerate for at least 3 hours or up to 12 hours. This will firm up the mixture so that it will form a tidier loaf. If you’ve worked with ground turkey, you know what I’m talking about.


Turkey-Mushroom Meatloaf - Classic Comfort Food (this photo meatloaf ready to go into oven) / www.delightfulrepast.com


3 Preheat oven to 400F/205C/Gas6. Line a 15x10x1-inch baking sheet pan with foil (you will regret it if you don’t!); spray lightly with cooking spray. Form chilled meatloaf mixture into a 15x4-inch loaf on the foil-lined pan. If using ketchup, spread ketchup over loaf. If using bacon, arrange bacon slices crosswise over loaf, overlapping slightly and tucking ends under loaf.

4 Bake for 55 to 60 minutes, or until it reaches a temperature of 165F/74C on an instant-read thermometer. Let stand 5 to 10 minutes before slicing.

Disclosure: We are a participant in the Amazon Services LLC Associates Program, an affiliate advertising program designed to provide a means for us to earn fees by linking to Amazon .com and affiliated sites.

Jean

29 March 2018

Quinoa Chickpea Salad

Quinoa Chickpea Salad / www.delightfulrepast.com

We have one or two nights a week when we need to have a no-muss-no-fuss, almost-no-cleanup-afterward, make-ahead meal. And since it's spring and we really do need to start eating more salads, I’ve been thinking of making one of them a Salad Night.

There’s always quinoa in the cupboard, though I haven’t actually cooked any in months. And there’s always canned chickpeas (garbanzo beans). Together, a cup of quinoa and a can of chickpeas has about 45 grams of protein, making this a great vegan main dish.

And since quinoa is actually a seed rather than a grain, Quinoa Chickpea Salad is a suitable dish for those on grain-free or gluten-free diets. This is really one of those not-a-recipe recipes, so you can add and subtract vegetables and seasonings at will.

What is your favorite salad ingredient?

Quinoa Chickpea Salad / www.delightfulrepast.com

Quinoa Chickpea Salad


(Makes 3 main-dish servings or about 10 side servings)

1 cup (6.35 ounces/180 grams) quinoa
2 cups (16 fluid ounces/473 ml) water
1 15-ounce (425 grams) can chickpeas
1 large (about 12 ounces/340 grams) English cucumber, chopped
12 ounces (340 grams) tomatoes, chopped
1 bunch cilantro, most of stems removed
1/2 cup extra virgin olive oil
1/3 cup red wine vinegar
1/2 teaspoon salt
1/2 teaspoon coarsely ground black pepper
1/2 teaspoon dried tarragon
1/4 teaspoon ground coriander

1 Rinse quinoa in a large fine-mesh strainer with cold water. Pour it into a 1.5-quart saucepan and add the water. Bring to a boil. Reduce heat and simmer, covered, for about 15 minutes until all the water is absorbed. Set aside to cool.

2 Put cooled quinoa in a large (at least 3-quart) bowl. Rinse and drain chickpeas in the strainer and add to the bowl. Add cucumber, tomatoes and cilantro. Pour the remaining ingredients directly into the bowl or, if you prefer, make the dressing separately and mix it in. Taste and adjust seasoning.

Quinoa Chickpea Salad / www.delightfulrepast.com


Note: You might also like my Tabbouleh - Made with Quinoa Instead of Bulgur.

Jean

09 November 2017

Chocolate-Hazelnut Roulade - Naturally Gluten-Free

Chocolate- Hazelnut Roulade or Swiss Roll - Naturally Gluten-Free (and Nutella-Free!) / www.delightfulrepast.com

Many autumn tables will be featuring a pumpkin roll, that American classic. But in case you are “pumpkined out” or would just like to offer guests an alternate dessert, I thought I’d post this naturally gluten-free and pumpkin-free hazelnut roulade or Swiss roll.

You will definitely need a half-sheet pan for this cake. Don't attempt it in a smaller rimmed baking sheet or it will overflow. It makes quite a long roll, so I cut it to fit the serving plate I wanted to use, then cut the first servings from the "spare" roll.

As you know, my freezer is my best friend, so I cut two slices and froze them in my favorite glass storage containers so I could tell you how well it works. Just thawed them out at room temperature and had a slice. Perfection! Now I need to bake another one and see how well the whole roll freezes.

If you like, fancy it up even more with frosting. But I like to keep things as low-sugar as possible, so no frosting for me. For more cake-roll tips, check out my Raspberry Swiss Roll post. Do you like rolled cakes? 


Chocolate-Hazelnut Roulade or Swiss Roll - Naturally Gluten-Free (and Nutella-Free!) / www.delightfulrepast.com


Chocolate-Hazelnut Roulade


(Makes 12 to 16 servings)

Adapted from an Almond Roll recipe at King Arthur Flour

The Cake

1 3/4 lightly packed cups (7 ounces/198 grams) hazelnut flour or finely ground hazelnuts
1 tablespoon non-GMO cornstarch
1 1/2 teaspoons non-GMO baking powder
1/4 teaspoon salt, divided
9 large eggs, separated cold, left at room temperature for 30 minutes
3/4 teaspoon cream of tartar
1 cup (7 ounces/198 grams) sugar, divided
1 teaspoon vanilla extract

The Filling

1 1/2 cups (12 fluid ounces/355 ml) heavy whipping cream
1/4 firmly packed cup (1 ounce/28 grams) unsifted powdered sugar
1/4 packed cup (0.75 ounce/21 grams) unsweetened natural cocoa powder
3 tablespoons (1.5 fluid ounces/44 ml) Frangelico or other hazelnut liqueur

1 Preheat oven to 350F/180C/Gas4. Line an 18x13x1-inch half-sheet pan with a piece of parchment with an extra 2 inches on each end for easy removal. Spray parchment and sides of pan with cooking spray. In small bowl, whisk together hazelnut flour, baking powder and half the salt.

2 In bowl of stand mixer fitted with whisk, beat the egg whites, cream of tartar and half the salt on low speed until foamy (might have to use a spoon to mash up clump of cream of tartar). Increase speed to medium and continue beating until trails become visible and bubbles are very small, about 2 to 3 minutes.

3 Increase speed to medium-high and gradually add in 1/2 cup of sugar, about a tablespoon at a time, taking about 2 to 3 minutes. Increase speed a bit and whip until meringue is glossy and medium* peaks form when the whisk is lifted, about 4 to 5 minutes.

* Must beat past soft peaks, but not all the way to stiff peaks.

4 In a 2.5- to 3-quart mixing bowl, using an electric hand mixer, beat the egg yolks with remaining 1/2 cup sugar until pale yellow and fluffy; this takes a few minutes, perhaps 4 or 5. Add the vanilla extract.

5 Give the hazelnut flour mixture another whisking and sprinkle it over the egg yolk mixture. With silicone spatula, gently fold the flour in. Then gently fold in the medium-stiff egg whites, a third at a time, being careful not to deflate them.

6 Gently scrape the batter into the prepared half-sheet pan and quickly spread it evenly. Place a towel (or pair of potholders) on the countertop and drop the pan onto it from a height of about 6 inches two or three times to get out the large air bubbles that would make holes in the cake.

7 Bake for 18 to 20 minutes, just until done. A toothpick inserted in the center should come out clean; the cake should spring back a bit when pressed gently in the center.

8 Use a knife to loosen the sides of the cake from the pan. Using the two ends of parchment paper, lift the cake out of the pan onto a wire rack to cool for a bit.

9 When the cake is nearly cool, make the filling. In a small bowl, whisk together the powdered sugar and cocoa. In medium bowl, whip the cream to soft peaks, sift the powdered sugar and cocoa over the cream and stir until incorporated. Continue whipping the cream until it is quite stiff. Fold in the liqueur.

10 Transfer the cake, still paper-side down, from the wire rack onto the counter with a long side in front of you. Spread the filling evenly over the cake, leaving about a 1.5-inch border at the far side uncovered.

11 Start rolling the cake at the long side nearest you, peeling away the parchment as you go. Place on tray seam-side down and refrigerate for at least 4 hours or up to 1 day.

12 When ready to serve, trim the ends of the roll for a tidier look (and a cook's treat!), place it on an attractive platter, dust with powdered sugar, garnish as you like. Cut into 1- to 1.5-inch slices.

Disclosure: Some posts contain links to my affiliate account at Amazon. If you purchase something from Amazon through one of my links, I receive a small commission, at no additional cost to you, which I use toward the expenses of running this blog. Thanks for supporting Delightful Repast whenever you start your Amazon shopping from one of my links!

12 October 2017

Blackberry Crumble Bars

Blackberry Crumble Bars - Like Pie, Only Quicker and Easier / www.delightfulrepast.com

Blackberry crumble bars came about when I decided my craving for blackberries was greater than my determination to save my stash of summer berries I'd frozen for winter.

If you don't have such a stash, you can buy two 10-ounce bags of frozen blackberries for this recipe. And don't thaw them; use them frozen.

If you're gluten-free, just replace the flour with a combination of 1 cup sorghum flour, 3/4 cup potato starch, 3/4 cup tapioca flour and 1 teaspoon xanthan gum.

Gluten-free flour blends require more liquid than wheat flour, so you'll need to add a bit of iced water after stirring in the eggs. Add the water just a spoonful at a time so that you don't overdo it.

Cut into 2-inch squares, these crispy-crusted bars don't require a fork and are perfect for afternoon tea. Cut into larger portions, they stand in quite nicely for pie.

My Southern grandmother often made Blackberry Cobbler, another way I enjoy blackberries. What's your favorite black(or other)berry dessert? 

Blackberry Crumble Bars - Like Pie, Only Quicker and Easier / www.delightfulrepast.com
Don't forget to Pin it!

Blackberry Crumble Bars


(Makes 24 2-inch squares)

The Crust and Crumble Layers

2 1/2 dip-and-sweep cups (12.5 ounces/354 grams) unbleached all-purpose flour
1/2 cup (3.5 ounces/99 grams) sugar
1/2 teaspoon salt
1 1/2 sticks (6 ounces/) unsalted butter, cut into 1/4-inch cubes
2 large eggs


The Blackberry Filling

1/3* to 2/3 cup (2.33 ounces/66 grams to 4.67 ounces/132 grams) sugar
2 tablespoons tapioca flour or non-GMO cornstarch
Pinch of salt
20 ounces (567 grams/about 5 cups) fresh or frozen blackberries
1 or 2 tablespoons fresh lemon juice


* We like tart rather than sweet so use 1/3 cup sugar and 2 tablespoons lemon juice.

1 Preheat oven to 375F/190C/Gas5. Grease or spray with cooking spray a 13x9x1-inch quarter-sheet pan. If you don't have a quarter-sheet pan (and you really should!), you may use a 13x9x2-inch pan. Also, you might want to line the pan with baking parchment, leaving enough paper overhanging the ends to use later for lifting the bake out of the pan for cutting. Grease or spray the paper as well.

2 In medium bowl, stir together flour, sugar and salt. Cut in the butter until mixture is like coarse cornmeal with some 1/4-inch chunks remaining. Stir in the beaten eggs to form a dough that clumps together.

3 Pour half the crumble into the prepared pan and press it into a crust just on the bottom; you may need to use a bit more of the reserved crumble. Bake the crust for 15 minutes. Keep the reserved crumble in the refrigerator until needed.

4 In small bowl, stir together sugar, tapioca flour and salt. Spread blackberries over baked crust. Sprinkle sugar mixture evenly over berries, then sprinkle on lemon juice. Sprinkle clumps of crumble topping over the berries. Bake until crumble topping is golden and berries are bubbling, which took about 1 hour with my very large frozen berries and small amount of sugar.

Note: The baking time will be shorter for fresh berries, thawed berries or smaller berries and likely shorter with the larger amount of sugar. So check on it at 30 minutes and see what's going on in there.

5 Cool in pan on wire rack until completely cool before lifting out the bake on parchment. Or just serve from the pan. 

Blackberry Crumble Bars - Like Pie, Only Quicker and Easier / www.delightfulrepast.com

05 October 2017

Apple Pie - Autumn Classic

Apple Pie - Autumn Classic - with All-Butter Pastry - and lots of tips / www.delightfulrepast.com

Apple pie is among those things I posted in the first months of blogging before I had many (any?) readers, so it has had few comments or Pins. So I'm bringing it out again, hoping it will now get the attention it deserves!

Apple pie has always been one of my favorite desserts. My earliest food memory is of being in the kitchen watching my Southern grandmother make one when I was not yet three.

I was fascinated that she could peel the apples in one continuous spiral, something I still cannot do. She served her apple pie with vanilla ice cream and a cup of coffee. 

Tea was the beverage of choice of my English grandmother, and her apple pies were more likely to have a side of custard sauce or whipped cream. But I don't recall ever seeing her follow that other (unappealing to me) English tradition of Cheshire or Cheddar cheese with apple pie.

"Good apple pies are a considerable part of our domestic happiness." ~ Jane Austen

Peach pie is my number one favorite. But when peach season ends, that's it for me until next summer. Buying only in-season produce grown as close to home as possible gives us the pleasure of anticipation and supports local farmers.

And both apples and peaches are on the Top 12 list of fruits and vegetables most important to buy organic because of having the highest levels of pesticide residue in the conventionally grown.

Apple Pie - An Autumn Classic - with All-Butter Pastry - lots of tips for the perfect pie / www.delightfulrepast.com
And this illustrates why you should let the pie cool for three hours before cutting. When you cut the pie too soon, the juices run out; cooling prevents this problem.


I like to combine two apples with different qualities in a pie. A good combination of two that are readily available (in the US, anyway) is Granny Smith and Golden Delicious. But I made this one with all Braeburn.

If you are fortunate enough to have an apple tree or live in an area where you can buy heritage apples, go for it. Look for varieties that are good "pie apples." I like Bramley and Cox's Orange Pippin, but haven't tried them in a pie yet.

You might also want to check out my Rustic Apple Tart - Sour Cream Pastry.

What are your favorite pie apples? And do you like the pie cooked until the apples are tender but still holding their shape, as I do, or until the apples are cooked down?

Apple Pie - Autumn Classic - with all-butter crust / www.delightfulrepast.com
Don't forget to Pin it!

Apple Pie


(Makes one 9-inch pie, 8 servings)

Pastry* for double-crust pie
1 1/4 to 1 1/2 pounds (567 to 680 grams) Granny Smith apples (3 cups peeled and thinly sliced)
1 1/4 to 1 1/2 pounds (567 to 680 grams) Golden Delicious apples (3 cups peeled and thinly sliced)
2 or 3 tablespoons freshly squeezed lemon juice
2/3 cup (4.67 ounces/132 grams) sugar
3 tablespoons (0.9375 ounce/27 grams) unbleached all-purpose flour
3/4 teaspoon cinnamon

1/8 teaspoon salt
1/8 teaspoon allspice
1/8 teaspoon nutmeg
1 tablespoon unsalted butter


* Check out the following pastry recipes: Pastry Tutorial - Food Processor or Pastry Tutorial - By Hand. If you're gluten-free, just double my Gluten-Free Pastry recipe and thicken the pie filling with tapioca flour rather than wheat flour.

1 Line a rimmed baking sheet with parchment or foil (I usually have a used piece of one or the other I'd like to get one more use out of). Spray a 9-inch glass pie plate with cooking spray and line with pastry; cover with parchment and place in the refrigerator. Roll out pastry for top crust on parchment; place on a baking sheet, cover with parchment and place in the refrigerator.

2 Peel and quarter apples, cut away cores and cut (the short way) 1/4-inch-thick slices into a large bowl (I use a 2-quart glass measure). Add lemon juice and toss gently. You can use all Granny Smiths, but I think the combination of the crisp, juicy, tart Granny Smith with the sweeter Golden Delicious adds a certain complexity to the pie and allows you to use less sugar.

Note: Don't get carried away with the apples as some are wont to do. I even got a little carried away and used 7 cups, when 6 cups is exactly right for my standard 9-inch Pyrex pie plate, which is the perfect pie plate.

3 In small bowl, combine sugar, flour, spices and salt; add to apples and mix well. Pour into pastry-lined pie plate, dot with little pieces of butter and put top crust in place; seal and crimp edge; prick top with fork, marking eight wedges, to vent. Place on lined baking sheet to catch any drips from the pie. Pop the pie in the freezer for 15 minutes while preheating the oven.

4 Move your oven racks so that you can place your pie on the lowest. Preheat oven to 425F/220C/Gas7.

Note: I don't always do it, but this time I brushed the top with a little cream and sprinkled on a bit of sugar mixed with cinnamon.

5 Bake for 20 minutes. Lower temperature to 350F/180C/Gas4 and bake for an additional 40 minutes, when the apples will be tender but still holding their shape. Cool on wire rack for 3 hours before serving; the pie needs that time to solidify so that all the juices don't run out when the pie is cut.

Note: To warm individual slices of pie, preheat oven to 350F/180C/Gas4. Place on a rimmed baking sheet lined with parchment and bake for about 10 minutes.