Showing posts with label vegan. Show all posts

14 September 2023

Sesame Noodle Salad

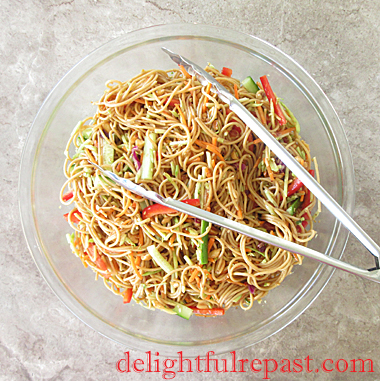
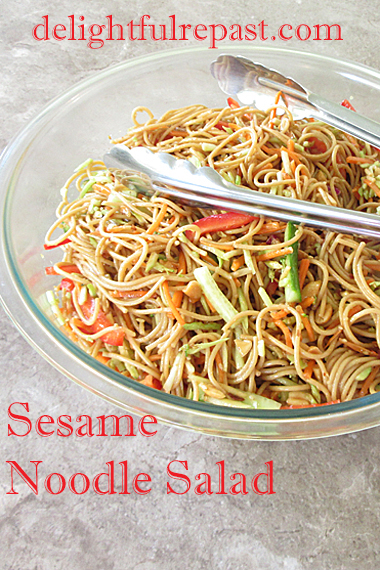
Sesame Noodle Salad / www.delightfulrepast.com

Sesame Noodle Salad is the perfect dish for end-of-summer picnics and potlucks since it is good at any temperature. If it's fresh out of the refrigerator, I figure it is good—from a food safety standpoint—for three hours at room temperature. Get out your big bowl for this recipe; it makes a lot!

If you're taking a lunch to work, this is perfect. Just divvy it up into glass storage containers of whatever size matches your appetite, and you're all set for the next four days.

I love mung bean sprouts but left them out of the recipe because they are not always readily available. And to go main-dish with this salad, it is wonderful with slices of chicken breast. 

For years I've seen similar salads called "Asian" noodle salad. I avoid that since I like to be very specific, down to not just a country but often a region of a country or even a city, if possible. With Chinese soy sauce, Japanese toasted sesame oil, and Italian spaghetti, I thought I'd better just call it Sesame Noodle Salad!
 

Sesame Noodle Salad / www.delightfulrepast.com

If you like it, please Pin it and share it!
 

Sesame Noodle Salad

(Makes 12 to 16 servings)

The Dressing

(Makes 1 1/2 cups—you'll have extra)

1/2 cup (4 fluid ounces/118 ml) extra virgin olive oil
1/2 cup (4 fluid ounces/118 ml) low sodium soy sauce
1/4 cup (2 fluid ounces/59 ml) fresh lime or lemon juice
1/4 cup (2 fluid ounces/59 ml) red wine vinegar 
1 tablespoon toasted sesame oil
1 tablespoon honey
1 teaspoon freshly grated ginger
1 teaspoon crushed red pepper flakes (more or less, depending your heat tolerance)

The Salad


8 ounces (227 grams) whole grain spaghetti (I like Barilla)
1 12-ounce (340 grams) package Broccoli Slaw (mostly shredded broccoli)
1/2 10-ounce package (5 ounces/142 grams) shredded carrots
1/2 large English cucumber (to make 5 ounces/142 grams julienned)
1 medium red bell pepper (to make 5 ounces/142 grams julienned)
1 cup (5 ounces/142 grams) lightly salted dry roasted peanuts, coarsely chopped
1 1/2 tablespoons sesame seeds, toasted
A handful of chopped cilantro leaves
Optional: 3 green onions (scallions), green part only, thinly sliced


1 In a 2-cup glass measure, whisk together the dressing ingredients and set aside to "meld" while you make the salad. You might even make it the day before.

2 In a 3-quart saucepan, bring 6 1/2 cups of water with 3/4 teaspoon of salt to a rapid boil. Add the spaghetti and cook a minute past package's "al dente" instructions. I cooked the Barilla whole grain spaghetti for 8 minutes. Drain, rinse with cold tap water, drain thoroughly, and put it in a 4-quart mixing bowl. Stir in 1/4 cup of the dressing.

Note: If it's still available when you're reading this, there is a fabulous deal on the lidded bowl and glass measuring cup sold together!

3 I know the packages of various prepped salad things say things like "thoroughly washed," "ready to use," "triple washed." But I'm a little too fussy to take their word for it. AND giving them a wash and spin hydrates and freshens them up for your salad. So do that to the broccoli slaw and shredded carrots, or not—I won't judge—and add them to the mixing bowl along with another 1/4 cup of the dressing and toss to combine. 

4 Add the remaining ingredients and more dressing, reserving at least 1/4 cup that might be needed at serving time (the pasta absorbs a lot, and you don't want a dry salad). Cover and refrigerate for 6 to 12 hours. Any leftover dressing will not go to waste; it's delicious on any salad. 

Disclosure: We are a participant in the Amazon Services LLC Associates Program, an affiliate advertising program designed to provide a means for us to earn fees at no cost to you by linking to Amazon .com and affiliated sites. This helps cover some of the costs of running the blog. Thank you for your support. 

Jean

If you liked this post, please Pin it and share it!

14 April 2022

One-Bowl Guinness Chocolate Cake

Guinness Chocolate Cake - Easy and Has No Eggs or Dairy / www.delightfulrepast.com

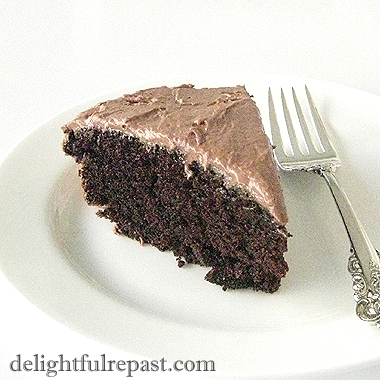
Guinness Chocolate Cake can be done as a single 8-inch layer with a simple icing or dusting of powdered sugar or as two 6-inch layers filled and frosted. But unless it's going on the afternoon tea table, I just make the single layer. With whipped cream, above, or a thin layer of icing, below.


Guinness Chocolate Cake - Easy, Egg-Free, Dairy-Free / www.delightfulrepast.com


Made without eggs or butter, Guinness Chocolate Cake also just happens to be vegan. I once saved a piece for four days, just for test purposes, and it was still fresh and fabulous! I had thought it might dry out since it has no eggs.

What does the Guinness add to the cake? What does it taste like? I can't really describe it, but it's different. The Guinness enhances the chocolate flavor and gives it a slightly tangy, malty flavor—a bit of an "edge," you might say.

Another thing you'll love about it is that it is so easy and no-muss-no-fuss. No need for a stand mixer or even a hand mixer. A one-bowl cake that will never wear you out or let you down!


Guinness Chocolate Cake - Easy and Has No Eggs or Dairy / www.delightfulrepast.com

If you like it, please Pin it and share it!

Guinness Chocolate Cake


(Makes one 8-inch round layer)

1 1/3 dip-and-sweep cups (6.67 ounces/189 grams) unbleached all-purpose flour
1 cup (7 ounces/198 grams) sugar
1/3 packed cup (1 ounce/28 grams) natural unsweetened cocoa
1 teaspoon baking soda
1/4 teaspoon salt
1 1/4 cup (10 fluid ounces/296 ml) Guinness stout
1/4 cup (2 fluid ounces/59 ml OR 1.875 ounces/53 grams) extra virgin olive oil
1 1/2 teaspoons vanilla extract

1 Grease and flour one 8-inch round 2-inch deep cake pan (Don't even bother with shallow cake pans!). And a circle of parchment paper in the bottom will ensure successful removal from the pan, if you have that concern. Preheat oven to 350F/180C/Gas4. 


Note: If you want to get fancy and make a sweet little layer cake (the size I make for an afternoon tea), divide the batter between two 6-inch round 2-inch deep cake pans and bake for 30 to 35 minutes. (I also love, and have several, Fat Daddio's cake pans.)

2 In a 2-quart bowl, whisk together flour, sugar, cocoa, baking soda, and salt. Add Guinness, oil, and vanilla extract. Whisk vigorously for about a minute, or until smooth. Pour into prepared pan. Run a knife through the batter a few times to break up any large air bubbles. Bake for about 35 to 45 minutes, or until it tests done with a toothpick.

Note: When measuring the stout in a 2-cup glass measure, let it stand a minute for the foam to settle and make sure the liquid, not the foam, comes up to the mark.

3 Let cool in pan on wire rack for 10 minutes. Invert onto the rack to cool completely. 


Disclosure: We are a participant in the Amazon Services LLC Associates Program, an affiliate advertising program designed to provide a means for us to earn fees by linking to Amazon .com and affiliated sites. We are a ThermoWorks affiliate, earning a small commission at no cost to you on purchases made through our links. This helps cover some of the costs of running the blog. Thank you for your support. 

Jean

If you liked this post, please Pin it and share it!
06 January 2022

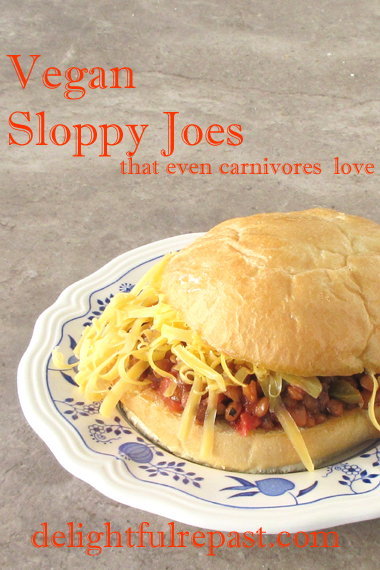
Vegan Sloppy Joes Everyone Loves

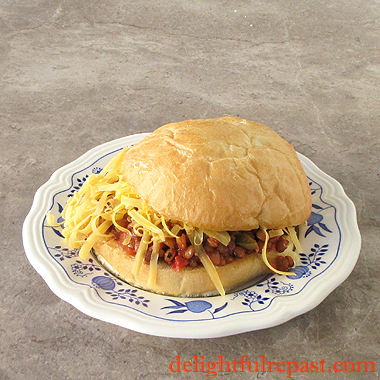
Vegan Sloppy Joes Everyone Loves / www.delightfulrepast.com

Though I am not vegan, or even vegetarian at this time, I eat like one much of the time. Meatless sloppy joes were in my regular rotation when I was a vegetarian, and I made them with TVP—textured vegetable protein—back in the day. 

But I developed this recipe with lentils, for a few reasons. One, I'm not keen on TVP. Two, I don't feel the need for a meatless product to imitate meat. And three, I really like lentils. I could live on legumes!

Cooking time for lentils is shorter than for beans, but the cooking time varies depending on the variety and the age of lentils. This time, before opening a new package, I used the last of the bag of lentils that was well past its "best by" date, which meant they required longer cooking.

If you're not toasting the buns for burgers and other bun sandwiches, I hope you'll give it a try. Heat equal parts of unsalted butter and extra virgin olive oil on the griddle and toast the split buns well on the cut side and lightly on the outside. Makes them soooo good.

Here's my Homemade Hamburger Buns recipe (apologies to my vegan friends because there is also meat in that post). There are a number of good vegan cheeses on the market now, which hasn't always been the case! Perfect also for those who are dairy-free.

This recipe even passes muster with Mr Delightful, who isn't as keen on legumes as I am. That means: if you're having vegans and carnivores at the same table, you can make them both happy with this recipe!


Vegan Sloppy Joes Everyone Loves / www.delightfulrepast.com

If you like it, please Pin it and share it!


Vegan Sloppy Joes


(Makes 8)

1 tablespoon extra virgin olive oil
1/2 medium (about 4 ounces/113 grams) yellow onion, finely diced
1 medium (about 4 ounces/113 grams) green or red bell pepper, finely diced
2 tablespoons (1.5 ounces/43 grams) tomato paste
1 cup (7 ounces/198 grams) lentils
2 1/2 cups (20 fluid ounces/591 ml) water
1 teaspoon paprika

1/2 teaspoon salt
1/2 teaspoon cumin
1/4 teaspoon coarsely ground black pepper
1/8 teaspoon cayenne
1/8 teaspoon crushed red pepper flakes
1 1/2 teaspoons dark brown sugar
1 1/2 teaspoons country Dijon mustard
1 1/2 teaspoons cider vinegar
1 14.5-ounce (411 grams) can fire roasted crushed tomatoes

8 buns, split and toasted
Garnishes: shredded cheese, chopped cilantro, sliced jalapenos, sliced dill pickles


1 In 3-quart saucepan, heat oil and cook onion for about 5 minutes. Add bell pepper and tomato paste; continue cooking for about 2 minutes.

2 Add lentils and water. Bring to a boil; reduce heat and simmer, partially covered, for about 30 minutes, until most of the water is absorbed and lentils are firm-tender (biteable, but not completely cooked).

Note: Remember that cooking times for beans and legumes can vary. 

3 Stir in paprika, salt, cumin, pepper, cayenne, crushed red pepper flakes, brown sugar, mustard, vinegar, and crushed tomatoes. Bring back up to a simmer and cook for about 30 minutes more, or until the lentils are tender and the mixture is thick. 

4 I use my own Homemade Hamburger Buns or similar ones from the bakery, split and well toasted on the griddle with half organic unsalted butter and half extra virgin olive oil, and 1/2 cup of sloppy joe mixture for each.

Disclosure: We are a participant in the Amazon Services LLC Associates Program, an affiliate advertising program designed to provide a means for us to earn fees by linking to Amazon .com and affiliated sites. We are a ThermoWorks affiliate, earning a small commission at no cost to you on purchases made through our links. This helps cover some of the costs of running the blog. Thank you for your support. 

Jean

If you liked this post, please Pin it and share it!
21 March 2019

Instant Pot Pinto Beans - Frijoles de Olla Instante

Instant Pot Pinto Beans - THE best way to cook dried beans / www.delightfulrepast.com

Don’t worry, my regular readers—I’m not going to be blogging constantly about Instant Pot cooking. I’m not convinced everyone “needs” one, even though I’m having fun with it. But I’ve decided there is one group of people who might need one—people who cook a lot of beans. So far I’ve just made Pinto Beans.

I’ve stuck with the one kind of bean because I wanted to experiment and find the ideal way—well, my ideal way, anyway—of cooking Instant Pot Pinto Beans. The first conclusion I came to on the subject was that presoaking is not necessary. I kept reading that you’ll have more “blown-out” beans if you pressure cook them without presoaking. 

But my experiments have shown that it’s not whether the beans have been presoaked or not, but rather it’s the length of the natural pressure release, that determines whether the beans remain whole, for the most part, or break apart. For stovetop beans, I presoak; for Slow Cooker Pinto Beans, I do not. For the Instant Pot, definitely not.

The second conclusion I came to is that the beans made in the Instant Pot taste better than the beans cooked with the same ingredients by any other method. I was amazed and have no scientific explanation for it. I can only assume that pressure cooking somehow forces more flavor into the beans. Is that true, or just my imagination? 

Cooking times can be tricky for dried beans. Whatever method you use—stovetop, slow cooker or pressure cooker—cooking times for dried beans will vary due to the age of the beans and perhaps other factors about the beans themselves. There are different cooking times for different beans.


Instant Pot Pinto Beans - Frijoles de Olla Instante - How to Cook Beans in the Instant Pot / www.delightfulrepast.com


I decided to cook my presoaked pinto beans for 10 minutes at high pressure followed by natural pressure release for 25 minutes, with the idea that if they were underdone I’d set it for another 2 minutes (it should build pressure quickly the second time) and check again.

The presoaked (for 12 hours) beans were perfectly done in 10 minutes. So 20 to 25 minutes to come up to pressure, 10 minutes to cook, 25 minutes natural pressure release—an hour or less total—instead of 7 hours in the slow cooker or 2 1/2 to 4 hours on the stovetop. And they taste better! 

But then I decided to experiment with beans that had not been presoaked. Yes, they take longer to cook—the same 20 to 25 minutes to come up to pressure, 40 minutes to cook, the same 25 minutes natural pressure release—but it’s still just an hour and a half or less.


Instant Pot Pinto Beans - Frijoles de Olla Instante - How to Cook Beans in the Instant Pot / www.delightfulrepast.com


One pound of dried pinto beans makes the equivalent of four 15-ounce/425 gram cans of cooked pinto beans and costs about the same as one can—a significant savings. You can even put the batch of beans into four pint jars or glass storage containers to freeze. Just pull one out anytime a can of beans is called for. 

Since dried beans are done so quickly in the Instant Pot, you could cook several batches of various kinds of beans all in one day, refrigerate what you need for the week and freeze the rest for future meals. Can’t wait to try pressure cooking dried garbanzo beans for hummus.

Mr Delightful is not a bean fan, but since I’m not a huge carnivore, I rely on legumes for a lot of my protein. Lovelovelove Black Bean Soup and Bean with Bacon Soup


Instant Pot Pinto Beans - THE best way to cook dried beans / www.delightfulrepast.com


Instant Pot Pinto Beans - Frijoles de Olla Instante


(Makes about 6 cups of drained beans)

2 1/2 cups (16 ounces/454 grams) dried pinto beans
1 tablespoon extra virgin olive oil 
1 teaspoon salt
1 teaspoon coarsely ground black pepper
1/2 teaspoon cumin
1/2 teaspoon oregano
1/8 teaspoon crushed red pepper flakes
1/2 small (about 3 ounces) onion, peeled, optional

6 1/2 cups (56 fluid ounces/1.66 litres) water 

1 Rinse beans, watching for any debris or bad beans, and add to the inner cooking pot of the 6-quart Instant Pot or other brand pressure cooker. Add remaining ingredients. 

Note: Don't skip the olive oil; it prevents foaming that could clog up the valve. 

2 Put the lid in place and turn the steam valve to Sealing. Plug in the Instant Pot. Press the Pressure Cook key. Leave the indicator lights on High Pressure and Normal temperature, and change the cooking time to 40 minutes.

Note: It takes 20 to 25 minutes to reach working pressure. This varies with the amount and temperature of the ingredients in the pot. 

3 When the beep sounds, turn it off by pressing Cancel. Set a kitchen timer for 25 minutes and allow the pressure to release naturally, then do a quick release by turning the steam valve to Venting.

4 When the float valve drops down, carefully remove the lid. If the beans are not done to your liking, put the lid back on, turn the steam valve to Sealing, and cook on High Pressure for additional minutes.

5 Remove the onion; taste and adjust seasoning.

Note: The cooked beans can be kept in the refrigerator for up to a week or in the freezer for up to 3 months.

Disclosure: We are a participant in the Amazon Services LLC Associates Program, an affiliate advertising program designed to provide a means for us to earn fees by linking to Amazon .com and affiliated sites. We are a ThermoWorks affiliate, earning a small commission at no cost to you on purchases made through our links. This helps cover some of the costs of running the blog. Thank you for your support. 

Jean

24 May 2018

Vegetarian Chili - Won't-Even-Miss-the-Meat Chili

Vegetarian Chili - Won't-Even-Miss-the-Meat Chili / www.delightfulrepast.com

When I first developed my recipe for meatless chili many years ago during one of my vegetarian periods, I just called it Vegetarian Chili. But when a meat-loving friend who had expressed his doubts that it could possibly be any good at all declared it delicious and said he didn’t even miss the meat, I renamed it Won’t-Even-Miss-the-Meat Chili.

A big pot of chili is great for feeding a crowd. Set up a chili bar where guests can choose their favorite garnishes. Offer guacamole or diced avocado, sour cream, shredded Cheddar and Jack cheese, sliced black olives, diced onion, sliced green onion, shredded cabbage or iceberg lettuce, cilantro, lime wedges and thinly sliced radishes.

If you’re not vegetarian, you could even add shredded beef to your chili bar for the die-hard carnivores. But when I was a vegetarian, this was the one dish I could count on to satisfy even the most carnivorous of my friends! No longer vegetarian, I still enjoy meatless meals often. Just add a salad (maybe this Broccoli Salad) and some Cornbread, and you’re all set.

You can use info from my Slow Cooker Pinto Bean post to adapt this recipe for the slow cooker. 

(I'm using just a single old photo I have of this dish because I'm taking a break this week and not cooking or taking photos! Next time I make it, I'll add a much better photo to the post!)

Vegetarian Chili - Won’t-Even-Miss-the-Meat Chili


(Makes twelve 1 1/2-cup servings)

The Beans

2 pounds dry red kidney beans
10 cups water
1 1/2 teaspoons salt

The Sauce

2 tablespoons extra-virgin olive oil
1 cup chopped onion (1 large)
1 cup chopped celery (2 large stalks)
1 cup chopped green bell pepper (1 large)
1 6-ounce can tomato paste
2 tablespoons dried ground chiles
2 teaspoons Worcestershire sauce (soy sauce if you're vegan or vegetarian)
1 teaspoon cumin
1/2 teaspoon salt
1/2 teaspoon coarsely ground black pepper
1/4 teaspoon dried oregano
1/8 teaspoon crushed red pepper (to start!)
1 29-ounce can diced tomatoes (I use Muir Glen Organic Fire Roasted)

1 Wash beans in cold water. Put beans and water in a 6- or 7-quart pot. Soak beans at least 5 hours or overnight. Drain off soaking liquid and add 10 cups of fresh water. (I'm so precise about the water because we're going to add the sauce to the beans, so I don't want the beans to be swimming in water.)

2 Bring to a full rolling boil, boil for a minute, then reduce heat. Simmer, partially covered, for about 2 1/2 hours, adding salt during the last 1/2 hour. And don't bother skimming off the foam that will form on the surface. A lot of people do, but I consider it just a waste of my precious time.

3 During the last 45 minutes, make the sauce. In large skillet or 3-quart saucepan, heat oil and cook onion, celery and green pepper until softened, about 5 minutes. Stir in tomato paste and seasonings, and cook for about 10 minutes to "brown" the tomato paste and toast the spices (mixture will be very thick). Add diced tomatoes.

4 Simmer, stirring occasionally, for 30 minutes. If the beans aren't tender by the time the sauce has cooked 30 minutes, turn the heat off under the sauce, cover and let stand until beans are done.

5 Add sauce to beans. Simmer, stirring occasionally, for 30 minutes or until the chili is the consistency you like. Taste and adjust seasoning. Ladle into bowls and serve, offering assortment of garnishes. Can be made a day or more ahead--it just gets better!

Note: I made those fettuccine-like shreds of cheese with my Microplane Professional Extra Coarse Grater!


Jean

10 May 2018

Hummingbird Muffins - Banana-Pineapple Muffins

Hummingbird Muffins - Banana-Pineapple Muffins / www.delightfulrepast.com

Hummingbird muffins are just the thing to make when you’re craving Hummingbird Cake but don’t want to go to quite that much trouble. Of course, you could slap a little cream cheese frosting on these muffins and call them hummingbird cupcakes, even though they have less sugar than actual cupcakes.

This was one of those days when I was missing a vital ingredient—in this case, eggs—but would rather take a beating than venture out to the grocery store. So I decided today was the day to try something I’ve wanted to try for a long time: “flax eggs." I had the ground flaxseed meal on hand, so why not?

I was really pleased with the results. The muffins seemed no different from muffins made with eggs.

So if you or someone you know is vegan or allergic to eggs, you can make this recipe with “flax eggs" and, for vegans, with an oil in place of the butter. Though flax is certainly no across-the-board substitute for an egg, it should work fine in things like muffins, quick breads and cookies.


Hummingbird Muffins - Banana-Pineapple Muffins / www.delightfulrepast.com

Hummingbird Muffins - Banana-Pineapple Muffins


(Makes 12)

1 1/3 dip-and-sweep cup (6.67 ounces/189 grams) unbleached all-purpose flour
1 1/2 teaspoon non-GMO baking powder
1/2 teaspoon baking soda
1/4 teaspoon salt
3/4 teaspoon cinnamon
1/2 cup (2 ounces/57 grams) finely chopped pecans, toasted
6 tablespoons (3 ounces/85 grams) unsalted butter
1/2 cup (3.5 ounces/99 grams) sugar
3/4 teaspoon vanilla extract
2 large eggs, room temperature OR 2 flax eggs*
2/3 cup (5.85 ounces/166 grams) mashed very ripe banana (1 large 8.25-ounce/234-gram banana in its skin)
1 8-ounce (227 grams) can unsweetened crushed pineapple in 100% pineapple juice, undrained


* To make 2 “flax” eggs:
In small bowl, gradually whisk 6 tablespoons of boiling water into 2 tablespoons of ground flaxseed meal; let stand for 5 minutes, until gelatinous.


1 Preheat oven (toaster oven is perfect for hot summer days) to 375F/190C/Gas5. In 4-cup glass measure or small bowl, whisk together flour, baking powder, baking soda, salt and cinnamon. Stir in finely chopped and toasted pecans.

2 In 2-quart glass measure or bowl, melt butter. Stir in sugar and vanilla extract. Beat in eggs, beating well. Stir in mashed banana (a fork works just fine on a very ripe banana) and crushed pineapple. Add flour mixture to wet mixture, and mix just until combined; do not overmix.

3 Spray 12-cup standard muffin tin with cooking spray or line them with paper liners. Using a 1/3-cup measuring cup, divide batter between cups. Bake for about 25 minutes, or until a middle one tests done with a toothpick.

4 Turn out onto a pristine kitchen towel, if baked without paper liners. Place on wire rack to cool for a few minutes before serving. 

Jean

29 March 2018

Quinoa Chickpea Salad

Quinoa Chickpea Salad / www.delightfulrepast.com

We have one or two nights a week when we need to have a no-muss-no-fuss, almost-no-cleanup-afterward, make-ahead meal. And since it's spring and we really do need to start eating more salads, I’ve been thinking of making one of them a Salad Night.

There’s always quinoa in the cupboard, though I haven’t actually cooked any in months. And there’s always canned chickpeas (garbanzo beans). Together, a cup of quinoa and a can of chickpeas has about 45 grams of protein, making this a great vegan main dish.

And since quinoa is actually a seed rather than a grain, Quinoa Chickpea Salad is a suitable dish for those on grain-free or gluten-free diets. This is really one of those not-a-recipe recipes, so you can add and subtract vegetables and seasonings at will.

What is your favorite salad ingredient?

Quinoa Chickpea Salad / www.delightfulrepast.com

Quinoa Chickpea Salad


(Makes 3 main-dish servings or about 10 side servings)

1 cup (6.35 ounces/180 grams) quinoa
2 cups (16 fluid ounces/473 ml) water
1 15-ounce (425 grams) can chickpeas
1 large (about 12 ounces/340 grams) English cucumber, chopped
12 ounces (340 grams) tomatoes, chopped
1 bunch cilantro, most of stems removed
1/2 cup extra virgin olive oil
1/3 cup red wine vinegar
1/2 teaspoon salt
1/2 teaspoon coarsely ground black pepper
1/2 teaspoon dried tarragon
1/4 teaspoon ground coriander

1 Rinse quinoa in a large fine-mesh strainer with cold water. Pour it into a 1.5-quart saucepan and add the water. Bring to a boil. Reduce heat and simmer, covered, for about 15 minutes until all the water is absorbed. Set aside to cool.

2 Put cooled quinoa in a large (at least 3-quart) bowl. Rinse and drain chickpeas in the strainer and add to the bowl. Add cucumber, tomatoes and cilantro. Pour the remaining ingredients directly into the bowl or, if you prefer, make the dressing separately and mix it in. Taste and adjust seasoning.

Quinoa Chickpea Salad / www.delightfulrepast.com


Note: You might also like my Tabbouleh - Made with Quinoa Instead of Bulgur.

Jean

22 February 2018

Faux Tuna Salad

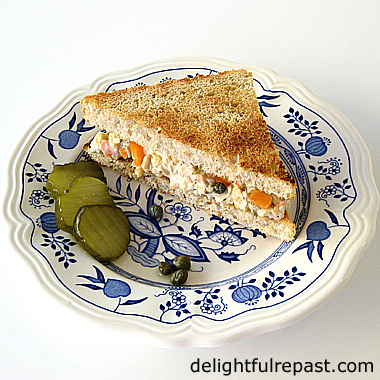
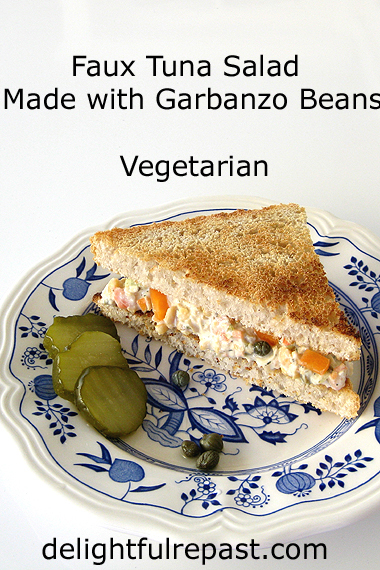
Faux Tuna Salad - Made with Garbanzo Beans - Vegetarian / www.delightfulrepast.com

I really like a good tuna salad sandwich, but the kind of tuna I like, the solid white albacore, has even more mercury (nearly three times as much, I recently read) than the light tuna from the smaller skipjack. And sometimes I just like to eat vegetarian. So I started looking through the pantry to see if it would spark an idea for a substitute.

First thing I spotted was a can of organic garbanzo beans (also called chickpeas), and I thought, hmm … chopped up and mixed with my favorite tuna salad ingredients … And, of course, it would make a delightful tea sandwich, especially when there’s a vegetarian on the afternoon tea party guest list.

Then I decided to google it. And shoooot! It’s already a “thing.” Anyway … I don’t mind. If something’s a good idea, it’s a good idea, even if somebody else already had it! And, no, it does not “taste just like tuna salad.” Similar, due to the other ingredients, but it’s not going to fool anyone. It tastes good, and that’s what counts.

But if, like Mr Delightful, you insist on the real, not faux, thing, here’s Tuna Salad. What do you think - are you ready for faux tuna salad? This sandwich was made with my Sourdough Sandwich Bread we always have on hand.


Faux Tuna Salad - Made with Garbanzo Beans - Vegetarian / www.delightfulrepast.com


Faux Tuna Salad


1 15-ounce can garbanzo beans, rinsed and drained
1/4 cup diced celery
1/4 cup diced carrot
1/4 cup diced red bell pepper
1/4 cup diced sweet pickle
2 teaspoons capers, drained and roughly chopped
1 tablespoon chopped lemon (juice is a bit too liquid for the salad)
1/2 teaspoon dried dill
1/2 teaspoon Worcestershire sauce (omit for vegetarian or vegan)
1/8 teaspoon coarsely ground black pepper
1/4 cup mayonnaise or vegan substitute
2 teaspoons country Dijon mustard

1 Turn your rinsed and drained garbanzo beans out onto a cutting board and chop them coarsely with a large knife. You’ll notice the skins coming off the beans. You don’t have to, of course, but I found myself unable to resist pulling the large pieces of skin out of the pile and discarding them. And I like to put a half cup or so of the beans into a small mixing bowl and mash them up before adding the chopped ones.

Note: How finely you need to chop the garbanzos and vegetables depends on whether you are making regular sandwiches or tea sandwiches.

2 Add remaining ingredients. Stir well. Taste and adjust seasoning. Cover and refrigerate.

05 November 2015

The Ultimate Dairy-Free Hot Chocolate - Chocolat Chaud Sans Laitage

The Ultimate Dairy-Free Hot Chocolate / www.delightfulrepast.com

(Pardon my French! Not entirely sure "Sans Laitage" shouldn't be "Sans Produits Laitiers" or something else.)

Ever since I heard that at Ladurée in Paris they blend hot chocolate with an immersion blender to make it really frothy just before serving, I knew I had to have an immersion blender. But by the time I got the immersion blender my chocolate mood had passed and has only just now returned. You see, generally speaking I am not a chocolate fan. But when the mood does strike, nothing else will do! 

And one of the chocolate things I enjoy is a good not-too-sweet hot chocolate. An "adult" hot chocolate, if you will. Since I'm contemplating experimenting with dairy-free for a couple of months at some point, I thought I'd make my hot chocolate with rice milk. Of course, you can use regular milk and even add more sugar, if you like. And you might want to leave out the Kahlua or coffee.

There is only one thing you can't change about this recipe. You must froth the chocolate with an immersion blender for one minute and serve immediately. I've made hot chocolate with rice milk before, and it seemed rather thin. Not this. The immersion blender gives the hot chocolate a texture I can only call "plush."

Have you tried it? If not, give it a go and let me know what you think. 


The Ultimate Dairy-Free Hot Chocolate / www.delightfulrepast.com

The Ultimate Dairy-Free Hot Chocolate


(Makes 1 serving)

1 cup (8 fluid ounces/237 ml) rice milk
1 ounce (28 grams) bittersweet or semi-sweet chocolate, finely chopped
1 tablespoon natural unsweetened cocoa
1 teaspoon (or more) Kahlua or 1 tablespoon brewed coffee
1/4 teaspoon vanilla extract

1 In 1-quart saucepan, combine all ingredients, cooking and stirring until hot. Turn off heat.

2 With immersion blender, blend hot chocolate for 1 minute. It will be very frothy. 

Note: If you are multiplying recipe to make 2 or 3 servings, use a 2-quart pan. For 4 servings, step up to a 3-quart pan because the immersion blender will really expand the contents of the pan. 

3 Pour into mug(s). Enjoy.

29 January 2015

Small-Batch Chocolate Cupcakes - Makes 6

Small Batch Chocolate Cupcakes / www.delightfulrepast.com

Do you ever get a craving for a little something sweet (and maybe chocolate), but there's nothing on hand and you're just not in the mood to make a big mess and a big batch of something? Maybe you're thinking a small pan of brownies wouldn't be much trouble, but you're out of eggs and butter. Well, here you go! 

Six chocolate cupcakes you can stir up quickly by hand in one bowl. No eggs, no butter, no milk? No muss, no fuss, no problem! It's the thing I love best about having a toaster oven. Sure I can bake big loaves of bread and 13-inch pizzas in it or cook a good-sized casserole, but what I'm really having fun with is developing recipes for quick and easy small-batch treats. 

I don't know about you, but there are a lot of us who really don't need to have two dozen cupcakes sitting around staring at us every time we walk through the room. Six is the perfect number, and the pan fits easily in the toaster oven. Actually, a full-size 12-cup muffin tin fits easily in it, but I don't need to have even one dozen cupcakes sitting around! 

My new Cuisinart convection toaster oven broiler has lots of features I haven't figured out yet. Like convection and speed convection. I'm sure they're going to be really handy once I sort it all out.

In the meantime, it's wonderful to be able to pull out of the freezer just enough frozen scoops of homemade Oatmeal Cookie dough to fill the 13x9x1-inch pan that came with the oven. Or pop in a quick batch of six cupcakes. It just never felt right to heat up my big gas oven for such small amounts of food. 

If you want to frost the fluffy chocolate cupcakes as pictured, this recipe calling for just 3 tablespoons of butter (or something else, if you're vegan), makes precisely enough frosting for 6 cupcakes. I absolutely hate waste, and does anyone ever actually use the leftover frosting they put in the refrigerator? Better to make only what's needed!


Small Batch Chocolate Cupcakes / www.delightfulrepast.com

Small-Batch Chocolate Cupcakes 

(Makes 6 standard-size cupcakes)  

The Cupcakes (vegan) 

3/4 dip-and-sweep cup (3.75 ounces) unbleached all-purpose flour 
1/3 cup sugar
2 tablespoons natural unsweetened cocoa
1/2 teaspoon baking soda
1/8 teaspoon salt
1/2 cup water or cold coffee
3 tablespoons organic canola oil
1 teaspoon apple cider vinegar
1/2 teaspoon vanilla extract 

The Frosting (not vegan) 

3 tablespoons (1.5 ounces) unsalted butter, softened
1 1/2 packed cups (6 ounces) powdered sugar
2 tablespoons natural unsweetened cocoa
Pinch salt
1/2 teaspoon vanilla extract
1 tablespoon cream, milk or cold coffee 

1 Preheat oven to 350 degrees. Put standard paper bake cups in one 6-cup standard muffin tin. 

2 In 1-quart bowl (I use a Pyrex 4-cup measuring cup), whisk together flour, sugar, cocoa, baking soda and salt. Add water or coffee, oil, vinegar and vanilla extract. Whisk vigorously for about 1 minute, or until smooth. 

3 Using a scant 1/4-cup measure, fill the bake cups. You will need to scrape the bowl and measuring cup; there is no waste with this recipe! Bake at 350 degrees for 16 to 18 minutes, or until they test done with a toothpick. 

4 Immediately remove from pan and cool on wire rack for an hour. They must be thoroughly cool before frosting. 

5 In 1-quart bowl (I use a Pyrex 1-quart glass measure), with a hand mixer, cream the butter until smooth. With the mixer on low speed, gradually beat in the powdered sugar, cocoa and salt. Scrape down the sides of the bowl. Add the vanilla extract and liquid; beat on high speed until frosting is light and fluffy, about 5 minutes. You will likely have to add the liquid ingredients before adding all the powdered sugar.

6 With a pastry bag fitted with a 2D tip or a 1M tip, pipe frosting on cupcakes.


Disclosure: Some posts contain links to my affiliate account at Amazon.com. If you purchase something from Amazon through one of my links, I receive a small commission, at no additional cost to you, which I use toward the expenses of running this blog. Thanks for supporting Delightful Repast when you shop at Amazon!

Though Cuisinart provided the oven, the opinions expressed at Delightful Repast are entirely my own. I always tell my readers what I really think!