Showing posts with label Indian food. Show all posts

26 September 2024

Namak Para - Salt Pieces - An Indian Snack

Namak Para - Salt Pieces - An Indian Snack

I had never heard of Namak Para - Salt Pieces until one afternoon at the home of friends, one of whom is from India. As we sat down to tea, I noticed among the treats a little dish of something I'd never seen before. When I heard the name Salt Pieces I thought, I'm just not hearing that right. It must be an Indian name. But, no, Salt Pieces was the English name.

They're rather unusual, to the uninitiated, but quite addictive. I found myself reaching for that little bowl again and again and knew this would be my next experiment in the kitchen. In the meantime, they gave us a box of them. The label indicated carom seeds (ajwain) as the main spice ingredient. Having none on hand, I tried to come up with a combination from my spice rack that would stand in for it. I've listed them here. And I can always pay a visit to my local spice shop to pick up some ajwain to try next time. 

The first batch I made did not taste particularly salty, and something called "Salt Pieces" should be noticeably salty, I should think; so I added an extra 1/8 teaspoon to the recipe to correct that deficiency.  

Namak Para is usually fried, but I prefer baking over frying so thought I'd try a baked version. Some people use vegetable oil, others use ghee. Since I avoid refined oils and only ever have organic unsalted butter and extra virgin olive oil on hand, I thought I'd go with the ghee. Of course, you can buy ghee. But that would have involved a trip out to get it, so I made my own. It's simply Beurre Noisette (Brown Butter) with the milk solids removed, and I've put the directions below. 

I'm certainly no expert—this is only the fifth Indian recipe I have developed—so I'd love to hear your comments and any suggestions you might have. Here are the other recipes: Chicken Tikka Masala, Dal Makhani, Slow Cooker Chicken Tikka Masala, and Naan. 


Namak Para - Salt Pieces - An Indian Snack

If you like it, please Pin it and share it!
 

Namak Para - Salt Pieces

(Makes about 6 dozen)

1 cup (5 ounces/142 grams) unbleached all-purpose flour (maida)
OR use half unbleached and half whole wheat flour (atta) 
1/4 teaspoon baking powder
1/2 teaspoon salt 
1/4 teaspoon coarsely ground black pepper
1/2 teaspoon carom seeds (ajwain) OR
1/16 teaspoon each anise seed, celery seed, ground coriander, ground cumin, oregano, and thyme
3 tablespoons ghee*, melted (or melted unsalted butter) 
4 to 6 tablespoons (2 to 3 fluid ounces/59 to 89 ml) water


Namak Para - Salt Pieces - And How to Make Ghee / www.delightfulrepast.com
This is the ghee when hot from the pan; it changes color,
lightens, as it cools and solidifies.


* Ghee is useful for so many things, I made a little 1-cup batch of it. You can just use melted butter if you like, but if you want to make the ghee it only takes 10 minutes. In a 10- or 12-inch stainless steel skillet (the shiny interior allows you to judge the color of the butter as it browns) over medium-high heat, melt 2 sticks (8 ounces/227 grams) of unsalted butter that you've cut into 8 slices each, about 2 to 3 minutes. Continue to cook, stirring with a silicone spatula and/or swirling the pan, until it smells nutty and is dark golden brown, about 6 minutes. The time varies according to your stove, so pay attention. You can't take your eyes off it; it can go from brown to black in a flash. Strain through a fine-mesh sieve into a glass measuring cup, to get rid of much of the foam and milk solids. Skim off any remaining foam. Clean the sieve and then strain the butter again into a half-pint canning jar, pouring slowly to leave the remaining milk solids behind. The color changes, lightens, as the ghee cools and solidifies.


Namak Para - Salt Pieces - And How to Make Ghee / www.delightfulrepast.com


1  In 1.5- to 2-quart mixing bowl, whisk together the flour, baking powder, salt, and spices. Pour in the melted ghee and rub the flour between your palms for a minute or two until the fat is well incorporated into the flour and the mixture looks like breadcrumbs. Press some of the mixture together in your hand; it should hold together and not crumble.  

2 With your hand, mix in 4 tablespoons (2 fluid ounces/59 ml) of water. Add only as much more water as needed to form a stiff dough (I used a total of a little over 5 tablespoons). Taste the dough and add more salt and spices if needed. 

Note: The dough should be stiff but pliable, neither too soft or sticky nor too dry and crumbly.

3 Knead it for just a minute or so (with no added flour) to form a sort-of-smooth dough; don't overdo it. Cover (if your mixing bowl has no lid, just turn your bowl upside-down over the dough) and rest the dough for 30 minutes. During last 10 minutes, preheat oven to 375F/190C/Gas5 and line baking sheet with parchment paper. 

4 On surface lightly dusted with flour, roll out the dough to a rectangle about 10 by 13 inches and about 1/8 inch (3 to 4 mm) thick. Using a straight edge and pizza wheel or knife, cut the dough into 1-inch wide strips and then cut pieces 1.5-inches long. 

5 Lay the pieces out on the parchment-lined 18x13x1-inch half sheet pan. Bake for about 10 to 15 minutes, checking for doneness after 10 minutes (mine took 15 minutes). Transfer the pieces, still on the parchment, to a wire rack; cool completely before storing in an airtight container for up to 2 weeks at room temperature. 

Disclosure: We are a participant in the Amazon Services LLC Associates Program, an affiliate advertising program designed to provide a means for us to earn fees by linking to Amazon .com at no cost to you on purchases made through our links. This helps cover some of the costs of running the blog. Thank you for your support. 

Jean

If you liked this post, please Pin it and share it!
03 March 2022

Chicken Biryani

Chicken Biryani / www.delightfulrepast.com

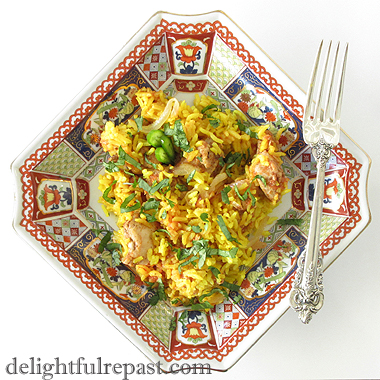
Chicken Biryani is a popular dish of India and beyond that originated in Persia. Biryani is also made with other meats, but I prefer chicken thighs. It varies from region to region (and from cook to cook) in both ingredients and method, and (disclaimer here) I make no claims whatever to authenticity!

If you have made, or even had, biryani of any type, I'd love to hear about it. I have much to learn. There's a great long list of spices used in biryanis, but no one recipe includes them all. I checked my bottle of garam masala to remind myself which spices were included in that blend and then added two that were not in it and extra of a couple that were.


Chicken Biryani / www.delightfulrepast.com


Many people add garlic, but I am allergic. And many people add way too much garlic, which can easily overpower a dish. So if you do add garlic, use just one small clove or even less, so your finished dish will have some subtlety! But it is very flavorful without it, and I doubt that you would miss it.

The Naan - Classic Yeasted Flatbread of India and Beyond that I posted a month ago is the perfect accompaniment.

Have you tried any new dishes or cuisines lately? I think many of us have during the last two years!
 

Chicken Biryani / www.delightfulrepast.com

If you like it, please Pin it and share it!

Chicken Biryani

(Makes 4 servings)

The Chicken

1 1/2 to 2 teaspoons garam masala
1/2 teaspoon fennel seeds, toasted and crushed
1/2 teaspoon salt
1/4 teaspoon coarsely ground black pepper
1/4 teaspoon cumin
1/8 teaspoon cayenne
1/3 cup (2.88 ounces/82 grams) plain yogurt
1 teaspoon grated fresh ginger
1 small clove garlic, crushed, optional
1 1/4 pounds (20 ounces/567 grams) boneless skinless chicken thighs, cut into 1-inch pieces
3/4 cup tomato puree (fresh or half a 14.5-ounce can diced tomatoes, pureed)

The Rice

1 cup (6.625 ounces/188 grams) white basmati rice
1 1/2 cups (12 fluid ounces/355 ml) water
1 tablespoon unsalted butter
1/4 teaspoon salt
1 small bay leaf 
1/2 teaspoon turmeric

The Onion

1 tablespoon extra virgin olive oil
1 tablespoon unsalted butter
1 medium (12 ounces/340 grams) onion*, quartered and thinly sliced 

* I used a yellow onion, but red or white are fine.

The Garnish

2 packed tablespoons cilantro (fresh coriander)


1 In 1.5-quart mixing bowl, whisk together garam masala, fennel, salt, pepper, cumin, and cayenne. Gradually whisk in yogurt and grated ginger. Add chicken, coating well. Cover and refrigerate several hours or overnight.

2 In 2-quart saucepan, bring rice, water, butter, salt, bay leaf, and turmeric to a boil. Stir once and cover tightly with lid. Reduce heat to maintain a low simmer and cook for 15 minutes. Remove from heat, leave covered, and let stand for 10 minutes. Fluff with fork and remove bay leaf. Cover and set aside. 

3 In 12-inch skillet (that has a lid), heat oil and butter over medium-high heat and fry the onion slices until golden brown; this might take up to 20 minutes. Drain on paper towels. Set aside 1/3 of the prettiest fried onions for the garnish.

4 Add the chicken and marinade to the skillet and cook over medium to medium-high heat for about 7 minutes. Add the tomato puree and continue cooking for about 3 minutes. Stir in half of the remaining fried onions to the mix and continue cooking for 3 minutes.

5 Spread the rice over the chicken. Scatter the remaining onions (but not the 1/3 reserved for the garnish) over the rice. Cover with lid and cook over low heat for 15 minutes.

6 Stir lightly. Leave in skillet or transfer to serving dish. Garnish with reserved fried onions and chopped cilantro. The cilantro is not just a garnish, it is an important part of the dish, so don't skip it or substitute parsley (unless you're one of those people who really don't like cilantro).

Disclosure: We are a participant in the Amazon Services LLC Associates Program, an affiliate advertising program designed to provide a means for us to earn fees by linking to Amazon .com and affiliated sites. We are a ThermoWorks affiliate, earning a small commission at no cost to you on purchases made through our links. This helps cover some of the costs of running the blog. Thank you for your support. 

Jean

If you liked this post, please Pin it and share it!
  

03 February 2022

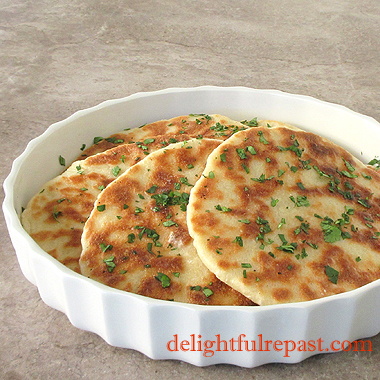
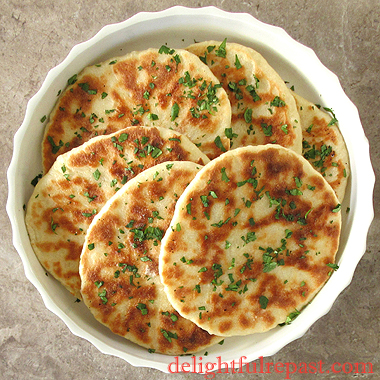
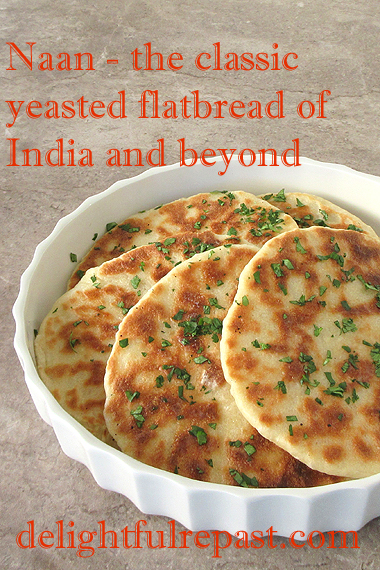
Naan - Classic Yeasted Flatbread of India and Beyond

Naan - Classic Yeasted Flatbread of India and Beyond / www.delightfulrepast.com

Naan is India's, and other parts of Asia's, classic yeasted flatbread that I love so much! Not that I'm an expert, but it's my understanding that yeast is traditional, but you'll see baking powder and/or baking soda in more modern variations.

I will likely never try those variations because I like the yeasted version so much. The bread is soft and pillowy and, at the same time, chewy. I like to spread the top with unsalted butter and sprinkle it with finely chopped fresh cilantro leaves. You might like a sprinkle of finely minced garlic as well, but I'm allergic and must refrain. 

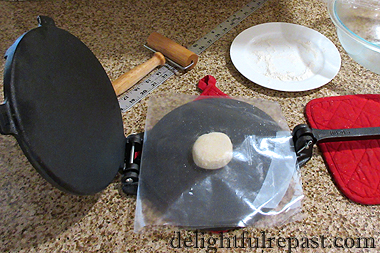
You know how much I've been enjoying my cast iron tortilla press, making batch after batch of both corn and flour tortillas. So, naturally, I was going to try pressing the naan. And I am thrilled to report that it worked beautifully! But you can also roll them out with a rolling pin as most people do.

I did a lot of research on this and saw much disagreement on how thick/thin to roll the dough. Most said 1/8 to 1/4 inch. While that might be fine for non-yeasted versions, I found that the yeasted dough starts puffing up right after rolling so needs to be rolled as thin as possible, certainly no more than 1/8 inch (3 mm). 


Naan - Classic Yeasted Flatbread of India and Beyond / www.delightfulrepast.com


Naan can be any shape. To mimic the shape they might naturally assume hanging on the sides of a tandoor (cylindrical oven), you can roll them into ovals or teardrop shapes. I just make mine round because everybody's going to know I don't have a tandoor anyway!

Roll them out or press them one at a time. While the first one is cooking, roll out the second one, and so on. Since the yeast dough rises quickly, give each a final roll/press just before cooking. So easy because you get into a real rhythm. I've put cooking tips for both stainless steel and cast iron pans in step 5 of the directions.

In my research, I found all kinds of tips that different cooks swear by. Cover the pan with a lid for cooking the first side only, cover with lid for cooking the second side only, grease the pan, don't grease the pan. I tried it all. The only one that made a difference to me was this: Rub water on one side before placing it in the hot pan water side down. Doing that and then tapping fingertips over the surface right away really increased the bubbling.

These will be great with my limited repertoire of Indian dishes: Chicken Tikka Masala, Slow Cooker Chicken Tikka Masala, and Dal Makhani. And being such a bread lover, the naan will inspire me to try more Indian recipes. And I look forward to working up a gluten-free naan for my GF friends.

Are you a bread fan? Have you made naan or other flatbreads? Tell me all about it in the comments below.


Naan - Classic Yeasted Flatbread of India and Beyond / www.delightfulrepast.com

If you like it, please Pin it and share it!


Naan - Classic Yeasted Flatbread

(Makes 8)

2 dip-and-sweep cups (10 ounces/283 grams) unbleached all-purpose flour
2 teaspoons (8 grams) sugar
1 teaspoon (4 grams) instant yeast
1 teaspoon (5 grams) salt
3/4 cup (6 fluid ounces/177 ml or grams) hot but not boiling water
1/4 cup (2.16 ounces/61 grams) plain yogurt
2 tablespoons (1 fluid ounce/30 ml/25 grams) extra virgin olive oil
For kneading and shaping: Up to 1/3 dip-and-sweep cup (1.67 ounces/47 grams) unbleached all-purpose flour


1 In a 1.5- to 2.5-quart mixing bowl (I like to use the Pyrex 2-quart glass measure), measure or weigh the flour. Whisk in the sugar, yeast and salt. 

2 In a 2-cup glass measure, measure the water; heat in the microwave until very hot but not boiling. Whisk in the yogurt and oil. Check that the temperature of the mixture is very warm (120 to 130F/49 to 54C).

3 Make a well in the center of the flour, then add the warm liquid to the well. With a spoon, slowly stir until soft, shaggy dough comes together. Turn out onto lightly floured (from that 1/3 cup) counter for about 5 minutes, adding only enough flour to keep it from sticking a great deal to your hands. (Set aside the remainder of that flour; you'll need it.) With very lightly oiled hands, make a ball of the soft, tacky dough. Place it in the bowl and cover the bowl with a lid, plate, or wrap. Let dough rise until doubled, about 1 to 1.5 hours.

Note: Naan can be made ahead up to this point (step 3). Just pop the risen dough into the refrigerator for up to 24 hours. Bring out of the refrigerator 2 to 3 hours ahead of the time you want to be shaping the dough for its second brief rise (actually just a 20-minute rest).

4 On lightly floured surface (from that 1/3 cup), shape the dough into a rectangle and cut the dough into 8 fairly equal parts. (I, of course, am so persnickety that I weigh the dough, divide by 8, and have realllly equal parts! These were 69 grams each.) Shape each into a smooth little 2-inch disk. Place on lightly floured plate and sprinkle lightly with flour. Cover and let rest for 20 minutes. 

5 Cast iron: Preheat cast iron pan gradually until it is super-hot (see Note); I use the Lodge Pre-Seasoned 14-Inch Cast Iron Baking Pan with Loop Handles that has lived in my oven for more than 12 years now. To preheat cast iron pan evenly, place over medium heat for 10 minutes, rotating every once in a while. Then wipe on a teaspoon of olive oil with a paper towel and continue heating for 2 minutes. 

Stainless steel: Preheat heavy-bottomed 12-inch stainless steel skillet over medium-high heat until very hot, about 3 to 5 minutes.

6 Naan can be any shape. To mimic the shape they would naturally assume hanging on the sides of a tandoor (cylindrical oven), you can roll them into ovals or teardrop shapes. I make mine round. They should be rolled or pressed very thin, not more than 1/8 inch (3 mm).


Naan - Classic Yeasted Flatbread of India and Beyond / www.delightfulrepast.com


If using a tortilla press, place a very lightly floured disk of dough between the two layers of plastic* in the center of the tortilla press. Then gently press the dough ball. Turn it 90 degrees and press again. Press and turn until it is about 7 inches (18 cm) in diameter. 

* I use a 1-gallon zip-top bag cut into an open-on-three sides 8-inch square "folder" to line the press. Wash and save the bag for next time; it will last for many, many batches.

7 Peel back the top layer of plastic, turn it on your hand, and peel back the other layer; or pick up the rolled naan and lay it over your non-dominant hand. Brush, or with your fingertips rub, water on one side of the dough. Lay it on the hot pan, water side down, and press the surface all over with your fingertips. Cook for about a minute when the naan gets bubbles on top and is well browned on the underside. Turn and repeat. You can give it another turn, if you like. Put on a plate and cover with a kitchen towel to keep warm.

8 If serving right away, brush the top of each naan with butter and sprinkle on a little chopped cilantro. If serving later, do that after reheating the naan. 

9 The naan reheats beautifully. Wrap the completely cooled naan in foil and store at room temperature for a day or two. 

Disclosure: We are a participant in the Amazon Services LLC Associates Program, an affiliate advertising program designed to provide a means for us to earn fees by linking to Amazon .com and affiliated sites. We are a ThermoWorks affiliate, earning a small commission at no cost to you on purchases made through our links. This helps cover some of the costs of running the blog. Thank you for your support. 

Jean

If you liked this post, please Pin it and share it!

28 November 2019

Slow Cooker Chicken Tikka Masala

Slow Cooker Chicken Tikka Masala / www.delightfulrepast.com

Chicken Tikka Masala was the first Indian food I attempted 8 years ago. Actually, some say it's not really Indian food, but rather the national dish of Britain!

In that Chicken Tikka Masala recipe, I used serrano chile. But in this streamlined slow cooker version, I opted for the always-on-hand cayenne pepper for a little heat.

Slow Cooker Chicken Tikka Masala / www.delightfulrepast.com


My next foray into Indian cookery was Dal Makhani, a vegetarian lentil curry I really like. And next up will be some of the wonderful flatbreads because, like my father before me, I can hardly consider dinner complete without bread on the table.

The chopped cilantro is more than a garnish to this dish; the flavor complements the sauce perfectly and is a must! 

I served it with Turmeric Rice. Just added 1/2 teaspoon of turmeric for 1 cup of uncooked rice to my usual recipe for plain rice. A spicy main dish calls for plain rice. 


Slow Cooker Chicken Tikka Masala / www.delightfulrepast.com

Slow Cooker Chicken Tikka Masala


(Makes 6 servings)

2 pounds (32 ounces/0.9 kg) boneless skinless chicken thighs, cut into 1-inch pieces
2/3 cup (6 ounces/170 grams) whole or low-fat (2%) plain yogurt
3/4 teaspoon salt, divided

2 tablespoons extra virgin olive oil 
1/2 small yellow onion, diced (1/2 cup)
1 1/2 teaspoons peeled and grated* fresh ginger 
1 teaspoon finely minced shallot
2 teaspoons garam masala
3/4 teaspoon coriander
1/2 teaspoon cumin
1/4 teaspoon turmeric
1/8 teaspoon cayenne pepper
3 or 4 tablespoons (3 ounces/85 grams) tomato paste
1 14.5-ounce (411 grams) can crushed tomatoes
1/4 cup (2 fluid ounces/59 ml) heavy cream

1/4 packed cup chopped fresh cilantro

* I use the Microplane Classic Zester/Grater.


1 Place the chicken, yogurt, and 1/2 teaspoon of the salt in a 4-quart or larger slow cooker or the 6-quart Instant Pot and stir to combine. (I used all organic ingredients except for a couple of the spices.)

2 In a large skillet over medium heat, add the oil and onion and cook, stirring occasionally, until tender, about 8 minutes. Add the ginger, shallot, garam masala, coriander, cumin, turmeric and cayenne pepper; cook for 1 minute. Add the tomato paste and cook about 1 minute. Add the crushed tomatoes and remaining 1/4 teaspoon of salt and bring to a simmer, scraping up the browned bits from the bottom of the pan. 

3 Add the cooked mixture to the slow cooker or Instant Pot and stir to combine with the chicken.

Note: With the Instant Pot, you can saute right in it, then switch it to Slow Cooker mode.

4 Put on the optional Instant Pot glass lid, or use the pressure cooking lid with the steam release handle turned to Venting. Select the Slow Cook program. Within 10 seconds, press Slow Cook to set temperature to Normal. Within 10 seconds, press “+ or –“ to set time to 6 hours.

Note: If using a slow cooker, cover and cook on Low for 6 hours. 

5 Stir in the cream. Leave the slow cooker uncovered and cook on the High setting for 30 minutes. Taste and adjust seasoning. Garnish with cilantro and serve with rice or naan or both. 

Disclosure: We are a participant in the Amazon Services LLC Associates Program, an affiliate advertising program designed to provide a means for us to earn fees by linking to Amazon .com and affiliated sites. We are a ThermoWorks affiliate, earning a small commission at no cost to you on purchases made through our links. This helps cover some of the costs of running the blog. Thank you for your support.

Jean

24 January 2019

Dal Makhani - An Indian Dish

Dal Makhani - An Indian Dish / www.delightfulrepast.com

Dal Makhani (pronounced doll mock-NEE), a buttery lentil curry, is a popular Indian (Punjabi, to be precise) dish introduced to me by Tony of the delightful blog London Calling after his autumn trip to northern India. 

Tony was part of a group of six whose guide organized a cooking experience for them in the home of a family in Old Delhi. This recipe is my adaptation of one he learned.

Dal Makhani is only the second Indian dish I’ve ever made, the first being Chicken Tikka Masala. With copious amounts of butter and cream, this is a very rich vegetarian, though not vegan, dish often reserved for special occasions.

It can be the main dish or an accompaniment. For me, a 1-cup (8 fluid ounces/237 ml) portion makes a perfect lunch all on its own, but it’s strictly a side dish for Mr Delightful.

The recipe Tony got from his hostess/instructor in Old Delhi called for cooking it in a pressure cooker. But I thought, since I’m brand new to pressure cooking, I’d adapt it to stovetop.

Lentils require no soaking and have quite a short cook time, and by using canned red kidney beans instead of dried, which take a long time, it really comes together rather quickly.

Dal Makhani requires no special equipment, just a 3-quart saucepan and a 2-quart saucepan and a food processor or blender to puree the fresh tomatoes. I’ve converted the difficult-to-find-here spices, such as black and green cardamom pods, to available ground spices.

Though I make no claims to authenticity, I think my adaptation captures the flavors quite well. But feel free to play with the spice amounts to suit your own palate.


Dal Makhani - An Indian Dish / www.delightfulrepast.com

Dal Makhani


(Makes seven 1-cup servings)

3 cups (24 fluid ounces/710 ml) water
1 1/8 cup (8 ounces/227 grams) lentils (I could not find the whole black gram lentils/urad dal called for)
1 15-ounce (425 grams) can red kidney beans, drained
3/4 cup* (6 fluid ounces/177 ml) heavy cream, divided
3/4 teaspoon salt
1/2 teaspoon paprika, divided
1/4 teaspoon ground ginger or 1-inch piece of fresh ginger, grated
1/4 teaspoon ground cloves or 4 whole cloves
1/8 teaspoon cinnamon or 1/2-inch piece of cinnamon stick
1/8 teaspoon ground cardamom
1/8 teaspoon cayenne
6 tablespoons (3 ounces/85 grams) unsalted butter
1 1/2 teaspoons ground coriander
1 1/4 teaspoons cumin or 1 teaspoon cumin seeds
1 pound (16 ounces/454 grams) tomatoes, pureed in food processor
1 4-ounce (113 grams) can diced green chiles (hot or mild, I used the hot) or 2 to 3 green chiles, minced
Garnish: cilantro (also known as fresh coriander leaves)

* That is a very generous amount of cream. I think next time I make it I'll use half the amount.

1 In 3-quart saucepan, bring water just to the boil. Stir in lentils that have been rinsed and picked over for debris. Bring the water to a rapid boil, then reduce heat and gently simmer for about 45 to 60 minutes, or until tender.

Note: If you use urad dal, whole black gram lentils, they will require soaking and longer cooking.

2 Stir in the kidney beans, half the cream (3 ounces), salt, half the paprika (1/4 teaspoon), ginger, cloves, cinnamon, cardamom and cayenne. Leave it simmer for 15 minutes or so while you proceed with the tomato mixture.

3 In 2-quart saucepan, melt the butter. Stir in the coriander, cumin, remaining 1/4 teaspoon paprika, tomato puree and green chiles. Cook for 5 to 6 minutes “or till the butter leaves the gravy.” (If you don’t know what that last bit means, don’t ask me; just cook it for about 6 minutes and let that be that!)

4 Stir the sauce into the lentil mixture and cook for another 10 minutes over low heat. Stir in the remaining cream and continue cooking for 5 minutes. Taste and adjust seasoning. Garnish with cilantro and serve with rice and naan or roti.

Jean