Showing posts with label Mexican food. Show all posts

25 April 2024

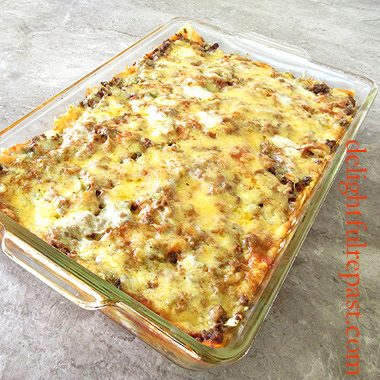
Enchilada Casserole - For Now or Later - Homemade Freezer Meals

Enchilada Casserole - For Now or Later - Homemade Freezer Meals / www.delightfulrepast.com

It was time for Enchilada Casserole, and I thought "Why not make a bigger batch and have four meals out of it?" One for now and three for later. You know, I'm all about streamlining and am never happier than when my freezer is full of homemade freezer meals!

Since I'm usually cooking for two, I freeze two portions in my favorite 3-cup rectangular glass storage containers that are just the right size and shape for two pieces of anything you make in a 13x9x2-inch baking dish and cut into 8 pieces. You might need a different size container for the number of servings that make a meal in your house.


Enchilada Casserole - For Now or Later - Homemade Freezer Meals / www.delightfulrepast.com


This casserole can be made with ground beef or chopped cooked chicken or whatever you like. For convenience, I used frozen chopped onions and canned green chiles.

I couldn't compromise on the sauce though, and homemade is really not that much trouble. It's a pretty basic and simple sauce that packs a lot of flavor. And you can adjust it however you like. If a canned sauce has too much of something for your taste, you can't do anything about it.

Do you love casseroles? My father did not like casseroles (or chicken or ground beef), so we never had them. I love them! 


Enchilada Casserole - For Now or Later - Homemade Freezer Meals / www.delightfulrepast.com

If you like it, please Pin it and share it!


ENCHILADA CASSEROLE

(Makes 8 servings)

The Meat

1 1/2 pounds (24 ounces/680 grams) ground beef (I use organic grassfed 85% lean) 
OR 4 cups chopped cooked chicken, and omit the 3/4 teaspoon salt
1/2 cup chopped onions
3/4 teaspoon salt
1 4-ounce (113 grams) can diced mild green chiles

The Sauce

3 tablespoons (1.5 ounces/43 grams) unsalted butter 
3 tablespoons (27grams) unbleached all-purpose flour
2 teaspoons paprika
1 teaspoon cumin
1/4 teaspoon salt
1/4 teaspoon coarsely ground black pepper 
1/4 teaspoon cayenne
1/4 teaspoon oregano
3 tablespoons (2 ounces/57 grams) tomato paste 
3 cups (24 fluid ounces/710 ml) lower sodium chicken broth

The Casserole

12 ounces (340 grams) cheese, shredded (I use half jack and half medium cheddar)
9 6-inch white corn tortillas
4 1/2 teaspoons extra virgin olive oil


1 In large skillet, cook the ground beef, breaking it up and browning it well. Remove the fat from the pan by your favorite means: covering pan with lid and draining it off, tilting the pan and spooning it out with a large metal spoon, or using a turkey baster. Then add the onions and salt, and cook for a few minutes. Then stir in the diced chiles. Remove from the heat. OR cook the onions in a tablespoon of extra virgin olive oil, stir in the chopped chicken and chiles, and set aside.

2 In another skillet or saucepan, melt the butter and blend in the flour, paprika, cumin, salt, pepper, cayenne, and oregano. Cook over low heat, stirring constantly, for 2 to 3 minutes. Whisk in the tomato paste until smooth and fragrant. Whisk in the broth. Bring the sauce to a simmer. When it begins to bubble, continue cooking and stirring for about 10 minutes, until sauce is thickening. Remove from the heat. 

3 Spread 1/3 cup (2.67 fluid ounces/79 ml) of the sauce in a lightly greased 13x9x2-inch baking dish.

4 Heat a griddle (my square griddle can cook 2 tortillas at a time), put 2 little 1/2 teaspoon puddles of oil (about the size of a quarter) on the hot griddle. When oil is hot, lay down the 2 tortillas and cook for about a minute, turning them several times. Repeat to lightly cook all 9 tortillas. Stack them neatly and cut in half. 

5 Dip each tortilla half in the sauce as you assemble the casserole. Place 4 halves with cut edges against the long sides of the baking dish and then 2 halves down the middle. Top the first layer of tortillas with 1/3 of the meat mixture, then 1/3 of the cheese mixture. Make second layer of tortillas, meat, and cheese. For the third layer, tortillas and meat, then pour over the remaining sauce, and top with cheese. 

6 Preheat oven to 350F/180C/Gas4. Bake for about 30 to 35 minutes, or until bubbly and browned. Let stand for 30 minutes before cutting into 8 pieces. Place 2 pieces in each of 4 of my favorite 3-cup lidded Pyrex storage containers. Freeze for up to 3 months. 

7 When ready to serve, remove plastic lid and heat in microwave until heated through. Plate and garnish with sour cream, a squeeze of lime, chopped cilantro, or sliced green onions. Serve with Mexican RicePinto Beans or Refried Beans, and Broccoli Salad.

Disclosure: We are a participant in the Amazon Services LLC Associates Program, an affiliate advertising program designed to provide a means for us to earn fees by linking to Amazon .com and affiliated sites. This helps cover some of the costs of running the blog. Thank you for your support. 

Jean

If you liked this post, please Pin it and share it!
11 May 2023

Enchilada Casserole - Enchilada Cazuela

Enchilada Casserole - Enchilada Cazuela / www.delightfulrepast.com

My Enchilada Casserole came on the heels of a binge of enchilada making. I made multiple batches of cheese enchiladas, chicken enchiladas, shredded beef enchiladas.
 
Then after a break from all that, I found myself craving enchiladas again, but not craving that much work. I mean, it's easy enough to roll a dozen enchiladas, but it can get a bit tedious.

I have a natural inclination to make things that take a lot of time, but I have other things I want to do with my limited time and energy right now, so I sat myself down and gave myself a good talking-to ...

... about streamlining, simplifying, coming up with ways to get the flavors I'm craving with less time and effort. The result, this Enchilada Casserole. Made with ground beef. Carne molida. One step.

And I decided to use a couple of other busy-day timesavers, frozen chopped onions and canned diced green chiles. Of course, you're welcome to chop your own onion and chiles, but remember, I was streamlining! 

I couldn't compromise on the sauce though, and homemade is really not that much trouble. It's a pretty basic and simple sauce that packs a lot of flavor. And you can adjust it however you like. If a canned sauce has too much of something for your taste, you can't do anything about it.

Do you love casseroles?


Enchilada Casserole - Enchilada Cazuela / www.delightfulrepast.com

If you like it, please Pin it and share it!


Enchilada Casserole


(Makes 4 to 6 servings)

The Beef

1 pound (16 ounces/454 grams) ground beef (I use organic grassfed 85% lean)
1/2 cup frozen chopped onions
1/2 teaspoon salt
1/2 to 1 4-ounce (113 grams) can diced mild green chiles

The Sauce

3 tablespoons (1.5 ounces/43 grams) unsalted butter 
3 tablespoons (27grams) unbleached all-purpose flour
2 teaspoons paprika
1 teaspoon cumin
1/4 teaspoon salt
1/4 teaspoon coarsely ground black pepper 
1/4 teaspoon cayenne
1/4 teaspoon oregano
3 tablespoons (2 ounces/57 grams) tomato paste 
2 1/2 cups (20 fluid ounces/591 ml) lower sodium beef or chicken broth

The Enchiladas

10 ounces (283 grams) cheese, shredded (I use half jack and half medium cheddar)
9 6-inch white corn tortillas
4 1/2 teaspoons extra virgin olive oil


1 In large skillet, cook the ground beef, breaking it up and browning it well. Remove the fat from the pan by your favorite means: covering pan with lid and draining it off, tilting the pan and spooning it out with a large metal spoon, or using a turkey baster. Then add the onions and salt, and cook for a few minutes. Then stir in the diced chiles. Remove from the heat.

2 In another skillet or wide saucepan, melt the butter and blend in the flour, paprika, cumin, salt, pepper, cayenne, and oregano. Cook over low heat, stirring constantly, for 2 to 3 minutes. Whisk in the tomato paste until smooth and fragrant. Whisk in the broth. Bring the sauce to a simmer. When it begins to bubble, continue cooking and whisking for about 10 minutes, until sauce is thickening. Remove from the heat. 

3 Spread 1/4 cup (2 fluid ounces/59 ml) of the sauce in a lightly greased 11x7x1.5-inch baking dish.

4 Heat a griddle (my square griddle can cook 2 tortillas at a time), put 2 little 1/2 teaspoon puddles of oil (about the size of a quarter) on the hot griddle. When oil is hot, lay down the 2 tortillas and cook for about a minute, turning them several times. Repeat to lightly cook all 9 tortillas. Stack them neatly and cut in half. 

5 Dip each tortilla half in the sauce as you assemble the casserole. Place 4 halves with cut edges against the long sides of the baking dish and then 2 halves down the middle. Top the first layer of tortillas with 1/3 of the meat mixture (about 1 cup), then 1/3 of the cheese mixture. Make second layer of tortillas, meat, and cheese. For the third layer, tortillas and meat, then pour over the remaining sauce, and top with cheese. Cover and refrigerate until an hour before baking time.

6 Preheat oven to 350F/180C/Gas4. Bake for about 45* minutes, or until bubbly. Let stand for 10 minutes before serving. Garnish with sour cream, a squeeze of lime, chopped cilantro, or sliced green onions. Serve with Mexican Rice, Pinto Beans or Refried Beans, and Broccoli Salad.

* If you're baking the enchiladas right after assembling them, just bake them for about 25 minutes, or until bubbly.

Disclosure: We are a participant in the Amazon Services LLC Associates Program, an affiliate advertising program designed to provide a means for us to earn fees by linking to Amazon .com and affiliated sites. This helps cover some of the costs of running the blog. Thank you for your support. 

Jean

If you liked this post, please Pin it and share it!

09 February 2023

Cheese Enchiladas with Homemade Red Enchilada Sauce

Cheese Enchiladas with Homemade Red Enchilada Sauce / www.delightfulrepast.com

Cheese enchiladas—one of my favorite comfort food meals—is the perfect thing to have on the occasion of my 13th blogiversary! Can't believe I haven't posted this before. 

And I can't believe I didn't take a pic of the enchiladas after they were baked! Sorry. They were so pretty!

I like to use a combination of Monterey Jack and medium cheddar cheeses, freshly grated. And, for me, homemade sauce is a must. If you've always used canned sauce, you'll be surprised at how quick, easy, and better homemade sauce is.

The enchiladas can be made ahead and refrigerated until an hour before serving time or baked right after assembling. You'll find baking times for both in step 6. 

After 10 years of posting weekly, I switched to posting every other week, which worked well for 2 1/2 years. Then I went to every three weeks, but I'm finding life so full that those three weeks fly by in a blur. Now at the 13-year mark, I've decided to post monthly, on the second Thursday of every month. 

If you join my Followers (in the sidebar, just above the Follow Me on Twitter button), you'll receive updates of this blog's posts in your Reading List on Blogger .com. Or you can just mark it on your calendar. 

Cheese Enchiladas with Homemade Red Enchilada Sauce / www.delightfulrepast.com

If you like it, please Pin it and share it!

And, again, sorry I didn't take a picture of the 
baked enchiladas for you. But if you could have 
smelled them, you'd see why I wanted to 
dive right in without the usual blog photo shoot! 

Cheese Enchiladas


(Makes 12)

The Sauce

3 tablespoons (1.5 ounces/43 grams) unsalted butter 
3 tablespoons (27 grams) unbleached all-purpose flour
2 teaspoons paprika
1 teaspoon cumin
1/4 teaspoon salt
1/4 teaspoon coarsely ground black pepper 
1/4 teaspoon cayenne
1/4 teaspoon oregano
2 tablespoons tomato paste 
2 1/2 cups (20 fluid ounces/591 ml) lower sodium chicken broth (or vegetable broth to make it vegetarian)

The Enchiladas

8 ounces (227 grams) medium or mild cheddar cheese, shredded
8 ounces (227 grams) Monterey Jack cheese, shredded 
12 6-inch white corn tortillas
About 2 tablespoons extra virgin olive oil


1 In skillet, melt the butter and blend in the flour, paprika, cumin, salt, pepper, cayenne, and oregano. Cook over low heat, stirring constantly, for 2 to 3 minutes. Whisk in the tomato paste until smooth and fragrant. Whisk in the broth. Bring the sauce to a simmer. When it begins to bubble, continue cooking and whisking for about 10 minutes, until sauce is thickening. Taste and adjust seasoning. Remove from the heat.

2 Combine the two cheeses and set aside 4 ounces/113 grams (1 packed cup) of the cheese mixture to top the filled and sauced enchiladas.

3 Spread 1/2 cup (4 fluid ounces/118 ml) of the sauce in a lightly greased 13x9x2-inch baking dish.

4 Heat a griddle (my square griddle can cook 2 tortillas at a time), put 2 little 1/2 teaspoon puddles of oil (about the size of a quarter) on the hot griddle. When oil is hot, lay down the 2 tortillas and cook for about a minute, turning them several times. Repeat to lightly cook all 12 tortillas. 

5 Spread a tablespoon of sauce on a dinner plate, lay the cooked tortilla on the plate, spread on a tablespoon of sauce, spread a line of shredded cheese mixture, about 3 tablespoons, a heaping packed 1/8 cup (1 ounce/28 grams) across the tortilla, roll tightly, and place seam side down in baking dish, making two rows of six in the dish. Top with remaining sauce and cheese. Cover and refrigerate until an hour before baking time.

6 Preheat oven to 350F/180C/Gas4. Bake for about 45* minutes, or until bubbly. Let stand for 10 minutes before serving. Serve with sour cream and a squeeze of lime; garnish with cilantro or sliced green onions.

* If you're baking the enchiladas right after assembling them, just bake them for about 25 minutes.

Disclosure: We are a participant in the Amazon Services LLC Associates Program, an affiliate advertising program designed to provide a means for us to earn fees by linking to Amazon .com and affiliated sites. We are a ThermoWorks affiliate, earning a small commission at no cost to you on purchases made through our links. This helps cover some of the costs of running the blog. Thank you for your support. 

Jean

If you liked this post, please Pin it and share it!

23 December 2021

How to Make Homemade Flour Tortillas - With or Without a Tortilla Press

How to Make Homemade Flour Tortillas - with or without a tortilla press / www.delightfulrepast.com

Yes, flour tortillas can be made with a tortilla press, despite what you (and I) may have been told!

Flour tortillas of the store-bought variety often have a lot of questionable ingredients that leave an odd aftertaste. But some of the homemade flour tortillas I've had were greasy and rubbery (and some 1/4-inch thick!), so about 10 years ago I decided to try making my own with just four simple (and organic) ingredients. I made up the recipe as I went along, and they turned out great the first time—which only means homemade flour tortillas are easy and practically foolproof!

Then a few weeks ago I got a cast iron tortilla press to make corn tortillas, posted about it, and a reader asked if the press could be used for flour tortillas as well. I told her I had always heard it couldn't but had never actually tried it. 

So I whipped up a batch and in about an hour reported back to her that you can indeed use the tortilla press for flour tortillas but that the press doesn't get them as paper-thin as I like them. So that set me on another round of experiments in the kitchen.

I discovered that giving the tortilla two additional (three, in all) 90-degree-turn-and-presses resulted in a beautifully thin tortilla. But if you have a different press that doesn't get that result for you, there is another way that spares you from getting out your great long rolling pin.


How to Make Homemade Flour Tortillas (with or without a tortilla press)  / www.delightfulrepast.com


A handy-dandy little gadget called a wooden pastry and fondant roller (4 inches wide, though it says 6 inches) makes quick work of making the tortillas as thin as you like. Just leave the pressed tortilla in its plastic "folder" and give it a few swipes with the roller. And it is useful for so many other things, such as rolling a press-in crust right in the pan to give your bars and traybakes a perfectly even base.

You can use any type of fat for flour tortillas, but I prefer organic unsalted butter. Organic lard is more expensive than organic butter and is not as readily available. The mild butter flavor is sooooo good! Cooking for two on most days, I usually just make a half batch. If you don't have a tortilla press, you can roll them out with a rolling pin.

I've been making so many tortillas since I got the tortilla press, I haven't even bothered to decide where to put it when I put it away. I just leave it out looking cute and compact in one of the corners of my U-shaped countertop.

Hope you'll make some flour tortillas or corn tortillas soon and let me know how they turned out for you. I love hearing all the different ways these versatile flatbreads are made. 

How to Make Homemade Flour Tortillas - with or without a tortilla press / www.delightfulrepast.com

If you like it, please Pin it and share it!

Flour Tortillas


(Makes 12 7-inch tortillas)

2 1/2 dip-and-sweep cups (12.5 ounces/354 grams) unbleached all-purpose flour
1 teaspoon non-GMO baking powder, optional
1 teaspoon salt
6 tablespoons (3 ounces/85 grams) unsalted butter
2/3 cup (5.33 fluid ounces/158 ml or grams) hot* water

*push the 160F (71C) button on my electric kettle, then measure the water in a glass measure, which cools it down a few degrees.


1 In medium mixing bowl, mix flour and salt (and baking powder, if you're using it) together with your hands. Grate the butter into the bowl or use a small knife to slice tiny pieces of butter into the bowl. With your fingertips, mix the butter into the flour until it resembles coarse meal. Pour the hot water while mixing with a fork, in case you don't need to add all the water. The mixture should be moist enough to come together into a tacky dough. Knead, right in the bowl, with one hand or on a smooth countertop for about 3 minutes until it is smooth and springy, adding a little more flour if the dough is too wet or a little more water if it is too dry. 

Note: If you measure ingredients using a digital kitchen scale, you'll likely not need to add more flour or water and will come out with precisely enough dough to make 12 50-gram tortillas. 

2 Cover the dough tightly to keep it from drying out. Let it rest for at least 30 minutes or up to an hour. Divide total weight of dough in grams by 12 to portion out the dough, rolling them into smooth balls (about 50 grams each). As you make the tortillas, keep the dough balls covered to keep them from drying out and let them rest for 10 to 15 minutes.

Note: The first time or two that you make tortillas (before you've developed "a feel" for the dough), test one dough ball first to make sure it presses well and peels easily from the plastic before portioning out all the dough.

3 Preheat your griddle well over low to moderate heat, about 5 minutes. Since I used my nonstick griddle, I rubbed a tiny amount, 1/2 teaspoon, of extra virgin olive oil on the cold griddle (because you are never supposed to preheat a nonstick pan empty or over high heat or use cooking spray on it). Then when I was ready to start cooking the tortillas, I wiped the griddle, removing nearly all the oil, and turned the heat up to medium to medium-high.


How to Make Homemade Flour Tortillas (with or without a tortilla press)  / www.delightfulrepast.com


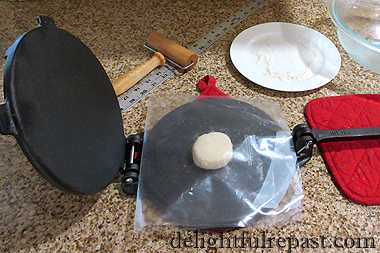
4 On lightly floured (not more than a tablespoon) small plate, flatten slightly one of the smooth balls to a disk about 2 inches round, getting a dusting of flour on both sides. Place it between the two layers of plastic in the center of the tortilla press. Then gently press the dough ball. Turn it 90 degrees and press again. It will be about 6 inches in diameter. If you would like it a little thinner, as I do, either give it two more 90-degree-turn-and-presses or give it a few swipes with the little wooden pastry roller. It will be about 7 inches in diameter. 

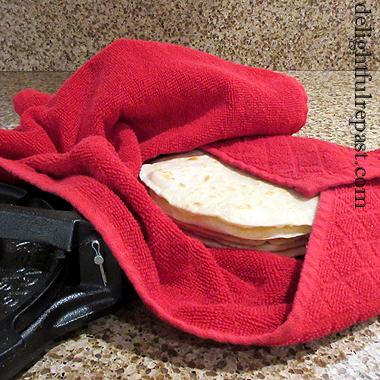
5 Peel back the top layer of plastic, turn it on your hand, and peel back the other layer. Lay it on the hot griddle and cook for about 45 to 60 seconds when the tortilla starts getting bubbles on top and specks of brown on the underside. Turn and repeat. You can give it another turn, if you like. Transfer to a tortilla warmer or a makeshift tortilla warmer—a clean kitchen towel in a glass pie plate. Repeat. Serve from the bottom of the stack first, as they'll be softest.

Disclosure: We are a participant in the Amazon Services LLC Associates Program, an affiliate advertising program designed to provide a means for us to earn fees by linking to Amazon .com and affiliated sites. We are a ThermoWorks affiliate, earning a small commission at no cost to you on purchases made through our links. This helps cover some of the costs of running the blog. Thank you for your support. 

Jean

If you liked this post, please Pin it and share it!

09 December 2021

Homemade Corn Tortillas

Homemade Corn Tortillas / www.delightfulrepast.com


Homemade tortillas are easier than most people think. I first made flour tortillas nearly ten years ago, making up the recipe as I went along, and they turned out great. A rolling pin is all you need. But for corn tortillas, I really needed a tortilla press.

My friend Julia told me about the older generations of her family making them by hand. But that hand patting technique can take years to perfect, so I again looked into tortilla presses. 

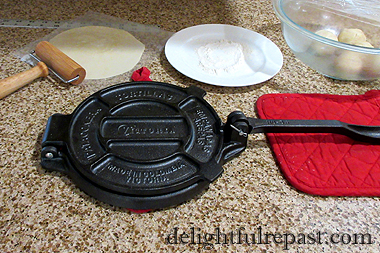
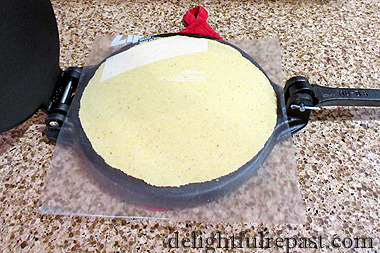
Read great things about this tortilla press I found on Amazon. Beautifully made, heavy cast iron. It will turn your kitchen into a tortilleria! 

I used Bob's Red Mill organic masa harina. Just add hot water and a little salt, and that's it. Since I was just cooking for two, I made a half batch, six tortillas. You might need more or less water depending on your masa harina. These amounts are what worked for me.

There are varying opinions on the temperature of the water, some saying your hottest tap water. I pushed the 160F (71C) button on my electric kettle, then measured the water in a glass measure, which cooled it down a few degrees. It was just right. 

Have your tortilla press standing by, along with a 1-gallon Ziploc bag cut into an open-on-three sides 8-inch square "folder" to line the press. Save the bag for next time; it will last for many, many batches, I'm sure.

I used this batch for tostadas, but I'm looking forward to making more very soon for Chicken Enchilada Verde Casserole.

Do share any tips you might have for making homemade corn tortillas. 


Homemade Corn Tortillas / www.delightfulrepast.com

If you like it, please Pin it and share it!

Homemade Corn Tortillas

(Makes 12 6.5- to 7-inch tortillas)

2 1/2 cups (10 ounces/283 grams) masa harina
2 tablespoons (0.5 ounce/14 grams) non-GMO cornstarch, optional
1/2 teaspoon salt
1 1/2 cups (12 fluid ounces/355 ml or grams) hot water*
2 1/2 teaspoons extra virgin olive oil, optional

* That was the amount of water that worked with every single batch of tortillas made with Bob's Red Mill golden masa harina. But then my order of King Arthur organic white corn masa harina arrived, and I found it took an extra 1/4 cup (2 fluid ounces/59 ml or grams) of water.

1 In large bowl, stir together the masa harina and salt. I sometimes like to add that little bit of cornstarch; it seems to make the tortillas more pliable. While stirring with a silicone spatula, gradually add the water, then stir until the masa is evenly moistened. With one hand, knead the dough right in the bowl or on a smooth countertop for 5 minutes until it is smooth and springy, after a few minutes adding, only if necessary, a little more masa harina if the dough is too wet or a little more water if it is too dry.

Note: Some cooks like to add a small amount of oil if the corn tortillas are going to be stored for a day or more, but that is optional. If using, add it along with the water. 

2 Cover the masa tightly to keep it from drying out. Let it rest for at least 20 minutes or up to an hour. Divide total weight of dough in grams by 12 to portion out the dough, rolling them into smooth balls (about 50 grams or so each). As you make the tortillas, keep the dough balls covered to keep them from drying out.

Note: Test one dough ball first to make sure it presses well and peels easily from the plastic before portioning out all the dough.

3 Preheat your griddle well over moderate heat. Since I used my nonstick griddle, I rubbed a tiny amount, 1/2 teaspoon, of extra virgin olive oil on the cold griddle (because you are never supposed to preheat a nonstick pan empty or over high heat or use cooking spray on it). Then when I was ready to start cooking the tortillas, I wiped the griddle, removing nearly all the oil.


How to Make Homemade Corn Tortillas - with Tortilla Press / www.delightfulrepast.com


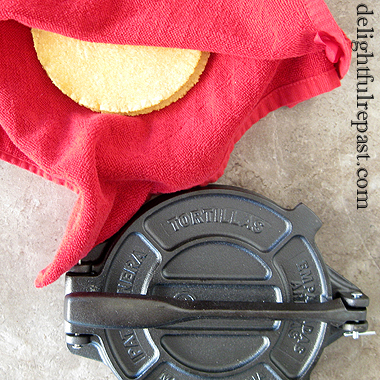
4 Place a smooth dough ball between the two layers of plastic in the center of the tortilla press. Then gently press the dough ball. Give it three 90-degree turns and presses to get the thinnest possible tortilla. Peel back the top layer of plastic, turn it on your hand, and peel back the other layer. Lay it on the skillet and cook for about a minute on each side. Transfer to a tortilla warmer or, as I do, a makeshift tortilla warmer—a clean kitchen towel in a glass pie plate. Repeat. Serve from the bottom of the stack first, as they'll be softest.

Disclosure: We are a participant in the Amazon Services LLC Associates Program, an affiliate advertising program designed to provide a means for us to earn fees by linking to Amazon .com and affiliated sites. We are a ThermoWorks affiliate, earning a small commission at no cost to you on purchases made through our links. This helps cover some of the costs of running the blog. Thank you for your support. 

Jean

If you liked this post, please Pin it and share it!