16 December 2022

Cannelés - A Small French Pastry That Originated in Bordeaux

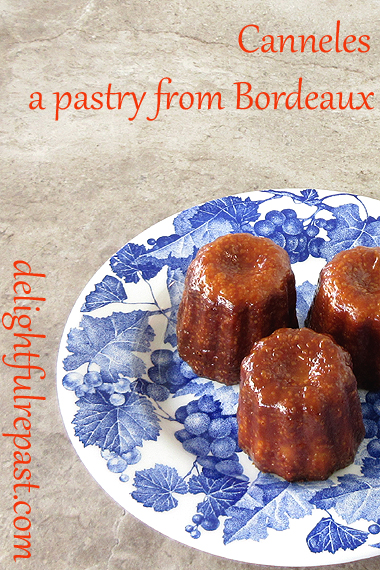
Canneles - A Small French Pastry That Originated in Bordeaux / www.delightfulrepast.com

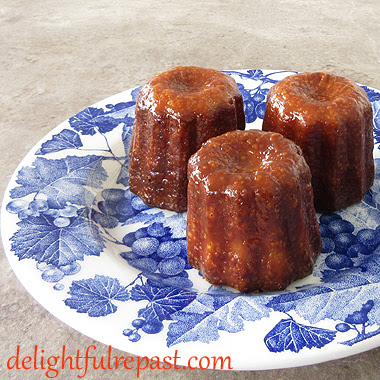
Cannelés
(sometimes spelled canelés, and pronounced CANuhLEE, actually not quite LEE and not quite LAY) have been on my must-make list for literally (and I don't use that word lightly) decades. 

But every time they occur to me happens to coincide with a time when I am trying mightily to not add another specialty item to my batterie de cuisine collection! Some of you know what I'm talking about, right?

As recently as perhaps 15 years ago, I would have only been satisfied with the very pricey individual tin-lined copper molds and would have gone to great lengths to procure food-grade beeswax to coat the interiors, etc, etc. Well, I am soooo over all that!

When my latest reminder of cannelés came from David at Cocoa and Lavender, well, I could hold out no longer and ordered the same pan he recently acquired. He started his blog at the same time I did, with recipes ranging from simple to complex, like mine; and a love of food that, like mine, goes back to his childhood and his mother's amazing cooking. He also has an allergy, like mine, to garlic! So naturally I assumed that I could trust his choice of cannelés molds.

Canneles - A Small French Pastry That Originated in Bordeaux / www.delightfulrepast.com


So I ordered a pan and started digging through my files, remembering that I had come up with a recipe many years ago that was a mishmash of ones I had looked at and added my own touches to. The main differences between recipes is in the baking time and temperature. 

Most call for at least the first 10 to 20 minutes at a very high (some as high as 500F/260C/Gas10) temperature. One recipe said to bake at 400F/205C/Gas6) for 2 hours! Really?! 

Every recipe I've seen calls for way more sugar than I like. First batch I made, I cut the sugar to 3/4 cup but found them still a bit too sweet (you won't!), so next time I went to 1/2 cup. It was plenty sweet enough for me, but it made the texture all wrong, no longer cannelés, so I'm going to stick with my original 3/4 cup.

One type of cannelés molds I never considered is the silicone. I have never tried a silicone baking "pan" of any kind. They just do not appeal to me in any way. If you like them, fine. But I just, no, just, no. A baking tin, or pan, should not be squishy!

A delightful after-dinner dessert or coffee go-with, cannelés are perfect for the afternoon tea table, along with Fruit Tartlets and petite Cream Puffs.  

So tell me, have you ever made cannelés? What kind of molds—silicone, tin-lined copper, other metal? What degree of caramelization do you prefer—golden, light brown, dark brown, black?


Canneles - A Small French Pastry That Originated in Bordeaux / www.delightfulrepast.com

If you like it, please Pin it and share it!

Cannelés


(Makes 12, if you're using the same size molds)

2 cups (16 fluid ounces/473 ml) milk
3 tablespoons (1.5 ounces/43 grams) unsalted butter
3/4 dip-and-sweep cup (5.25 ounces/106 grams) unbleached all-purpose flour
3/4 cup (5.25 ounces/149 grams) sugar
1/4 teaspoon salt
2 large eggs (medium, in UK and some other places)
2 large egg yolks
1/4 cup (2 fluid ounces/59 ml) dark rum
2 teaspoons vanilla extract

1 In 1-quart saucepan, heat the milk and butter until the butter is melted and the milk is up to a simmer; do not boil.

2 In medium mixing bowl, whisk together the flour, sugar, and salt vigorously for 1 minute to "sift."

3 Add the eggs, yolks, rum, and vanilla extract to the flour mixture and whisk vigorously until smooth. When smooth, whisk in the hot milk a third at a time. This ensures a lump-free batter that doesn't need straining.

4 Cover and refrigerate for 24 to 72 hours.

5 When ready to bake, put a sheet of aluminum foil on the shelf beneath the shelf you'll be placing the pan on (the foil will catch any butter drips) and preheat oven to 425F/220C/Gas7. In small bowl (microwave) or pan (stovetop), melt 2 teaspoons of solid shortening* and brush the molds with it.

* I keep a stick of Crisco in my refrigerator strictly for greasing certain pans. Many pans do a great job of releasing cakes that have been buttered, buttered and floured, oiled, or sprayed. But for pans that are molds (such as these and Bundt cakes), shortening always gives me a good result and does not gum up the pan as some oils do.

6 Whisk the batter a bit. If a skin has formed, just whisk it in. Fill each mold to within about 3/8 inch (1 cm) of the top.

Note: For this pan, I use a 1/3-cup measuring cup as a ladle to fill the molds with the 1/4 cup of batter they need. Using a 1/4-cup measuring cup as a ladle actually fills them with less than 1/4 cup due to the concave meniscus of the liquid (or something like that!). 

7 Place the cannelés pan in the preheated oven. Bake for 20 minutes, then reduce heat to 375F/190C/Gas5 and bake for about 50 to 60 minutes, or until they are as deeply caramelized as you like them. Some people go for nearly black. Rotate pan halfway through for more even baking.

8 Turn the cannelés out onto a wire rack to cool. If any of the cannelés are not adequately or evenly caramelized, set them right side up on a small baking sheet and return them to the oven for 5 minutes or so. Allow them to cool for 2 hours before serving. This allows time for the exterior to crisp and the interior to set to the proper consistency. The crispy exterior will last for perhaps 6 hours. After that it will soften, and the cannelés will still be delicious but the characteristic crunch will be gone. They can be reheated and left to cool again to refresh them.

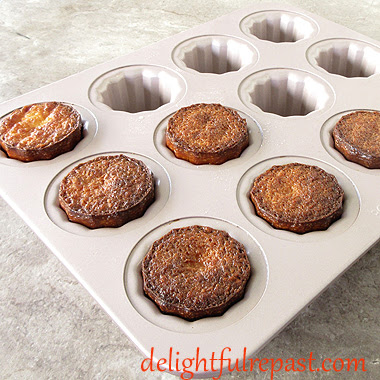
* Pan details: ChefMade WK9158 carbon steel 12-cup nonstick cannele mould, oven safe up to 450F/230C/Gas8, handwash only, made in China.

Disclosure: We are a participant in the Amazon Services LLC Associates Program, an affiliate advertising program designed to provide a means for us to earn fees by linking to Amazon .com and affiliated sites. We are a ThermoWorks affiliate, earning a small commission at no cost to you on purchases made through our links. This helps cover some of the costs of running the blog. Thank you for your support.

Jean

If you liked this post, please Pin it and share it!

24 November 2022

Velvety Vanilla Cupcakes - with Strawberry Buttercream Frosting

Velvety Vanilla Cupcakes - with Strawberry Buttercream Frosting / www.delightfulrepast.com

Velvety Vanilla Cupcakes are, I think, the ideal cupcake—rich, buttery, flavorful, with a texture that is, well, velvety! I developed the recipe years ago, first as gluten-free for my gluten-free friends. For that version, go to Velvety Vanilla Cupcakes - That Just Happen to Be Gluten-Free. But these are made with my usual organic unbleached all-purpose flour.

There are times when Vanilla Chiffon Cupcakes are called for. Otherwise, I'm team butter cake cupcake all the way. No need to separate eggs and fold in the whipped egg whites—not that there's anything difficult about that, but it does mean another bowl and another beater and several more minutes, and who needs that! Just keep it simple.

The cupcakes are frosted with a simple buttercream frosting, flavored and colored with either my homemade strawberry freezer jam or a tiny batch of simple pectin-free jam (below). This frosting is soooo good. It tastes like homemade strawberry ice cream. Of course, if fresh strawberries are available, there's my Fresh Strawberry Frosting.

Great for an afternoon tea or parties and showers, but I didn't have a special occasion in mind. It's just nice to have a stash of cupcakes in the freezer for a rainy day! 


Velvety Vanilla Cupcakes - with Strawberry Buttercream Frosting / www.delightfulrepast.com

If you like it, please Pin it and share it!


Velvety Vanilla Cupcakes


(Makes 24)

3 large eggs (medium, in UK)
1 cup (8 fluid ounces/237 ml) milk, divided
2 teaspoons vanilla extract
2 dip-and-sweep cups (10 ounces/283 grams) unbleached all-purpose flour
1 1/2 cups (10.5 ounces/298 grams) sugar
3 1/2 teaspoons baking powder
1/2 teaspoon salt
12 tablespoons (6 ounces/170 grams) unsalted butter, room temperature

1 Preheat oven to 350F/180C/Gas4. Put 2½-inch paper bake cups in two standard muffin tins. In small bowl (I use a Pyrex 2-cup glass measure), lightly whisk together the eggs, 1/4 cup of the milk, and the vanilla extract.

2 In large mixing bowl, combine flour, sugar, baking powder, and salt; and mix on low speed for one minute to "sift." Add the softened butter and remaining milk. Mix on low speed until combined. With mixer on medium-high speed, beat for a minute and a half. Scrape the bowl (I use this silicone spatula).

3 With mixer on medium speed, gradually beat in the egg mixture in three batches, beating for 20 seconds after each addition. Scrape the bowl.

4 Using a 1/4-cup measure, fill the bake cups with a scant 1/4 cup of batter. Bake for about 20 to 23 minutes or until they test done with a toothpick.

5 Immediately remove from pans and cool on wire rack for an hour. They must be thoroughly cool before frosting.


Strawberry Buttercream Frosting


8 tablespoons (4 ounces/113 grams) unsalted butter, room temperature
3 packed cups (12 ounces/340 grams) powdered sugar 
1/16 teaspoon salt
1 teaspoon vanilla extract
4 tablespoons homemade less sugar strawberry freezer jam
A little milk, if needed for proper consistency

In bowl of stand mixer, or with a hand mixer, cream the butter until smooth. With the mixer on low speed, gradually beat in the powdered sugar. Scrape the bowl. Add the salt, vanilla extract, and jam; and beat on high speed until frosting is light and fluffy, about 5 minutes. You will likely have to add the liquid ingredients (the jam and perhaps a little milk) before adding all the powdered sugar. 


Tiny Batch Strawberry Jam


4 ounces (113 grams) frozen unsweetened whole strawberries
1/4 cup (1.75 ounces/50 grams) sugar
1 1/2 teaspoons freshly squeezed lemon juice
Pinch of salt

In small saucepan, cook over medium-low heat for about 10 minutes, stirring frequently. About halfway through, use a stick blender to puree the softened berries. Set aside to cool thoroughly before using in the frosting.

Disclosure: We are a participant in the Amazon Services LLC Associates Program, an affiliate advertising program designed to provide a means for us to earn fees by linking to Amazon .com and affiliated sites. We are a ThermoWorks affiliate, earning a small commission at no cost to you on purchases made through our links. This helps cover some of the costs of running the blog. Thank you for your support.

Jean

If you liked this post, please Pin it and share it!

03 November 2022

Orange Chiffon Cake - and ThermoWorks Silicone Tools Giveaway

Orange Chiffon Cake - and ThermoWorks Silicone Tools Giveaway / www.delightfulrepast.com

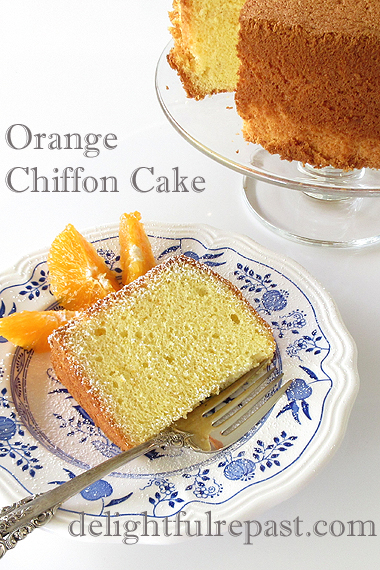
The Orange Chiffon Cake

Orange Chiffon Cake is the most refreshing of cakes and so light it practically floats off the plate! If you're new to chiffon cakes, they are like angel food cakes, but made more luscious by the addition of oil and egg yolks.

Chiffon cakes typically, and originally, are made with vegetable oil and cake flour, two things I don't keep in my kitchen. So I started experimenting with using extra virgin olive oil (a fruity rather than peppery one) and my usual organic unbleached all-purpose flour and came up with this delightful cloud of a cake.

Here are three of my other cakes made with olive oil, in case you'd like to try them: Olive Oil Apple Cake, Olive Oil Carrot Cake, Olive Oil Fig Cake. If you're in the mood for chiffon, try my Vanilla Chiffon Cupcakes; but do make them with a fruity extra virgin olive oil instead of the organic canola oil I used for chiffon cakes back then.

If you have a 7-inch (18 cm) angel food cake pan that is not nonstick, use it. I have this very useful multipurpose 3-inch deep 7-inch diameter round pan and turn it into a tube pan any time I need to with this Ateco Stainless Steel 2x3-Inches-High Round Form that turns any pan into a tube pan. Just center it in the pan and fill in the batter around it. 

Another thing I love about chiffon cakes is that, when you're making cakes with a filling or frosting that must be refrigerated, chiffon cake is fine straight out of the refrigerator; but butter cake needs to be brought to room temperature for the proper texture. 

The ThermoWorks Hi-Temp Silicone Tools

I've tried dozens of spatulas over the years (as you may know, I have a serious gadget habit), and thought I'd found the ultimate one 8 years ago. But when ThermoWorks came out with theirs I could see that its shape would likely solve the only problem I had with my old favorite. So I had to try it. And it did solve that problem. I have a new favorite and I don't see how it could be improved upon.  

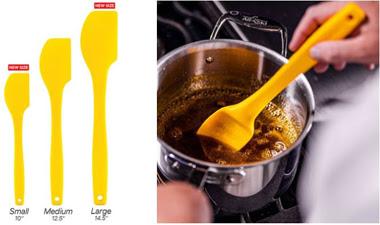
With its rounded side, this spatula scrapes every last drop of batter from my mixing bowls as well. I got the small and the medium and use them both. If you're cooking for a large family or making big quantities of food for whatever reason, you might also want to get the large spatula. And I got the spoonula for making custards and puddings. They're all part of the ThermoWorks Hi-Temp (rated to 600F) Silicone Tools collection, as are the silicone hotpad/trivets you've seen here before. 

See the giveaway info below the recipe. Two winners will be selected!

Orange Chiffon Cake - and ThermoWorks Silicone Tools Giveaway / www.delightfulrepast.com

If you like it, please Pin it and share it!


Orange Chiffon Cake


(Makes one 7-inch/18 cm tube cake)

3 large eggs, separated while cold, then brought to room temperature (about 1 hour)
3/4 dip-and-sweep cup (3.75 ounces/106 grams) unbleached all-purpose flour
1/8 packed cup (0.5 ounce/14 grams) non-GMO cornstarch
3/4 cup (5.25 ounces/149 grams) sugar, divided
1 1/2 teaspoons baking powder
1/4 teaspoon salt
Finely grated zest of one large orange (about 1 tablespoon)
1/4 teaspoon cream of tartar
1/4 cup (2 fluid ounces/59 ml) extra virgin olive oil
1/4 cup (2 fluid ounces/59 ml) freshly squeezed orange juice
1 teaspoon vanilla extract

1 Separate the cold eggs, putting the whites into a 1.5- to 2-quart mixing bowl and the yolks into a small bowl. Cover and bring to room temperature, about 1 hour.

2 Once the separated eggs are at room temperature, preheat oven to 350F/180C/Gas4. Cut a 7-inch circle of baking parchment paper to fit in the bottom of the pan. Do not grease the pan. 

3 In 2.5- to 3-quart mixing bowl, whisk together flour, cornstarch, 1/2 cup (3.5 ounces/99 grams) of the sugar, baking powder, salt, and orange zest.

4 Add the cream of tartar to the room temperature egg whites in the 1.5- to 2-quart mixing bowl. Using hand mixer on medium speed, beat the egg whites and cream of tartar until nearly at soft peaks stage. On high speed, gradually beat in the remaining 1/4 cup (1.75 ounces/50 grams) sugar until egg whites are stiff enough to hold up in soft peaks but are still glossy and moist. Watching carefully, continue beating until whites just reach stiff peaks but are not dry; set aside.

5 Make a well in the center of the flour mixture and add the egg yolks, olive oil, orange juice, and vanilla extract. Whisk vigorously, or beat with hand mixer on medium speed, until smooth, about one minute.

6 With a silicone spatula*, gently fold the egg whites, a third at a time, into the batter just until blended.

* The ThermoWorks hi-temp silicone spatulas (small or medium—I used the small) are perfect for this. The shape does the best job of scraping the bowl clean. And they are an easy-to-clean one-piece design. 

7 Pour the batter into the prepared pan and gently smooth the top and run a skewer through the batter a few times to break up any large air bubbles. Bake for about 35 to 40 minutes, or until a wooden skewer inserted into the center of the cake comes out clean or cake springs back when pressed gently. Immediately turn the pan upside down over the neck of a wine bottle and leave it there for 30 to 45 minutes.

Orange Chiffon Cake (this photo, cooling a cake in a tube pan on a wine bottle) / www.delightfulrepast.com
Cooling a cake in a tube pan on a wine bottle really works!
Doing this keeps the chiffon cake from settling and losing its light texture.
(That's a ThermoWorks 7-inch Hi-Temp Silicone Hotpad/Trivet on top of the pan
and my favorite timer, ThermoWorks TimeStack, that times four things at once!)

8 To remove the cake from the pan, run a thin-bladed metal spatula around the tube and the inside of the pan. Invert onto serving platter and let cool completely. If you like, make a simple glaze of powdered sugar and orange juice to drizzle over the cake.


ThermoWorks Hi-Temp Silicone Tools Giveaway


This giveaway is open to readers in the US* who are 18 years of age or older. To enter, leave a comment below (one entry per person). Be sure to tell me what color you prefer. Please include your email address in the body of your comment. If your name is drawn and I have no way to contact you, you will be disqualified. Must enter by 11:59 p.m. Eastern time Tuesday November 22.

* If you are outside the US but would like to have this sent to someone you know in the US, go ahead and enter!

Two winners will be chosen by random drawing and be announced here in the comments before noon Eastern time on Thursday November 24. If I don't hear back from the winners of the random drawing by noon Eastern time Saturday November 26, new winner(s) will be selected from the original entrants (those who commented before the giveaway deadline).

Disclosure: ThermoWorks provided the spatulas and spoonula for review purposes and two sets for the giveaway. The views expressed here are entirely my own. I always tell my readers what I really think!

Disclosure: We are a participant in the Amazon Services LLC Associates Program, an affiliate advertising program designed to provide a means for us to earn fees by linking to Amazon .com and affiliated sites. We are a ThermoWorks affiliate, earning a small commission at no cost to you on purchases made through our links. This helps cover some of the costs of running the blog. Thank you for your support.

Jean

If you liked this post, please Pin it and share it!

13 October 2022

Chewy Ginger Treacle Cookies

Chewy Ginger Treacle Cookies - Molasses Ginger Cookies / www.delightfulrepast.com


Chewy Ginger Treacle Cookies are just the thing to bake on a brisk autumn day. The spicy aromas wafting around create instant hygge. If you're in the US, you might know these as Ginger Molasses Cookies.

Whatever you call them, they will no doubt evoke cozy feelings and nostalgia, even if you've never had them before. They're an annual tradition in some homes, but they're delightful all year round.

Wonderful with a glass of cold milk or a cup of coffee, they go especially well, I think, with a nice cup of tea. I hope you'll try them soon and let me know what you think in the comments below. Happy Autumn! 
   

Chewy Ginger Treacle Cookies - Molasses Ginger Cookies / www.delightfulrepast.com

If you like it, please Pin it and share it!


Chewy Ginger Treacle Cookies


(Makes 4 dozen 3-inch cookies)

4 dip-and-sweep cups (20 ounces/567 grams) unbleached all-purpose flour
4 teaspoons baking soda
1/2 teaspoon salt
2 teaspoons cinnamon
2 teaspoons ginger
1/2 teaspoon cloves
1 1/2 cups (12 ounces/340 grams) unsalted butter, room temperature
2 cups (14 ounces/397 grams) sugar
1/2 cup (4 fluid ounces/118 ml/5.73 ounces/162 grams) black treacle or unsulphured molasses
2 eggs (medium in UK, large in US)

1 In medium bowl, whisk together flour, baking soda, salt and spices.

2 In large bowl of electric mixer, beat butter and sugar on medium speed for 30 seconds. Add molasses, then eggs, and beat until light and fluffy. Slowly beat in flour mixture. Cover and refrigerate for an hour.

3 Preheat oven to 375F/190C/Gas5. Place #40 scoops* (1.5-tablespoon 1.25-inch balls) 3 inches apart on parchment-lined baking sheets. Bake for about 10 to 12 minutes. For crisp cookies, bake a bit longer, watching carefully so that they don't burn.

Note: Of course, if you want to get really persnickety about the cookies being exactly the same size, you can weigh the dough in grams and divide by 48 and come up with something like 35 grams each.

4 Cool on baking sheet for 1 minute, then remove to wire racks to cool completely. Store in airtight container.

* If you don't have a Number 40 Squeeze Disher Scoop, you need to get one now! I don't know how people make cookies without it! And here is my favorite kitchen timer; since I got this ThermoWorks TimeStack, I haven't looked back!

Disclosure: We are a participant in the Amazon Services LLC Associates Program, an affiliate advertising program designed to provide a means for us to earn fees by linking to Amazon .com and affiliated sites. We are a ThermoWorks affiliate, earning a small commission at no cost to you on purchases made through our links. This helps cover some of the costs of running the blog. Thank you for your support.

Jean

If you liked this post, please Pin it and share it!
08 September 2022

An Announcement - Does "On Hiatus" Sound Too Grand?

This post has absolutely nothing to do with apples, but I had to put up a picture of
 something. And an apple made more sense than some of the stuff I paint.

Hello, friends! After 10 years of posting weekly, I switched to posting every other week, which has worked well for the past 2 1/2 years and likely will continue to work well once I get through a very busy time the next month or two. So don't count me out!

I may pop in and put up a new post or two during that time, but I don't want to have the pressure of having to do so, as I've got a lot on my plate just now with family health issues. But I'm sure not all of you have read all 600 of my posts, so there you go!

May I suggest you go to my Recipes index page and just pick a category! There are 13 categories: Appetizers, Beverages, Breads, Breakfast, Desserts, Gluten-Free, Main Dishes, Salads and Dressings, Sauces, Side Dishes, Soups, Teatime, and Miscellaneous.

And, please, leave comments on the posts. I may not be able to reply to all comments as I always have done, but I will read, enjoy, and post them all (though you may not see it right away as I moderate comments but may not do so as speedily as usual).


And, in keeping with autumn, a couple of pears. And one
of my favorite pear recipes, Pear Frangipane Tart.

As summer is winding down, I will take this opportunity to wish you an Awesome Autumn, or Fabulous Fall, whichever you prefer! 

Jean