Showing posts with label cakes frostings and fillings. Show all posts

23 May 2024

Dundee Cake - Scottish Teatime Classic

Dundee Cake - Scottish Teatime Classic / www.delightfulrepast.com

Dundee Cake is one of those recipes with lots of lore attached. As with all lore, much of it is inaccurate. Was it really created at the end of the 18th century by Janet Keiller of the Dundee marmalade family? Or was it first made in the 16th century for Mary Queen of Scots, who purportedly did not like cherries which usually featured in fruit cake? 

Which of the so-called must-have ingredients must one really have? Some insist on a bit of whisky from Scotland, or Seville orange marmalade, or ground almonds. The list goes on. So ... what to do? Professional bakers of the cake actually applied for protected status, but the government chose not to award the cake protected geographical indication (PGI) because "the name Dundee Cake is generic."

The application for PGI status specified certain ingredients, including sultanas, Amontillado sherry, candied orange peel, dried vine fruits, and a pattern of whole blanched almonds on top. Not even a wee dram of Scotland's finest! Good, because I've always preferred sherry (though not necessarily Amontillado). 


Dundee Cake - Scottish Teatime Classic / www.delightfulrepast.com

Please Pin it and share it!

I abhor store-bought candied orange peel, so unless I have a batch of my homemade candied orange peel on hand, I prefer to use fresh orange zest and perhaps a bit of juice. The main thing is that the predominant flavors be orange and almond. And I do hold with the PGI applicants' insistence on an arrangement of whole blanched almonds on the top.

Unfortunately, for some reason none of the stores around here had whole blanched almonds in stock, which I found surprising. Perhaps they consider them a "seasonal" item? Anyway ... I decided to proceed with the whole raw unblanched almonds I always have on hand. Perhaps not as pretty to some, or not "authentic" to others, but it will have to do! Blanching them myself would likely have been simple, but I wasn't in the mood to experiment with it just then.

When developing a recipe I always try to make it as "authentic" as possible, but not being a Dundonian myself, I don't wish to be dogmatic about any of this. But if you are a member of the Baker Trade of Dundee or just have set ideas about Dundee cake, do let me know in the comments!


Dundee Cake - Scottish Teatime Classic / www.delightfulrepast.com

 Please Pin it and share it!

Dundee Cake   


(Makes one 3-inch/8cm deep 7-inch/18cm round cake)

1 1/4 packed cups (6.25 ounces/177 grams) sultanas, currants, or other dried vine fruits
Finely grated zest of 2 medium organic or unsprayed and unwaxed oranges
1/4 cup (2 fluid ounces/59 ml) fresh orange juice
1 tablespoon (0.5 fluid ounce/15 ml) sherry
1 1/2 dip-and-sweep cups (7.5 ounces/213 grams) unbleached all-purpose flour*
3/4 cup (5.25 ounces/149 grams) sugar
1 1/2 teaspoons non-GMO baking powder
1/2 teaspoon mixed spice**
1/4 teaspoon salt
10 tablespoons (5 ounces/142 grams) unsalted butter, softened***
2 large (medium, in UK and some other places) eggs, room temperature
About 34 whole blanched almonds

* Many British recipes call for self-raising flour, but mine will always call for plain flour. I prefer to be in control of the amount of baking powder and salt I use. 

** Since the mixed spice, a ready-made blend popular in the UK, is not readily available elsewhere (not the same as US pumpkin pie spice), you may have to make your own. The amount to make depends on how frequently you’ll be using it. I usually stir up just a tablespoon at a time, but multiply these amounts if you’d like to make more: 3/4 teaspoon each allspice and cinnamon, 1/2 teaspoon mace or nutmeg, 1/4 teaspoon each cardamom, cloves, coriander and ginger.

*** Let butter stand at room temperature for 30 to 60 minutes. Butter needs to be a little softer for a hand mixer than for a stand mixer. It should be squishable, but not melting or greasy/oily.

1 About 12 to 24 hours before mixing cake, stir together fruit, zest, juice and sherry in a small bowl. Cover tightly and let stand for about 12 to 24 hours.

2 Preheat oven to 300F/150C/Gas2. Prepare baking tin. Butter the inside of a 3-inch deep 7-inch/18cm pan. Line the bottom with a circle of parchment paper. Turn the parchment over so that both sides are buttered. Lightly flour the tin and set it on a quarter sheet pan for baking.

3 In 2 to 2.5-quart bowl, vigorously whisk together the flour, sugar, baking powder, mixed spice, and salt to aerate as well as combine. With electric hand mixer, mix the softened butter into the flour mixture until it resembles crumbs. Drain the fruit and zest, reserving the liquid. On low setting, mix in the eggs and the reserved juice; beat on medium to high speed for 1 minute. Gently stir in the drained fruit. The batter is quite stiff and should just drop slowly off a spoon when nudged. If it is too stiff, add a tablespoon of milk or another tablespoon of orange juice or sherry, if you like.

4 Scrape batter into prepared tin and smooth the top. Arrange the whole blanched almonds in 3 concentric circles on the top, starting on the outside—20 almonds, then 11, then 3. Bake until golden brown and cake springs back when pressed lightly in the center or when a skewer inserted in the center comes out clean, about 1 1/4 to 1 1/2 hours.

5 Leave in tin on wire rack for 10 minutes before removing from tin. Peel away the parchment on the bottom and set right side up on rack to cool completely. 

Disclosure: We are a participant in the Amazon Services LLC Associates Program, an affiliate advertising program designed to provide a means for us to earn fees by linking to Amazon .com and affiliated sites. This helps cover some of the costs of running the blog. Thank you for your support. 

Jean

If you liked this post, please Pin it and share it!

22 June 2023

Maple-Walnut Snacking Cake

Maple-Walnut Snacking Cake / www.delightfulrepast.com


Maple-Walnut Snacking Cake was inspired by a cake found on the delicious blog The English Kitchen, where Marie made a recipe from The Small-Batch Snacking Cake Cookbook by Aimee Broussard. 

Looking at the ingredients list I could tell that the cake was far too sweet for my taste, and Marie described it as dense and sweet, like a brownie or blondie. If you have more of a sweet tooth than I, it might be just what you're looking for.

But I was in the mood for a cake that was light and less sweet, so decided to take the maple flavor inspiration and apply it to my Grandma's Little Yellow Cake that I call the "little black dress" of cakes because it can be "accessorized" lots of different ways to suit any occasion.


Maple-Walnut Snacking Cake / www.delightfulrepast.com


To me, "snacking cake" means a cake that is quick and easy; can be made by hand with no need for special equipment; is baked in, and often served from, the baking dish or tin; and calls for ingredients we generally have on hand.

My maple snacking cake has a subtle real maple flavor (don't try this with maple-flavored pancake syrup!) that I thought would be enhanced by a sprinkle of chopped walnuts over the icing (more of a glaze really). It was!

As my "regulars" know, I switched to blogging just once a month (second Thursday of every month). But since I already said I'll be posting a bread recipe next month, I decided to slip this post in this week as an "extra."

Need I tell you that a square of maple-walnut snacking cake goes beautifully with a cup of tea!


Maple-Walnut Snacking Cake / www.delightfulrepast.com


Maple-Walnut Snacking Cake 

(Makes one 8-inch/20-cm square layer, 9 servings)  

The Maple Cake 

1 tablespoon cider vinegar
Enough milk to make 1 cup (8 fluid ounces/237 ml)
1 1/4 dip-and-sweep cups (6.25 ounces/177 grams) unbleached all-purpose flour
1/4 dip-and-sweep cup (1.25 ounces/35 grams) non-GMO cornstarch
1/2 cup (3.5 ounces/99 grams) sugar
1 teaspoon baking powder
3/4 teaspoon baking soda
1/2 teaspoon salt
8 tablespoons (4 ounces/113 grams) unsalted butter, softened
2 large eggs, room temperature
1/4 cup (2 fluid ounces/59 ml) real maple syrup 
1 teaspoon vanilla extract

The Maple-Walnut Icing

1/3 packed cup (1.33 ounces/38 grams) powdered sugar
2 tablespoons (1 ounce/28 grams) unsalted butter, room temperature
2 tablespoons (1 fluid ounce/30 ml) real maple syrup
Small pinch* of salt
1/2 cup (2 ounces/57 grams) chopped walnuts, toasted or not 

* I actually have a "Pinch" measuring spoon. It holds 1/16 teaspoon. A "small" pinch is half that.


1
 Preheat oven to 350F/180C/Gas4. Grease well and lightly flour an 8x8x2-inch baking dish or tin. Measure vinegar into a 1-cup glass measure; add enough milk to make 1 cup. Stir and let stand about 5 minutes while you proceed.

2
 In mixing bowl, whisk together flour, cornstarch, sugar, baking powder, baking soda and salt. Cut in the butter as if making biscuits (I work it in with my impeccably clean fingers). Add soured milk, eggs, maple syrup, and vanilla. With electric mixer (or by hand with a large spoon, as I do), mix on low speed for 30 seconds to combine, then on medium speed for 1 minute. 

3
 Pour into prepared pan. Bake for about 40 minutes, or until golden and a toothpick inserted in the center comes out clean. 

4
 Cool in pan on wire rack for 10 minutes. Remove from pan and place on wire rack to cool. Grandma usually just served cakes like this directly from the pan, and that's what I did here. 

5 After the cake has been cooling for about 30 minutes, put the powdered sugar, soft butter, maple syrup, and salt in a 2- to 3-cup mixing bowl and whisk until smooth. Scrape onto top of the warm cake and spread to cover top only. Sprinkle chopped walnuts evenly over the top and lightly press them.
 Cool completely. Cut into 9 squares.
 

Disclosure: We are a participant in the Amazon Services LLC Associates Program, an affiliate advertising program designed to provide a means for us to earn fees at no cost to you by linking to Amazon .com and affiliated sites. This helps cover some of the costs of running the blog. Thank you for your support. 

Jean

If you liked this post, please Pin it and share it!

12 January 2023

Lemon Cakes with Raspberry Sauce

Lemon Cakes with Raspberry Sauce / www.delightfulrepast.com

Lemon Cakes—or Lemon Cupcakes, if you don't have the 
cannelés pan—look a little "dressy" without having to go to the mess and bother of making icing and getting out the piping bag and all that. Making a little batch of raspberry sauce is a doddle.

I was in the mood for Lemon Drizzle Cake, but I wanted to experiment with other uses for my new cannelés pan that has barely had time to cool off in the month I've had it. It has turned out batch after batch of perfect Cannelés

Anticipating my 13th blogiversary next month here at Delightful Repast, I was in the mood for something a little special, a little festive. Lemon Cakes with Raspberry Sauce and Whipped Cream filled the bill nicely. I hope you'll make them soon.


Lemon Cakes with Raspberry Sauce / www.delightfulrepast.com


For the first ten years of Delightful Repast, I posted every Thursday. Then I went to every other Thursday, then every third Thursday. Well, I'm going to reward myself for keeping this lark going for 13 years by going to monthly posting, the second Thursday of every month. 

I hope you'll carry on with me monthly, marking it on your calendar or however you remind yourself of things. Or just come back every week and read one of more than 600 posts. Wishing you a delightful 2023!


Lemon Cakes with Raspberry Sauce / www.delightfulrepast.com

If you like it, please Pin it and share it!


Lemon Cakes


(Makes 12)

1 large egg, room temperature
1 large egg white, room temperature
1/2 cup (4 fluid ounces/118 ml) milk, divided
1 teaspoon vanilla extract
1 dip-and-sweep cup (5 ounces/142 grams) unbleached all-purpose flour
3/4 cup (5.25 ounces/149 grams) sugar
2 teaspoons baking powder
1/4 teaspoon salt
5 tablespoons (2.5 ounces/71 grams) unsalted butter, room temperature
1 1/2 teaspoons freshly squeezed lemon juice
1 1/2 teaspoons grated lemon zest

1 Preheat oven to 350F/180C/Gas4. Prepare* the cannelés pan. Or put 2½-inch paper bake cups in a standard muffin tin. In small bowl, lightly combine the egg and yolk, a quarter of the milk, and the vanilla extract.

* You can use a baking spray—not a cooking spray—that contains flour or do what I do: grease (with Crisco shortening) and flour each of the 12 molds. Cooking sprays cause a gummy film to eventually build up on nonstick pans and ruins them. 

2 In medium mixing bowl, combine all the dry ingredients and mix on low speed for a minute to "sift." Add the softened butter and remaining milk. Mix on low speed until combined. With mixer on medium-high speed, beat for a minute and a half. Scrape the bowl.

3 Beat in the egg mixture in three batches, beating for 20 seconds after each addition. Scrape the bowl and, with spatula, stir in lemon juice and zest (I do it by hand because zest tends to get tangled up in the beaters).

4 Using a 1/4-cup measure as a scoop, divide the batter evenly among the 12 molds. Fill each with a scant (or level) 1/4 cup of batter, then scrape the bowl and spoon it in. Bake for about 20 to 22 minutes or until they are golden and one in the center tests done with a toothpick.

5 Cool in the cannelés pan for 5 minutes before turning them out to cool completely on a wire rack for an hour.


Raspberry Sauce


(Makes about 3/4 cup)

1 10-ounce package frozen whole raspberries unsweetened
1/4 cup (1.75 ounces/50 grams) sugar
1/4 cup (2 fluid ounces/59 ml) water
1 tablespoon (0.5 fluid ounce/15 ml) freshly squeezed lemon juice

1 In a small saucepan over medium heat, bring all the ingredients to a boil for 2 minutes, then reduce heat and simmer for 10 minutes, all the while stirring frequently.

2 With a silicone spatula, press the sauce through a fine-mesh strainer to remove the seeds. Cover and cool to room temperature, then refrigerate for at least an hour.

Disclosure: We are a participant in the Amazon Services LLC Associates Program, an affiliate advertising program designed to provide a means for us to earn fees by linking to Amazon .com and affiliated sites. We are a ThermoWorks affiliate, earning a small commission at no cost to you on purchases made through our links. This helps cover some of the costs of running the blog. Thank you for your support.

Jean

If you liked this post, please Pin it and share it! 

24 November 2022

Velvety Vanilla Cupcakes - with Strawberry Buttercream Frosting

Velvety Vanilla Cupcakes - with Strawberry Buttercream Frosting / www.delightfulrepast.com

Velvety Vanilla Cupcakes are, I think, the ideal cupcake—rich, buttery, flavorful, with a texture that is, well, velvety! I developed the recipe years ago, first as gluten-free for my gluten-free friends. For that version, go to Velvety Vanilla Cupcakes - That Just Happen to Be Gluten-Free. But these are made with my usual organic unbleached all-purpose flour.

There are times when Vanilla Chiffon Cupcakes are called for. Otherwise, I'm team butter cake cupcake all the way. No need to separate eggs and fold in the whipped egg whites—not that there's anything difficult about that, but it does mean another bowl and another beater and several more minutes, and who needs that! Just keep it simple.

The cupcakes are frosted with a simple buttercream frosting, flavored and colored with either my homemade strawberry freezer jam or a tiny batch of simple pectin-free jam (below). This frosting is soooo good. It tastes like homemade strawberry ice cream. Of course, if fresh strawberries are available, there's my Fresh Strawberry Frosting.

Great for an afternoon tea or parties and showers, but I didn't have a special occasion in mind. It's just nice to have a stash of cupcakes in the freezer for a rainy day! 


Velvety Vanilla Cupcakes - with Strawberry Buttercream Frosting / www.delightfulrepast.com

If you like it, please Pin it and share it!


Velvety Vanilla Cupcakes


(Makes 24)

3 large eggs (medium, in UK)
1 cup (8 fluid ounces/237 ml) milk, divided
2 teaspoons vanilla extract
2 dip-and-sweep cups (10 ounces/283 grams) unbleached all-purpose flour
1 1/2 cups (10.5 ounces/298 grams) sugar
3 1/2 teaspoons baking powder
1/2 teaspoon salt
12 tablespoons (6 ounces/170 grams) unsalted butter, room temperature

1 Preheat oven to 350F/180C/Gas4. Put 2½-inch paper bake cups in two standard muffin tins. In small bowl (I use a Pyrex 2-cup glass measure), lightly whisk together the eggs, 1/4 cup of the milk, and the vanilla extract.

2 In large mixing bowl, combine flour, sugar, baking powder, and salt; and mix on low speed for one minute to "sift." Add the softened butter and remaining milk. Mix on low speed until combined. With mixer on medium-high speed, beat for a minute and a half. Scrape the bowl (I use this silicone spatula).

3 With mixer on medium speed, gradually beat in the egg mixture in three batches, beating for 20 seconds after each addition. Scrape the bowl.

4 Using a 1/4-cup measure, fill the bake cups with a scant 1/4 cup of batter. Bake for about 20 to 23 minutes or until they test done with a toothpick.

5 Immediately remove from pans and cool on wire rack for an hour. They must be thoroughly cool before frosting.


Strawberry Buttercream Frosting


8 tablespoons (4 ounces/113 grams) unsalted butter, room temperature
3 packed cups (12 ounces/340 grams) powdered sugar 
1/16 teaspoon salt
1 teaspoon vanilla extract
4 tablespoons homemade less sugar strawberry freezer jam
A little milk, if needed for proper consistency

In bowl of stand mixer, or with a hand mixer, cream the butter until smooth. With the mixer on low speed, gradually beat in the powdered sugar. Scrape the bowl. Add the salt, vanilla extract, and jam; and beat on high speed until frosting is light and fluffy, about 5 minutes. You will likely have to add the liquid ingredients (the jam and perhaps a little milk) before adding all the powdered sugar. 


Tiny Batch Strawberry Jam


4 ounces (113 grams) frozen unsweetened whole strawberries
1/4 cup (1.75 ounces/50 grams) sugar
1 1/2 teaspoons freshly squeezed lemon juice
Pinch of salt

In small saucepan, cook over medium-low heat for about 10 minutes, stirring frequently. About halfway through, use a stick blender to puree the softened berries. Set aside to cool thoroughly before using in the frosting.

Disclosure: We are a participant in the Amazon Services LLC Associates Program, an affiliate advertising program designed to provide a means for us to earn fees by linking to Amazon .com and affiliated sites. We are a ThermoWorks affiliate, earning a small commission at no cost to you on purchases made through our links. This helps cover some of the costs of running the blog. Thank you for your support.

Jean

If you liked this post, please Pin it and share it!

03 November 2022

Orange Chiffon Cake - and ThermoWorks Silicone Tools Giveaway

Orange Chiffon Cake - and ThermoWorks Silicone Tools Giveaway / www.delightfulrepast.com

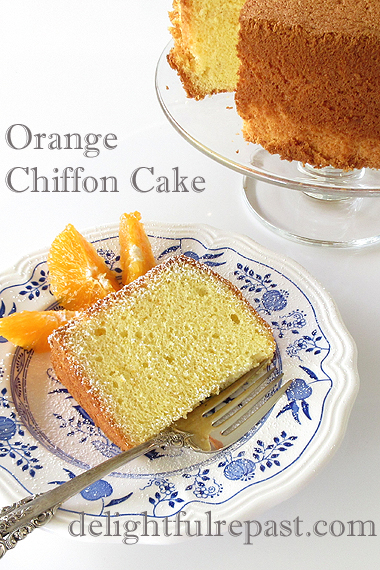
The Orange Chiffon Cake

Orange Chiffon Cake is the most refreshing of cakes and so light it practically floats off the plate! If you're new to chiffon cakes, they are like angel food cakes, but made more luscious by the addition of oil and egg yolks.

Chiffon cakes typically, and originally, are made with vegetable oil and cake flour, two things I don't keep in my kitchen. So I started experimenting with using extra virgin olive oil (a fruity rather than peppery one) and my usual organic unbleached all-purpose flour and came up with this delightful cloud of a cake.

Here are three of my other cakes made with olive oil, in case you'd like to try them: Olive Oil Apple Cake, Olive Oil Carrot Cake, Olive Oil Fig Cake. If you're in the mood for chiffon, try my Vanilla Chiffon Cupcakes; but do make them with a fruity extra virgin olive oil instead of the organic canola oil I used for chiffon cakes back then.

If you have a 7-inch (18 cm) angel food cake pan that is not nonstick, use it. I have this very useful multipurpose 3-inch deep 7-inch diameter round pan and turn it into a tube pan any time I need to with this Ateco Stainless Steel 2x3-Inches-High Round Form that turns any pan into a tube pan. Just center it in the pan and fill in the batter around it. 

Another thing I love about chiffon cakes is that, when you're making cakes with a filling or frosting that must be refrigerated, chiffon cake is fine straight out of the refrigerator; but butter cake needs to be brought to room temperature for the proper texture. 

The ThermoWorks Hi-Temp Silicone Tools

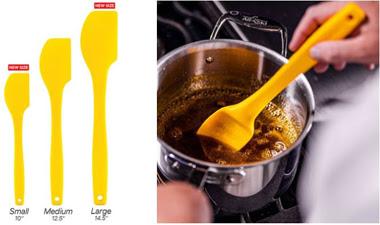
I've tried dozens of spatulas over the years (as you may know, I have a serious gadget habit), and thought I'd found the ultimate one 8 years ago. But when ThermoWorks came out with theirs I could see that its shape would likely solve the only problem I had with my old favorite. So I had to try it. And it did solve that problem. I have a new favorite and I don't see how it could be improved upon.  

With its rounded side, this spatula scrapes every last drop of batter from my mixing bowls as well. I got the small and the medium and use them both. If you're cooking for a large family or making big quantities of food for whatever reason, you might also want to get the large spatula. And I got the spoonula for making custards and puddings. They're all part of the ThermoWorks Hi-Temp (rated to 600F) Silicone Tools collection, as are the silicone hotpad/trivets you've seen here before. 

See the giveaway info below the recipe. Two winners will be selected!

Orange Chiffon Cake - and ThermoWorks Silicone Tools Giveaway / www.delightfulrepast.com

If you like it, please Pin it and share it!


Orange Chiffon Cake


(Makes one 7-inch/18 cm tube cake)

3 large eggs, separated while cold, then brought to room temperature (about 1 hour)
3/4 dip-and-sweep cup (3.75 ounces/106 grams) unbleached all-purpose flour
1/8 packed cup (0.5 ounce/14 grams) non-GMO cornstarch
3/4 cup (5.25 ounces/149 grams) sugar, divided
1 1/2 teaspoons baking powder
1/4 teaspoon salt
Finely grated zest of one large orange (about 1 tablespoon)
1/4 teaspoon cream of tartar
1/4 cup (2 fluid ounces/59 ml) extra virgin olive oil
1/4 cup (2 fluid ounces/59 ml) freshly squeezed orange juice
1 teaspoon vanilla extract

1 Separate the cold eggs, putting the whites into a 1.5- to 2-quart mixing bowl and the yolks into a small bowl. Cover and bring to room temperature, about 1 hour.

2 Once the separated eggs are at room temperature, preheat oven to 350F/180C/Gas4. Cut a 7-inch circle of baking parchment paper to fit in the bottom of the pan. Do not grease the pan. 

3 In 2.5- to 3-quart mixing bowl, whisk together flour, cornstarch, 1/2 cup (3.5 ounces/99 grams) of the sugar, baking powder, salt, and orange zest.

4 Add the cream of tartar to the room temperature egg whites in the 1.5- to 2-quart mixing bowl. Using hand mixer on medium speed, beat the egg whites and cream of tartar until nearly at soft peaks stage. On high speed, gradually beat in the remaining 1/4 cup (1.75 ounces/50 grams) sugar until egg whites are stiff enough to hold up in soft peaks but are still glossy and moist. Watching carefully, continue beating until whites just reach stiff peaks but are not dry; set aside.

5 Make a well in the center of the flour mixture and add the egg yolks, olive oil, orange juice, and vanilla extract. Whisk vigorously, or beat with hand mixer on medium speed, until smooth, about one minute.

6 With a silicone spatula*, gently fold the egg whites, a third at a time, into the batter just until blended.

* The ThermoWorks hi-temp silicone spatulas (small or medium—I used the small) are perfect for this. The shape does the best job of scraping the bowl clean. And they are an easy-to-clean one-piece design. 

7 Pour the batter into the prepared pan and gently smooth the top and run a skewer through the batter a few times to break up any large air bubbles. Bake for about 35 to 40 minutes, or until a wooden skewer inserted into the center of the cake comes out clean or cake springs back when pressed gently. Immediately turn the pan upside down over the neck of a wine bottle and leave it there for 30 to 45 minutes.

Orange Chiffon Cake (this photo, cooling a cake in a tube pan on a wine bottle) / www.delightfulrepast.com
Cooling a cake in a tube pan on a wine bottle really works!
Doing this keeps the chiffon cake from settling and losing its light texture.
(That's a ThermoWorks 7-inch Hi-Temp Silicone Hotpad/Trivet on top of the pan
and my favorite timer, ThermoWorks TimeStack, that times four things at once!)

8 To remove the cake from the pan, run a thin-bladed metal spatula around the tube and the inside of the pan. Invert onto serving platter and let cool completely. If you like, make a simple glaze of powdered sugar and orange juice to drizzle over the cake.


ThermoWorks Hi-Temp Silicone Tools Giveaway


This giveaway is open to readers in the US* who are 18 years of age or older. To enter, leave a comment below (one entry per person). Be sure to tell me what color you prefer. Please include your email address in the body of your comment. If your name is drawn and I have no way to contact you, you will be disqualified. Must enter by 11:59 p.m. Eastern time Tuesday November 22.

* If you are outside the US but would like to have this sent to someone you know in the US, go ahead and enter!

Two winners will be chosen by random drawing and be announced here in the comments before noon Eastern time on Thursday November 24. If I don't hear back from the winners of the random drawing by noon Eastern time Saturday November 26, new winner(s) will be selected from the original entrants (those who commented before the giveaway deadline).

Disclosure: ThermoWorks provided the spatulas and spoonula for review purposes and two sets for the giveaway. The views expressed here are entirely my own. I always tell my readers what I really think!

Disclosure: We are a participant in the Amazon Services LLC Associates Program, an affiliate advertising program designed to provide a means for us to earn fees by linking to Amazon .com and affiliated sites. We are a ThermoWorks affiliate, earning a small commission at no cost to you on purchases made through our links. This helps cover some of the costs of running the blog. Thank you for your support.

Jean

If you liked this post, please Pin it and share it!

30 June 2022

Apricot Upside-Down Cake

Apricot Upside-Down Cake / www.delightfulrepast.com

Apricot upside-down cake, especially this one made with almond meal (also called almond flour or, in the UK, ground almonds) and just a dash of almond extract, is the perfect midsummer dessert. If you don't eat almonds, simply replace the almond meal with an equal measure of flour and leave out the almond extract. 

Apricots and almonds have an affinity for each other, so unless you're allergic to almonds I hope you'll try it. Just don't increase the amount of almond extract as it can be quite overpowering. As you know, I appreciate subtlety rather than being slapped in the face by heavy-handed flavors. 

As I poured the batter into the pan, I was regretting putting "plus 2 tablespoons milk," thinking the cake was going to be too light to support the apricots. I needn't have worried. The cake didn't collapse even a smidge when I turned it upside down and lifted the pan away. 

Summer fruit is just about the only thing I like about summer! How about you? I hope you're having a super summer!


Apricot Upside-Down Cake / www.delightfulrepast.com

If you like it, please Pin it and share it!

Apricot Upside-Down Cake 


(Makes one 8-inch/20 cm cake, 8 servings) 

3 tablespoons (1.5 ounces/43 grams) unsalted butter, melted
6 packed tablespoons (2.625 ounces/74 grams) dark brown sugar
10 smallish apricots, halved and pitted
3/4 dip-and-sweep cup (3.75 ounces/106 grams) unbleached all-purpose flour
1/3 packed cup (1.75 ounces/51 grams) almond meal or finely ground almonds
2/3 cup (4.67 ounces/132 grams) sugar
2 teaspoons non-GMO baking powder
1/2 teaspoon salt
1/4 teaspoon mace or 1/8 teaspoon nutmeg
5 tablespoons (2.5 ounces/71 grams) unsalted butter, room temperature
1/2 cup plus 2 tablespoons (5 fluid ounces/148 ml) milk, room temperature
1 teaspoon vanilla extract
1/4 teaspoon almond extract
1 large egg, room temperature 


Note: For a gluten-free cake, replace 3/4 cup flour with 1/4 cup sorghum flour, 1/4 cup potato starch, 1/4 cup tapioca flour and 1/2 teaspoon xanthan gum. 

1 Halve and pit the apricots. Preheat oven to 350F/180C/Gas4. Spray the sides and bottom of a 2-inch deep 8-inch round cake pan with vegetable spray, line bottom with a round of parchment paper, and pour the melted butter in the pan. Add the brown sugar to the butter and blend. Starting at outer edge, arrange apricots, cut side down, in single layer in bottom of pan and press lightly to make them stick; set aside.

2 In large mixing bowl, combine flour, almond meal, sugar, baking powder, salt, and mace; mix on low speed for 1 minute to "sift.". Add the softened butter; mix on low speed for 1 minute. Add milk and extracts; mix on low speed for 1 minute. Add the egg; mix 1 1/2 minutes longer. 

3 Spread the batter carefully over the apricots with a rubber spatula. Bake for about 35 to 40 minutes. Remove from oven, let stand for just 3 minutes, loosen edges with knife and invert onto a platter. Carefully peel off parchment paper. Let cool about 45 minutes, or up to several hours, before serving slightly warm or at room temperature. Serve with vanilla ice cream or lightly sweetened whipped cream.

Disclosure: We are a participant in the Amazon Services LLC Associates Program, an affiliate advertising program designed to provide a means for us to earn fees by linking to Amazon .com and affiliated sites. We are a ThermoWorks affiliate, earning a small commission at no cost to you on purchases made through our links. This helps cover some of the costs of running the blog. Thank you for your support.

Jean

If you liked this post, please Pin it and share it!