19 October 2023

Perfect Pumpkin Pie - ThermoWorks Giveaway

Perfect Pumpkin Pie - ThermoWorks Giveaway / www.delightfulrepast.com

With the autumn baking season upon us, it's time for the annual quest for the perfect pumpkin pie
and to take stock of our kitchen tools to make sure we have what we need in the months ahead. 

The Pie

I've posted Pumpkin Pie before, including ones made with canned evaporated milk, but I can't buy organic evaporated milk just anywhere, so I developed a recipe I can make with readily available organic milk and cream. 

When I make pumpkin pie for just us, I use just 1/4 cup of sugar. I know, I know, it sounds extreme; but we love it. However, knowing other people might not, I would use 2/3 cup when making the pie for guests. But lately I've tried out a 1/2-cup version on some of them and they've loved it, so this recipe says "1/2 cup (3.5 ounces/99 grams) sugar." I hope you'll try it!

I've posted lots of different pie crusts, including gluten-free pie crust, made with different techniques. This is my favorite recipe using a food processor. If you don't have a food processor, you can easily adapt it to making it by hand. Food-processor all-butter pastry has a tendency to be difficult to cut with a fork, but I've included some significant changes/additions I've made to make the crust fork-tender. It's foolproof; you can't mess this up!

You just need one crust for a pumpkin pie, of course; but never waste time making just one crust. Always make the double-crust recipe and store one in the refrigerator for a few days or in the freezer for a couple months. It's very satisfying seeing a little stack of dough disks in the freezer ready for future pies! 
I've also posted various methods over the years to help you avoid the dreaded "soggy bottom," including fully prebaking the pie shell or using a pie tin on a pizza stone; but I wanted to find a way to have a lovely crisp, golden, un-soggy bottom using my all-time favorite pie plate, the classic 9-inch Pyrex glass pie plate. If you've had any of these challenges, I hope you'll find something here that works for you.

The Giveaway

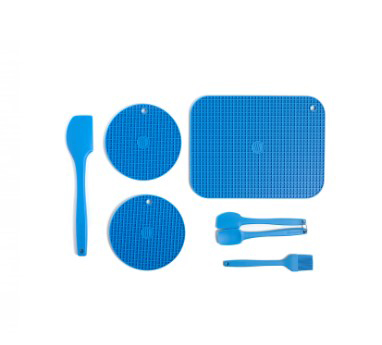
And, just in time for your fall baking, a giveaway from ThermoWorks of some of my favorite, tried-and-true, in-constant-use items! The Hi-Temp Silicone Kitchen Kit (in your choice of 10 colors): One Medium Silicone Spatula (12.5"), One Mini Silicone Spatula & Spoonula set, Two 7" Round Silicone Trivets, One Large 9" x 12" Trivet, and One Small Silicone Brush. And drumroll please, my favorite kitchen timer: the TimeStack quadruple timer (in your choice of 10 colors) that shows you all four displays and alarms at once. You can even record your own voice for each alarm.

The hotpad/trivets are amazing! I've tried all kinds, and these are the best. Super sturdy, yet flexible, and very grippy, they are my favorite hotpads. As trivets when cooking, baking, or serving a meal buffet- or family-style, they protect your tabletop or countertop from hot dishes and pans, round or rectangular. And hot pans and casseroles won't slide off these trivets.

Perfect Pumpkin Pie - ThermoWorks Giveaway (Hi-Temp Silicone Kitchen Kit) / www.delightfulrepast.com

And the TimeStack—
Why do I need a four-channel timer in my home kitchen? Because we use a timer for everything: brewing tea several times a day, checking the rising bread dough, baking, getting the laundry out of the dryer, watering the fruit trees for a certain length of time. We even use a timer as an alarm clock on those rare occasions when we need one. You'll wonder how you ever lived without it! 
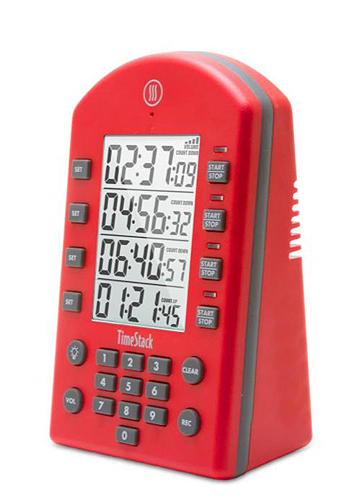
Perfect Pumpkin Pie - ThermoWorks Giveaway (TimeStack) / www.delightfulrepast.com

These items make wonderful gifts as well. You'll find the giveaway rules below the recipe. And do leave a comment, even if you're not entering the giveaway. I love your comments! Happy Autumn! 


Perfect Pumpkin Pie - ThermoWorks Giveaway / www.delightfulrepast.com


Pumpkin Pie


(Makes one 9-inch pie, 8 servings)


The Pastry - Food Processor Method

(for two single-crust pies or one double-crust pie)
 
2 1/4 dip-and-sweep cups (11.25 ounces/319 grams) unbleached all-purpose flour
1/4 dip-and-sweep cup (1.06 ounce/30 grams) tapioca flour
1 tablespoon sugar
1 teaspoon salt
2 sticks (8 ounces/227 grams) unsalted butter, cut into 1/4-inch slices
1 large egg, lightly beaten
4 tablespoons (2 fluid ounces/59 ml) ice water
1 tablespoon apple cider vinegar


The Filling

 
1/2 cup (3.5 ounces/99 grams) sugar
2 tablespoons non-GMO cornstarch
1/4 teaspoon salt
1 teaspoon cinnamon
1/2 teaspoon ginger
1/4 teaspoon allspice
1/8 teaspoon nutmeg
1/8 teaspoon ground cloves
3 large eggs
1 15-ounce (425 grams) can pumpkin (not pumpkin pie filling) or 1 3/4 cups pumpkin puree
3/4 cup (6 fluid ounces/177 ml) milk
1/2 cup (4 fluid ounces/118
 ml) heavy cream


1 Weigh/measure flour, sugar, and salt in 2- to 2.5-quart mixing bowl. Whisk vigorously for about 30 seconds to "sift." With food processor's metal blade in place, scoop out half (1 1/4 cups) the flour mixture into the work bowl of the food processor. Spread the butter slices evenly over the fairly even flour mixture. Pulse until no dry flour remains and mixture is starting to form clumps of dough, about 25 to 30 one-second pulses. Don't get hung up on counting the number of pulses, just watch for the clumping to begin. With a silicone spatula, spread dough evenly around the work bowl. Sprinkle with the remaining flour and pulse until the dough is just barely broken up, about 5 1-second pulses.

2 Transfer the dough back to the 2- to 2.5-quart mixing bowl. If the kitchen very warm, cover and refrigerate the dough for 10 minutes or so before proceeding. Sprinkle the dough with the egg-water-vinegar mixture and use the spatula to fold and press the dough until it comes together into a ball.

3 Turn the dough out, dividing onto two pieces of plastic wrap and flatten each slightly into a 4- to 5-inch round disk. Wrap and refrigerate for at least 2 hours or up to 3 days. You can even freeze the dough, wrapped well, for up to a month. To defrost the dough, move it from freezer to refrigerator for one day before using it. Let thoroughly chilled dough stand at room temperature for 10 to 15 minutes for easier rolling.

4 In medium bowl (using a 2-quart glass measure makes it easy to pour the filling into the crust), whisk together sugar, cornstarch, salt and spices. Whisk in the eggs, then the pumpkin and then the milk and cream. Refrigerate filling until ready to fill the pie shell, up to a full day.  

5 For single-crust pie: On lightly floured surface with lightly floured rolling pin, roll out the dough to 13 inches in diameter and 1/8 inch or so thick. Transfer the dough to the pie plate, pressing the dough (but not stretching it) to fit the pie plate, getting down into the corners, with a half- to one-inch overhang (trim with knife or scissors). Cover with the reserved piece of plastic wrap and chill for 10 minutes before fluting the edge. Cover and return to refrigerator while the oven heats up.

6 Put the oven rack in the lowest position. Preheat the oven to 450F/230C/Gas8. Pour the filling into the chilled unbaked shell and place it on a parchment-lined baking sheet to catch any butter drips. As soon as you put the pie in the oven, reduce temperature to 425F/220C/Gas7. Bake for 20 minutes. Reduce heat to 350F/180C/Gas4. Bake for about 40 to 45 minutes (after about 15 minutes, I put on a pie crust shield to ensure that the crimped edge doesn't burn), or until knife inserted midway between edge and center comes out clean or until it registers 185F/85C on an instant-read thermometer.

Note: After you've made pumpkin pie a few times, you can tell just by looking whether or not it's done. It will look darker and shinier and will have puffed up a bit and then fallen, and it should be fairly firm but still have a little jiggle left in the center (unless, of course, you're making it for Mr Delightful who wants his pie very firm, no jiggle!).

7 Cool on wire rack for 2 hours, then lay a square of wax paper over the top and refrigerate for at least 3 hours. Serve with softly whipped cream. I sweetened and flavored 1 cup of heavy whipping cream with 4 teaspoons of real maple syrup and 1 teaspoon of vanilla extract. And I sometimes garnish with a sprinkling of cinnamon sugar.

Note: Leftovers can be stored in the refrigerator for up to 3 or 4 days. As if!


Perfect Pumpkin Pie - ThermoWorks Giveaway / www.delightfulrepast.com
My pumpkin pies often crack because I overbake them to
suit Mr Delightful's preference for a very firm custard.


ThermoWorks TimeStack and Kitchen Kit Giveaway


This giveaway is open to readers in the US* who are 18 years of age or older. To enter, leave a comment below (one entry per person). Be sure to tell me what color you prefer. Please include your email address in the body of your comment. If your name is drawn and I have no way to contact you, you will be disqualified. Must enter by 11:59 p.m. Eastern time Tuesday October 31.

* If you are outside the US but would like to have this sent to someone you know in the US, go ahead and enter!

The winner will be chosen by random drawing and be announced here in the comments before noon Eastern time on Thursday November 9. If I don't hear back from the winner of the random drawing by noon Eastern time Friday November 3, a new winner will be selected from the original entrants (those who commented before the giveaway deadline).

Disclosure: ThermoWorks provided the timer and kitchen kit for review purposes and for the giveaway. The views expressed here are entirely my own. I always tell my readers what I really think!

Jean

If you liked this post, please Pin it and share it!

14 September 2023

Sesame Noodle Salad

Sesame Noodle Salad / www.delightfulrepast.com

Sesame Noodle Salad is the perfect dish for end-of-summer picnics and potlucks since it is good at any temperature. If it's fresh out of the refrigerator, I figure it is good—from a food safety standpoint—for three hours at room temperature. Get out your big bowl for this recipe; it makes a lot!

If you're taking a lunch to work, this is perfect. Just divvy it up into glass storage containers of whatever size matches your appetite, and you're all set for the next four days.

I love mung bean sprouts but left them out of the recipe because they are not always readily available. And to go main-dish with this salad, it is wonderful with slices of chicken breast. 

For years I've seen similar salads called "Asian" noodle salad. I avoid that since I like to be very specific, down to not just a country but often a region of a country or even a city, if possible. With Chinese soy sauce, Japanese toasted sesame oil, and Italian spaghetti, I thought I'd better just call it Sesame Noodle Salad!
 

Sesame Noodle Salad / www.delightfulrepast.com

If you like it, please Pin it and share it!
 

Sesame Noodle Salad

(Makes 12 to 16 servings)

The Dressing

(Makes 1 1/2 cups—you'll have extra)

1/2 cup (4 fluid ounces/118 ml) extra virgin olive oil
1/2 cup (4 fluid ounces/118 ml) low sodium soy sauce
1/4 cup (2 fluid ounces/59 ml) fresh lime or lemon juice
1/4 cup (2 fluid ounces/59 ml) red wine vinegar 
1 tablespoon toasted sesame oil
1 tablespoon honey
1 teaspoon freshly grated ginger
1 teaspoon crushed red pepper flakes (more or less, depending your heat tolerance)

The Salad


8 ounces (227 grams) whole grain spaghetti (I like Barilla)
1 12-ounce (340 grams) package Broccoli Slaw (mostly shredded broccoli)
1/2 10-ounce package (5 ounces/142 grams) shredded carrots
1/2 large English cucumber (to make 5 ounces/142 grams julienned)
1 medium red bell pepper (to make 5 ounces/142 grams julienned)
1 cup (5 ounces/142 grams) lightly salted dry roasted peanuts, coarsely chopped
1 1/2 tablespoons sesame seeds, toasted
A handful of chopped cilantro leaves
Optional: 3 green onions (scallions), green part only, thinly sliced


1 In a 2-cup glass measure, whisk together the dressing ingredients and set aside to "meld" while you make the salad. You might even make it the day before.

2 In a 3-quart saucepan, bring 6 1/2 cups of water with 3/4 teaspoon of salt to a rapid boil. Add the spaghetti and cook a minute past package's "al dente" instructions. I cooked the Barilla whole grain spaghetti for 8 minutes. Drain, rinse with cold tap water, drain thoroughly, and put it in a 4-quart mixing bowl. Stir in 1/4 cup of the dressing.

Note: If it's still available when you're reading this, there is a fabulous deal on the lidded bowl and glass measuring cup sold together!

3 I know the packages of various prepped salad things say things like "thoroughly washed," "ready to use," "triple washed." But I'm a little too fussy to take their word for it. AND giving them a wash and spin hydrates and freshens them up for your salad. So do that to the broccoli slaw and shredded carrots, or not—I won't judge—and add them to the mixing bowl along with another 1/4 cup of the dressing and toss to combine. 

4 Add the remaining ingredients and more dressing, reserving at least 1/4 cup that might be needed at serving time (the pasta absorbs a lot, and you don't want a dry salad). Cover and refrigerate for 6 to 12 hours. Any leftover dressing will not go to waste; it's delicious on any salad. 

Disclosure: We are a participant in the Amazon Services LLC Associates Program, an affiliate advertising program designed to provide a means for us to earn fees at no cost to you by linking to Amazon .com and affiliated sites. This helps cover some of the costs of running the blog. Thank you for your support. 

Jean

If you liked this post, please Pin it and share it!

10 August 2023

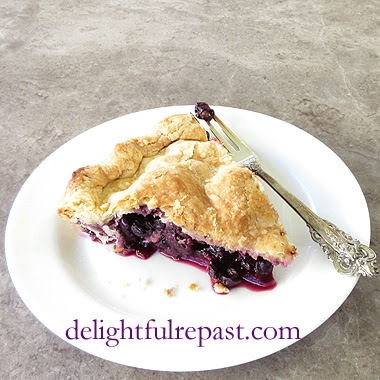
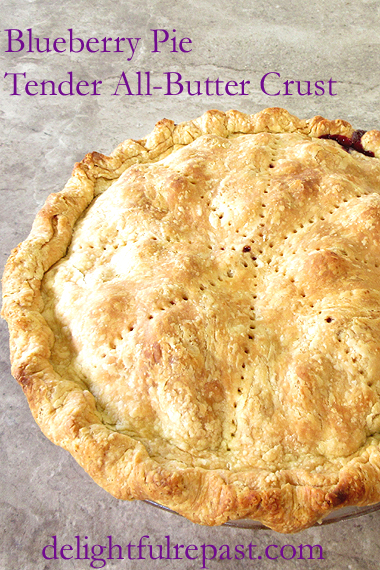
Blueberry Pie - Foolproof All-Butter Pastry (Final Version)

Blueberry Pie - Foolproof All-Butter Pastry / www.delightfulrepast.com

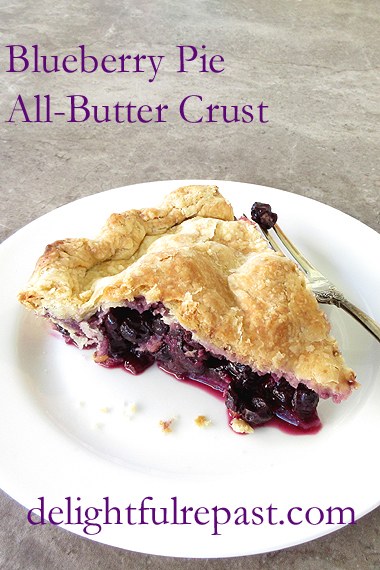
Blueberry Pie hit the menu this week when I found 18-ounce containers of organic blueberries for $2.50! If I had more available freezer space I would have bought a dozen, but I settled for four, enough for two pies and a double batch of
Homemade Blueberry Syrup/Sauce.

The two goals for blueberry pie are: 1. a tender, flaky all-butter crust, baked to golden brown perfection with no soggy bottom; and 2. a filling that sets perfectly, neither soupy nor gloopy. I still remember the first blueberry pie I ever ate. The filling was so gloopy it put me off blueberry pie for years.

Eventually I decided to bake one myself and, of course, erred on the side of soupy in order to avoid gloopy. Eventually I worked it out and achieved the balance I was looking for.


Blueberry Pie - Foolproof All-Butter Pie Crust / www.delightfulrepast.com


In April I posted Ham and Mushroom Quiche - Foolproof All-Butter Pastry Tutorial. That pastry is wonderful, but I just couldn't resist making further refinements to it, so below you will find the final (I promise!) version. I hope you'll make this pie before summer is over.

First make my Foolproof All-Butter Pastry - Final Version (below), roll out the two crusts, and pop them in the fridge. Then make the Fresh Blueberry Pie Filling and put it all together. Long baking and long cooling are crucial. If you don't get those juices bubbling in the oven, you're sunk. And don't even think about cutting it until it has cooled for at least 4 hours.

Are you a blueberry pie fan? I shared the pie with neighbors who had theirs with a scoop of vanilla ice cream. We had ours without. Which do you prefer?
 

Blueberry Pie - Foolproof All-Butter Pastry / www.delightfulrepast.com

Foolproof All-Butter Pastry

(makes one double-crust pie or two pie shells)

2 1/4 dip-and-sweep cups (11.25 ounces/319 grams) unbleached all-purpose flour 
1/4 dip-and-sweep cup (1.06 ounce/30 grams) tapioca flour
1 tablespoon sugar
1 to 1 1/4 teaspoon salt
2 sticks (8 ounces/227 grams) unsalted butter, cut into 1/4-inch slices
1 large egg, lightly beaten
4 tablespoons (2 fluid ounces/59 ml) ice water
1 tablespoon apple cider vinegar

Blueberry Pie Filling


6 cups (30 ounces/850 grams) fresh blueberries, stemmed and washed
2/3 cup (4.67 ounces/132 grams) sugar
1/4 dip-and-sweep cup (1.06 ounce/30 grams) tapioca flour
1/8 dip-and-sweep cup (0.625 ounce/18 grams) unbleached all-purpose flour
1/8 teaspoon salt
1/8 teaspoon allspice
1/8 teaspoon cinnamon
1/8 teaspoon nutmeg
1 teaspoon freshly grated lemon zest
1 to 2 tablespoons freshly squeezed lemon juice
1 tablespoon unsalted butter

1 Weigh/measure flour, sugar, and salt into a 2- to 2.5-quart mixing bowl. Whisk vigorously for about 30 seconds to "sift." With food processor's metal blade in place, scoop out half (1 1/4 cups) the flour mixture into the work bowl of the food processor. Spread the butter slices evenly over the fairly even flour mixture. Pulse until no dry flour remains and mixture is starting to form clumps of dough, about 25 to 30 one-second pulses. Don't get hung up on counting the number of pulses, just watch for the clumping to begin. With a silicone spatula, spread dough evenly around the work bowl. Sprinkle with the remaining flour and pulse until the dough is just barely broken up, about 5 1-second pulses.

2 Transfer the dough back to the 2- to 2.5-quart mixing bowl. If the kitchen is very warm, cover and refrigerate the dough for 10 minutes or so before proceeding. Sprinkle the dough with the egg-water-vinegar mixture and use the spatula to fold and press the dough until it comes together into a ball.

3 Turn the dough out, dividing onto two pieces of plastic wrap and flatten each slightly into a 4- to 5-inch round disk. Wrap and refrigerate for at least 1 to 2 hours or up to 3 days. You can even freeze the dough, wrapped well, for up to a month. To defrost the dough, move it from freezer to refrigerator for one day before using it. Let thoroughly chilled dough stand at room temperature for 10 to 15 minutes for easier rolling.

4 For double-crust pie: On lightly floured surface with lightly floured rolling pin, roll out the bottom crust dough to 13 inches in diameter and 1/8 inch or so thick. Transfer the dough to a 9-inch glass pie plate, pressing the dough (but not stretching it) to fit the pie plate with a half- to one-inch overhang (trim with knife or scissors). Cover with the reserved piece of plastic wrap and refrigerate. Roll out top crust dough to 11 inches in diameter and 1/8 inch or so thick and place it on a rimless baking sheet; cover with reserved plastic wrap and refrigerate. Make pie filling. Then assemble pie and bake as directed. 

For single-crust pie: On lightly floured surface with lightly floured rolling pin, roll out the dough to 13 inches in diameter and 1/8 inch or so thick. Transfer the dough to a 9-inch glass pie plate, pressing the dough (but not stretching it) to fit the pie plate, getting down into the corners, with a half- to one-inch overhang (trim with knife or scissors, and save in case you need to patch a little hole after the blind baking). Cover with the reserved piece of plastic wrap and chill for 10 minutes before fluting the edge. Cover and return to refrigerator while the oven heats up. Preheat oven to 375F/190C/Gas5. Line chilled pie shell with a square of foil and fill with pie weights (baking beans, in UK). I use two boxes of ceramic pie weights that store neatly in a 200-gram Twinings tea tin. Bake for 25 minutes. Remove pie weights. Prick the pastry bottom all over with a fork. Bake for another 15 minutes until golden brown. 

5 Pick over the blueberries, discarding any bad ones and removing any stems. Wash and drain well. Weigh or measure them into a 2-quart glass measure. In a small bowl, whisk together the sugar, tapioca flour, unbleached flour, salt, and spices. Gently stir the sugar mixture into the blueberries, along with the lemon zest and juice.  

6 Pour the filling into the pastry-lined pie plate, dot with little pieces of butter, and put top crust in place; trim with knife or scissors to make a half- to one-inch overhang. Seal and crimp the edge. Prick top with a fork, marking eight wedges, to vent; or cut vents with a knife. Place on lined baking sheet to catch any drips from the pie. Pop the pie in the freezer for 15 minutes while preheating the oven.

7 Move your oven racks so that you can place your pie on the lowest or second lowest. Preheat oven to 425F/220C/Gas7.

Note: I didn't do it this time, but sometimes I brush the top with a little cream or beaten egg yolk and maybe sprinkle on a little sugar or cinnamon-sugar for sparkle. 

Bake for 25 minutes, then put on a pie crust shield. Lower temperature to 350F/180C/Gas4 and bake for an additional 50 to 60 minutes, when the filling should be bubbling and thickened and the crust golden brown. Cool on wire rack for at least 4 hours before serving; the pie needs that time to solidify so that all the juices don't run out when the pie is cut.

Note: To warm individual slices of pie, preheat oven to 350F/180C/Gas4. Place on a rimmed baking sheet lined with parchment and bake for about 10 minutes.

Disclosure: We are a participant in the Amazon Services LLC Associates Program, an affiliate advertising program designed to provide a means for us to earn fees at no cost to you by linking to Amazon .com and affiliated sites. This helps cover some of the costs of running the blog. Thank you for your support. 

Jean

If you liked this post, please Pin it and share it!
13 July 2023

Pullman Loaf - Pain de Mie

Pullman Loaf - Pain de Mie / www.delightfulrepast.com

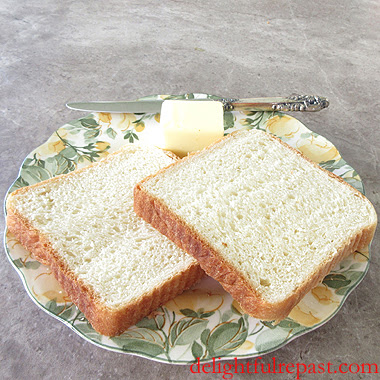
A pullman loaf, or pain de mie, can be used just as you would any other loaf of bread. But it has some other uses as well. If you're not familiar with it, it is a loaf baked in a straight-sided pan with a lid on top so that the loaf is perfectly rectangular and the slices perfectly square. It is the classic French sandwich bread, soft and fluffy yet, with its tight crumb, quite sturdy. 

It's for those who like uniformly shaped sandwiches or cutting tea sandwiches into squares, triangles, or rectangles with a great deal less waste. The first thing I used a pullman loaf for years ago was pinwheel tea sandwiches (slice the loaf horizontally, spread on the filling, roll up, wrap, chill, slice into pinwheel sandwiches).

I lost the lid to my pullman pan years ago, but I've come up with a way to "make-do," which you'll find in step 5 of the directions below. It came in handy when I got on that Pain Perdu - French Toast kick recently and another search for the lid came up empty. It's my very favorite bread for French toast ...

and for grilled sandwiches, for two reasons: 1. the taste and texture of the bread, and 2. because four of them fit perfectly on my square griddle!

Of course, you could just make my recipe and bake it in a regular 9x5 loaf tin and enjoy the delicious bread with a crowned top! Tell me your thoughts on Pain de Mie.
  

Pain de Mie - Pullman Loaf / www.delightfulrepast.com


Pullman Loaf - Pain de Mie

(Makes one 9x4x4-inch/1.5-pound/680 grams loaf)

3 1/2 dip-and-sweep cups (17.5 ounces/496 grams) unbleached all-purpose flour
2 tablespoons (25 grams) sugar
2 teaspoons (7 grams) instant yeast
1 1/2 teaspoons (9 grams) salt
1 cup (8 fluid ounces/237 ml or grams) water or half each milk and water
2 tablespoons (1 ounce/28 grams) unsalted butter
1 large egg 


1 In a 2.5- to 3-quart mixing bowl, measure or weigh the flour. Take out 1/8 cup and set aside for kneading and shaping. Whisk in the sugar, yeast and salt. 

2 In a 1-cup glass measure, measure the water, or water and milk; heat in the microwave until hot but not boiling. Stir in the butter until it is melted. Check that the temperature of the mixture is very warm (120 to 130F/49 to 54C), but not over 130F/54C.

3 Make a well in the center of the flour, then add warm liquid and egg to the well. With dough whisk or large spoon, slowly stir until combined. Knead gently in the bowl with one hand until the dough comes together.

4 Scrape dough onto very lightly floured (from that reserved 1/8 cup) work surface and knead gently for about 10 minutes, using some more of the reserved flour as needed, until smooth and bouncy. Place it in a lightly oiled (I use 1/2 teaspoon extra virgin olive oil) 2-quart glass measure (makes it easy to tell when dough has doubled) and cover; let rise for 60 to 90 minutes, until doubled in size.

5 Grease well a 9x4x4-inch pullman pan and lid* with solid shortening (I use 2 teaspoons of Crisco).
 
* I lost the lid to my pullman pan years ago, so I do this: Pull off a 12x8-inch piece of aluminum foil and shape it to the top of the loaf pan. Grease just the center part that will cover the top of the loaf pan. Then when it's time to put the lid on, I put that preshaped piece of greased-in-the-center foil over the top of the pan, place a 13x9x1-inch quarter sheet pan on top of the foil, then place a "heavy object" on the quarter sheet pan. I thought of a foil-covered brick, but it seemed too heavy and bulky. Next thought, my tortilla press, but it's too heavy for this task. Almost went with a couple of all-metal tools from the garage, but then I remembered my Cast Iron Heat Diffuser and found that it weighed about 1.5 pounds. Perfect!


Pullman Loaf - Pain de Mie - when you don't have a pullman pan / www.delightfulrepast.com
I actually use aluminum foil between the bread pan
and the quarter sheet pan, but it wasn't showing up
well in the photos so I used a piece of baking
parchment paper for the photos.

6 Turn risen dough out onto lightly floured surface, flattening gently to break up any large bubbles. Press into a 9-by-12-inch rectangle. Fold in short ends of dough until piece is about 6 inches long. Roll from one rough edge, pinch seam to seal and roll gently to form a tight log the length of pan.

Place seam-side down in prepared pan and press dough into pan so that it reaches sides, ends and corners. Cover with plastic wrap and let rise until about 1/2 to 1 inch from the top of the pan, about 60 minutes. At the 30-minute mark, preheat the oven to 375F/190C/Gas5 for at least 20 minutes. 

8 When the dough has risen to about 1/2 to 1 inch from the top, remove the plastic wrap and slide the greased lid, or place the lid substitute, onto the pan. Bake for 30 minutes. Remove the lid and bake for an additional 5 minutes, until golden brown, shrinking from the sides of the pan, and bottom of loaf sounds hollow if tapped. Remove immediately from pan and let cool on wire rack for at least 1 hour before slicing. Wrap well as soon as bread has cooled thoroughly. Store at room temperature.

Disclosure: We are a participant in the Amazon Services LLC Associates Program, an affiliate advertising program designed to provide a means for us to earn fees at no cost to you by linking to Amazon .com and affiliated sites. This helps cover some of the costs of running the blog. Thank you for your support. 

Jean

If you liked this post, please Pin it and share it!
22 June 2023

Maple-Walnut Snacking Cake

Maple-Walnut Snacking Cake / www.delightfulrepast.com


Maple-Walnut Snacking Cake was inspired by a cake found on the delicious blog The English Kitchen, where Marie made a recipe from The Small-Batch Snacking Cake Cookbook by Aimee Broussard. 

Looking at the ingredients list I could tell that the cake was far too sweet for my taste, and Marie described it as dense and sweet, like a brownie or blondie. If you have more of a sweet tooth than I, it might be just what you're looking for.

But I was in the mood for a cake that was light and less sweet, so decided to take the maple flavor inspiration and apply it to my Grandma's Little Yellow Cake that I call the "little black dress" of cakes because it can be "accessorized" lots of different ways to suit any occasion.


Maple-Walnut Snacking Cake / www.delightfulrepast.com


To me, "snacking cake" means a cake that is quick and easy; can be made by hand with no need for special equipment; is baked in, and often served from, the baking dish or tin; and calls for ingredients we generally have on hand.

My maple snacking cake has a subtle real maple flavor (don't try this with maple-flavored pancake syrup!) that I thought would be enhanced by a sprinkle of chopped walnuts over the icing (more of a glaze really). It was!

As my "regulars" know, I switched to blogging just once a month (second Thursday of every month). But since I already said I'll be posting a bread recipe next month, I decided to slip this post in this week as an "extra."

Need I tell you that a square of maple-walnut snacking cake goes beautifully with a cup of tea!


Maple-Walnut Snacking Cake / www.delightfulrepast.com


Maple-Walnut Snacking Cake 

(Makes one 8-inch/20-cm square layer, 9 servings)  

The Maple Cake 

1 tablespoon cider vinegar
Enough milk to make 1 cup (8 fluid ounces/237 ml)
1 1/4 dip-and-sweep cups (6.25 ounces/177 grams) unbleached all-purpose flour
1/4 dip-and-sweep cup (1.25 ounces/35 grams) non-GMO cornstarch
1/2 cup (3.5 ounces/99 grams) sugar
1 teaspoon baking powder
3/4 teaspoon baking soda
1/2 teaspoon salt
8 tablespoons (4 ounces/113 grams) unsalted butter, softened
2 large eggs, room temperature
1/4 cup (2 fluid ounces/59 ml) real maple syrup 
1 teaspoon vanilla extract

The Maple-Walnut Icing

1/3 packed cup (1.33 ounces/38 grams) powdered sugar
2 tablespoons (1 ounce/28 grams) unsalted butter, room temperature
2 tablespoons (1 fluid ounce/30 ml) real maple syrup
Small pinch* of salt
1/2 cup (2 ounces/57 grams) chopped walnuts, toasted or not 

* I actually have a "Pinch" measuring spoon. It holds 1/16 teaspoon. A "small" pinch is half that.


1
 Preheat oven to 350F/180C/Gas4. Grease well and lightly flour an 8x8x2-inch baking dish or tin. Measure vinegar into a 1-cup glass measure; add enough milk to make 1 cup. Stir and let stand about 5 minutes while you proceed.

2
 In mixing bowl, whisk together flour, cornstarch, sugar, baking powder, baking soda and salt. Cut in the butter as if making biscuits (I work it in with my impeccably clean fingers). Add soured milk, eggs, maple syrup, and vanilla. With electric mixer (or by hand with a large spoon, as I do), mix on low speed for 30 seconds to combine, then on medium speed for 1 minute. 

3
 Pour into prepared pan. Bake for about 40 minutes, or until golden and a toothpick inserted in the center comes out clean. 

4
 Cool in pan on wire rack for 10 minutes. Remove from pan and place on wire rack to cool. Grandma usually just served cakes like this directly from the pan, and that's what I did here. 

5 After the cake has been cooling for about 30 minutes, put the powdered sugar, soft butter, maple syrup, and salt in a 2- to 3-cup mixing bowl and whisk until smooth. Scrape onto top of the warm cake and spread to cover top only. Sprinkle chopped walnuts evenly over the top and lightly press them.
 Cool completely. Cut into 9 squares.
 

Disclosure: We are a participant in the Amazon Services LLC Associates Program, an affiliate advertising program designed to provide a means for us to earn fees at no cost to you by linking to Amazon .com and affiliated sites. This helps cover some of the costs of running the blog. Thank you for your support. 

Jean

If you liked this post, please Pin it and share it!