Showing posts with label watercolor. Show all posts

20 February 2026

Delightful Repast - 16th Blogiversary

Delightful Repast - 16th Blogiversary / www.delightfulrepast.com

Here I am, friends! It's been a while, but since I have not officially stopped blogging (just paused it), I am celebrating my 16th blogiversary this month!

Unfortunately, I haven't created a recipe for you and written about it and photographed it. Nevertheless, I thought it high time I wrote a little something.

As life takes its twists and turns, new things take over the calendar and the clock, and old interests fall lower and lower on one's to-do list. Food blogging and art are two of those interests.

Still not "feeling it" in the food department, I have been feeling the need to paint so started going through my supplies this week. Couldn't decide what to paint, then I remembered I've been wanting to send a thank-you card to someone. Since the person likes wildflowers and rustic flowers, I decided to do a little sunflower.

And I wanted to start small. It's been sooo long, I wasn't at all sure how it would go. So a tiny painting, 3.5x5 inches for a card, was a sensible choice. Several attempts wouldn't waste all that much of my expensive watercolor paper. As it happened, I felt kind of okay about the first effort and so stopped there. No paper wasted! 


Now, if I can just paint a little every few days, I'll be happy. No point in my setting the unrealistic goal of a "daily practice," which would be ideal.

Even though I didn't meet my goal of doing a food post for my 16th blogiversary, I hope you'll take a look at the Recipes index page and perhaps find something delicious among the hundreds of recipes.

Still on hiatus,
Do say Hello in the comments,
Jean  

31 March 2022

Baba Ghanoush with Oven-Toasted Pita Wedges

Baba Ghanoush with Oven-Toasted Pita Wedges / www.delightfulrepast.com

Baba Ghanoush, my second favorite Middle Eastern food (after hummus) is another one of those things my texturally challenged husband won't even try. He's just not a dip/spread kinda guy. But since most people are, you should have some of this on hand over the weekend. Make a big batch, serve some tonight and the rest over the weekend. It keeps nicely for a few days.

As with the hummus, don't get too carried away with the garlic. Remember the garlic is just a minor player, the eggplant is the star. You'll have plenty of time to make the oven-toasted pita wedges (see below) while the baba ghanoush is chilling. Tell me, do you or someone you know have these texture issues, or is Mr Delightful the only person on the planet who doesn't like dips of any kind?

If you'd like to make your own pita bread for the Oven-Toasted Pita Wedges (below), it's really quite easy. I hope you'll try it soon. (And, yes, I do know that 'pita' means bread and that saying 'pita bread' is really saying 'bread bread'!)


Baba Ghanoush with Oven-Toasted Pita Wedges (watercolor by me) / www.delightfulrepast.com)

If you like this post, please Pin it and share it!

I have to admit, baba ghanoush is not the most photogenic food in the world and needs some serious styling, which I didn't have time to do, so I used my watercolor eggplant painting for the "Pinnable-size" image in this post!

Baba Ghanoush - Caviar d'Aubergine

(Makes 2 cups)

2 medium (1 1/2 to 2 pounds total) eggplants
2 tablespoons fresh lemon juice
1/4 teaspoon (1/2 small clove) minced garlic
1/4 cup unsalted tahini
1/2 teaspoon salt
1/4 teaspoon pepper
1/8 teaspoon cumin
1 tablespoon extra-virgin olive oil

1 Preheat oven to 450F/230C/Gas8. Cut eggplants in half, score tops with diamond pattern, rub with just enough oil to coat. Place on foil-lined baking sheet and roast about 30 minutes or until very soft. Cool slightly. Scoop out flesh into colander and let stand a few minutes to drain off any liquid.

2
 In bowl of food processor, place drained eggplant and all remaining ingredients. Pulse 8 to 12 times. Put into serving dish and cover with plastic wrap directly on the surface. Refrigerate for at least four hours before serving. Can be made a day or two ahead.

3
 Garnish with a drizzle of olive oil and some finely chopped mint, flat-leaf parsley or pistachios. (I didn't have any of those on hand, so I just used some paprika.) Serve with oven-toasted whole wheat pita wedges (see below), sliced baguette or Armenian cracker bread (I love ak-mak!) and raw vegetable strips.

Oven-Toasted Pita Wedges

(Makes 48 wedges)

Preheat oven to 375F/190C/Gas5. Brush a little extra-virgin olive oil on both sides of 6 whole wheat pitas (one package). Cut each into 8 wedges. Place on two large baking sheets. Sprinkle with a little salt, if you like. Bake for 6 to 10 minutes or until crisp; no need to turn. Can be made day ahead, cooled completely and stored in airtight container.

And here's my favorite kitchen timer, the TimeStack, 'cause if you're like me and have a lot going on at one time, you need more than one or two timers!

Disclosure: We are a participant in the Amazon Services LLC Associates Program, an affiliate advertising program designed to provide a means for us to earn fees by linking to Amazon .com and affiliated sites. We are a ThermoWorks affiliate, earning a small commission at no cost to you on purchases made through our links. This helps cover some of the costs of running the blog. Thank you for your support. 

Jean

If you liked this post, please Pin it and share it!

16 September 2021

Oven-Dried Figs

Oven-Dried Figs - How to Dry Fruit in Your Conventional Oven / www.delightfulrepast.com

Fresh figs are a favorite of mine, but not all of my friends share that opinion. Yesterday a friend brought me a huge bowl of fresh figs and hinted broadly about what I might do with them, saying another friend of ours only likes figs in fig newtons (fig rolls in UK).

I have several projects going this week and have no time for extra baking, and I always make my Fig Rolls - Fig Newtons with dried figs. So I thought I'd just dry these figs for a future baking day.


Oven-Dried Figs - How to Dry Fruit in Your Conventional Oven (this photo, Fig Rolls - Fig Newtons) / www.delightfulrepast.com


I've never had a dehydrator, and have turned down one or two that have been offered to me, since I wouldn't use it often enough. It would just be taking up space 364 days a year. My toaster oven does convection, which would be great for this, and I could probably do two quarter sheet pans in it, but I don't have wire racks for that size pan.

So here's how I did it in the regular oven. At a "cool oven" temperature of 200F/95C/Gas1/8. No special equipment. Just a half sheet pan and a wire cooling rack.


Oven-Dried Figs - How to Dry Fruit in Your Conventional Oven / www.delightfulrepast.com


You can find all sorts of methods for doing this, everything from quickly at higher temperatures to 36 hours at extremely low temperatures. The former made no sense to me, and the latter seemed unnecessarily slow and would tie up my oven for far too long. Some recommend propping the oven door open a bit to let out moisture. No, I wasn't going to be doing that.

The reason I chose to store the dried figs in half-pint jars (tightly packed) is because that is the amount needed for a batch of Fig Rolls - Fig Newtons, which I'll be making in a couple weeks for a small autumn tea party in the gazebo. Might use the other jar for a batch of Homemade Granola. 


Oven-Dried Figs - How to Dry Fruit in Your Conventional Oven / www.delightfulrepast.com

If you like it, please Pin it and share it! 

Oven-Dried Figs


(Makes 2 half-pint jars with a bit leftover)

Up to about 2 3/4 pounds fresh figs (however many will fit, halved, on the rack)

1 Preheat oven to 200F/95C/Gas1/8.

2 Line an 18x13x1-inch half sheet pan with baking parchment paper, then set a wire cooling rack on top of the paper.

3 Wash and dry the figs. Cut off the top stem and trim away any bad spots. Cut in half lengthwise.

4 Place the halves cut side up on the wire rack.

5 Bake in the center of the oven for about 6 hours. This will vary, depending on the size and juiciness of the figs and the peculiarities of your oven. Check at 5 hours, then maybe every 20 minutes after that until they are done. The figs are done when they are quite dry, but not hard, and still a bit sticky to the touch in the center.

6 Cool completely and put in canning jar(s). Refrigerate for short-term storage or freeze for up to several months. I chose half-pint jars because they held, tightly packed, the amount (5 ounces) needed for a batch of fig rolls.


Oven-Dried Figs - How to Dry Fruit in Your Conventional Oven (this image, my original watercolor of a fig) / www.delightfulrepast.com


Disclosure: We are a participant in the Amazon Services LLC Associates Program, an affiliate advertising program designed to provide a means for us to earn fees by linking to Amazon .com and affiliated sites. We are a ThermoWorks affiliate, earning a small commission at no cost to you on purchases made through our links. This helps cover some of the costs of running the blog. Thank you for your support.

Jean


If you liked this post, please Pin it and share it!

05 August 2021

Summer Peach Cake

Summer Peach Cake / www.delightfulrepast.com

It's the height of summer, it's hot, but bake I must! After being out of commission following hand surgery, I simply had to bake at the first opportunity. And what better to bake than something with peaches (or nectarines), my favorite summer fruit.

But I needed to break-in the hand with something easy-breezy, no-muss-no-fuss, which means no machines, no peeling, no laborious whisking, just stir up the simple ingredients and throw it in the oven!

The only thing I really like about summer is the summer fruit! And, while I might occasionally enjoy the mild flavor of a white peach or nectarine on its own, the yellow varieties are much better in cakes and pies. And please don't peel them. The peel adds color and makes it even prettier.


Summer Peach Cake (this image, my original watercolor of a yellow peach) / www.delightfulrepast.com
Loved painting this perfectly ripe yellow peach; it smelled soooo good!


I developed this recipe for a 7-inch springform or push-bottom pan (also called a cheesecake pan). And I use an Ateco Stainless Steel 2x3-inches-high Round Form that turns any pan into a tube pan to prevent those center-of-the-cake baking challenges of deep pans and/or heavy batters, but I've also made the cake without it.

Thank you for all your good wishes on my hand surgery. I hope you're enjoying a beautiful summer and will make this, or something peachy, before they're gone. I love peach anything, but I am particularly fond of Peach Pie with Lattice Crust. How about you?


Summer Peach Cake / www.delightfulrepast.com

If you like it, please Pin it and share it!

Summer Peach Cake


(Makes one 7-inch cake)

1 stick (4 ounces/113 grams) unsalted butter, melted
1 1/4 dip-and-sweep cups (6.25 ounces/177 grams) unbleached all-purpose flour
2/3 cup (4.67 ounces/132 grams) sugar
1 teaspoon non-GMO baking powder
1/2 teaspoon baking soda
1/2 teaspoon salt
3/4 teaspoon cinnamon
1/8 teaspoon mace or nutmeg
2 large eggs, room temperature
1 pound (16 ounces/454 grams/2 large) yellow peaches or nectarines, cut into 1/2-inch chunks
1 tablespoon dark brown sugar

1 Grease well and flour a 7-inch springform or push-bottom pan. I use my Ateco Stainless Steel 2x3-inches-high Round Form to turn my 3-inch deep 7-inch pan into a tube pan to prevent those center-of-the-cake baking challenges of deep pans and/or heavy batters like this. Just grease and flour it and center it in the pan and hold it steady while you fill in the batter around it. Preheat oven to 350F/180C/Gas4. Melt the butter and set aside to cool. 

Tip: A circle of baking parchment in the bottom of the pan is always good, though I forgot to do it today.

2 In 2- to 3-quart bowl, combine flour, sugar, baking powder, baking soda, salt, cinnamon, and mace or nutmeg. Whisk together well to "sift."

3 Scrub well—don't peel—and dice the ripe but firm peaches or nectarines into a small mixing bowl; set aside. You'll have about 3 cups. Take out 1 cup of the fruit to put on the top.

Note: I almost never peel organic peaches. I just wash them very well and rub off the fuzz. The colorful skin adds nutrition and a beautiful color to whatever you're making.

4 Add the eggs and cooled melted butter to the flour mixture. With a large spoon, beat well until thoroughly combined. Stir the fruit (except the 1 cup) into the batter.

5 Scrape the thick batter into prepared pan, press down and smooth the top, and press the reserved cup of diced fruit into the top of the batter. Sprinkle with the brown sugar. Bake for about 65 to 75 minutes, until it passes "the toothpick test" or is pulling away from the sides of the pan a bit. Do not underbake!

Note: I love this TimeStack quad timer sooooo much!

6 Cool in pan on wire rack for 10 minutes, then turn cake out of pan right side up and continue cooling on wire rack for 2 hours. If you remembered to use a circle of parchment, it will be much easier to lift the cake off the springform pan bottom! Before serving, you might give it a dusting of powdered sugar. And a little whipped cream is never a bad idea.

Disclosure: We are a participant in the Amazon Services LLC Associates Program, an affiliate advertising program designed to provide a means for us to earn fees by linking to Amazon .com and affiliated sites. We are a ThermoWorks affiliate, earning a small commission at no cost to you on purchases made through our links. This helps cover some of the costs of running the blog. Thank you for your support.

Jean

22 July 2021

Classic Vegetable Quiche

Classic Vegetable Quiche / www.delightfulrepast.com

Every time I make this classic vegetable quiche, I say, "I love this! Why has it been so long since I made it?!" It was a mainstay in my vegetarian days. In those days, I was seriously into nutrition as well so always made the crust with part whole wheat flour. Years later I had the opportunity to have a little chat with Julia Child about that!

My mother and I enjoyed reading cookbooks and watching PBS cooking shows together, especially Julia Child's, when I was just a child. I had all these "warm fuzzies" associated with Julia, since I spent so many hours in the kitchen with her (courtesy of PBS) and my mother. When I finally met Julia, it felt as if I were reuniting with a beloved aunt who had been a part of my childhood.

It was sometime around 2000 that I first met her. As a great admirer of hers since childhood, you’d think I’d have recorded the exact date of that first, and a few subsequent, meetings. These occasions were small gatherings of food people (I'm not keen on the word "foodies") enjoying a cooking demonstration followed by dinner. In each case, I marveled that the person cooking could do so with such an august personage in the audience.

I’ve always been pretty hard to impress — I waste no more than a glance (and not a single thought) on movie stars and other celebrities — but I was more than a little dazzled by Julia! She was quite easy to talk to as she seemed completely unaware of her special standing in these groups. My mother, who died years before I met Julia, would have been so impressed!

Anyway ... back to the subject of the little chat referred to in the first paragraph ... When I mentioned putting whole wheat flour in my quiche crust, she got that look and asked why I would ruin a perfectly good pie crust with whole wheat flour. Then she uttered those famous words she's said so many times, even to Jacques Pepin: We're not interested in nutrition, we're interested in taste!


Classic Vegetable Quiche (this image - my watercolor sketch of a hen) / www.delightfulrepast.com
My little watercolor sketch of a hen, in a card sent to a friend
who keeps chickens in her suburban backyard
and shares their delicious eggs


So here's the quiche recipe I made up "back in the day;" but in honor of Julia, let's leave out the whole wheat flour just this once! 

As always, I love your comments, though I might be a bit slower to respond to them this time as I'm having hand surgery on Friday and may find typing a bit difficult.

Classic Vegetable Quiche / www.delightfulrepast.com

If you like it, please Pin it and share it!

Classic Vegetable Quiche


(Makes one 9-inch quiche)

The Pastry (not whole wheat!)

1 1/4 dip-and-sweep cups (6.25 ounces/177 grams) unbleached all-purpose flour
1/2 teaspoon salt
1/8 teaspoon baking powder
1 stick (4 ounces/113 grams) unsalted butter, well chilled
4 tablespoons ice water
1 1/2 teaspoons cider vinegar
1 tablespoon additional ice water, if needed

The Filling

2 tablespoons (1 fluid ounce/30 ml) extra virgin olive oil
1/2 cup chopped yellow onions
8 ounces mushrooms, thinly sliced
1 medium zucchini, thinly sliced
1/2 large red bell pepper, diced or julienned
1/2 teaspoon salt, divided
1/2 teaspoon coarsely ground black pepper, divided
1/4 teaspoon marjoram
1/8 teaspoon crushed red pepper flakes
4 large eggs (medium, in UK)
3/4 cup (6 fluid ounces/177 ml) milk
1/4 cup (2 fluid ounces/59 ml) heavy cream
2 teaspoons minced cilantro or flat-leaf parsley (or dried parsley flakes)
1 packed cup (4 ounces/113 grams) grated Cheddar and/or Jack cheese
Sprinkle of paprika

1 In medium bowl, whisk together flour, salt and baking powder. With coarse grater, grate butter into flour bowl. With fingers, quickly work the butter into the flour, leaving some pieces the size of small peas.

2 In small bowl, combine water and vinegar. Sprinkle over flour mixture while stirring with large fork. Add a little more water, if needed.

3 Turn dough out onto a piece of plastic wrap and flatten slightly into a 4-inch disk; double wrap; refrigerate for at least 30 minutes or up to four days. May be frozen for up to a month; defrost, wrapped, in the refrigerator.

4 Preheat oven to 450F/230C/Gas8. If dough is thoroughly chilled, let it stand at room temperature for 15 minutes before rolling. On lightly floured surface, roll out disk to a 13-inch circle about 1/8 inch thick. Place pastry in pie plate.* Bake, lined with buttered foil and weighted, for 10 minutes. Remove foil and ceramic pie weights, and continue baking for 10 minutes. Remove crust from oven and reduce oven temperature to 350F/180C/Gas4.

5 While crust is baking, prepare filling. In large skillet, heat the oil and sauté onions for 5 minutes. Add mushrooms, zucchini, red bell pepper, half the salt and pepper, marjoram and crushed red pepper to skillet. Sauté vegetables over medium-high heat until all the liquid released by the mushrooms and zucchini evaporates and there is some caramelization. Remove from heat and let cool slightly.

6 In medium bowl (I use a 2-quart glass measure), combine eggs, milk, cream, cilantro or parsley, remaining salt and pepper, and cheese. Stir in cooled vegetables. Pour filling into prebaked pie shell. Sprinkle with paprika. Use a pie crust shield to prevent overbrowning of crust edges. Bake for about 45 to 55 minutes or until crust is golden and filling is set but with a bit of jiggle. Allow to cool for at least 15 minutes or all the way to room temperature. Delicious at any temperature. I use the silicone hotpads pictured as both pot holders and trivets for hot dishes.

* I think a glass pie plate gives the best results, and I always use the Pyrex Clear Oven Ware 9" Glass Pie Plate. There are lots of quiche recipes in Julia's Mastering the Art of French Cooking (2 Volume Set).

Disclosure: We are a participant in the Amazon Services LLC Associates Program, an affiliate advertising program designed to provide a means for us to earn fees by linking to Amazon .com and affiliated sites. We are a ThermoWorks affiliate, earning a small commission at no cost to you on purchases made through our links. This helps cover some of the costs of running the blog. Thank you for your support.

Jean

24 June 2021

Apple Galette - ThermoWorks TimeStack Giveaway

Apple Galette - ThermoWorks TimeStack Giveaway / www.delightfulrepast.com

The Apple Galette

An apple galette is what I make when I don't have the time, or inclination, to make an Apple Pie—rolling out two crusts, peeling and slicing all those apples, making a pretty crimped edge. I just wasn't up for all that today.

The solution? A galette, or rustic tart, is quicker and easier than a double-crust pie or a tart. You can make it free-form on a baking sheet, as I did for my Rustic Peach Tart, or make it in a 9-inch glass pie plate.

Just make the same amount of dough you would for any 9-inch single-crust pie, but roll it a bit larger to about 14 inches. Center it in the pie plate, not worrying about evening up the ragged edges, pour in the filling, and then bring that raggedy overhanging pastry up over the apples.

I hope you'll leave a comment, enter the giveaway, and perhaps explore more of Delightful Repast while you're here. If you see something you like, be sure to Pin it, tweet it, whatever-social-media-you-have it.


Apple Galette - Rustic Apple Tart (this image, my watercolor sketch of apples on branch) / www.delightfulrepast.com
My watercolor version of a beautiful pencil drawing by UK artist Valerie Callen


The ThermoWorks TimeStack

Even though I had read about the TimeStack, I was shocked when it arrived. This thing is like the grandfather clock of kitchen timers! It's more than 6 inches tall and 4 inches wide, and it needs to be because it has four separate (independent) timers, each with four separate huge-digit, easy-to-read displays (no toggling).

Why do I need a four-channel timer in my home kitchen? Because we use a timer for everything: brewing tea several times a day, checking the rising bread dough, baking, getting the laundry out of the dryer, watering the fruit trees for a certain length of time. We even use a timer as an alarm clock on those rare occasions when we need one.

With four timers set, how do you know what each one is for? With this magnificent instrument, you can record a message for each one! 1. Check the dough. 2. Move the hose. 3. Take the casserole out. 4. Leave for appointment. No more sticky notes!

See the giveaway info below the recipe.


Apple Galette - ThermoWorks TimeStack Giveaway / www.delightfulrepast.com

If you like it, please Pin it and share it!

Apple Galette - Rustic Apple Tart


(Makes one 8.5-inch round tart, 6 servings)

Sour Cream Pastry

1 1/4 dip-and-sweep cups (6.25 ounces/177 grams) unbleached all-purpose flour
1/4 teaspoon salt
1/4 teaspoon baking powder
1 stick (4 ounces/113 grams) very cold unsalted butter
1/2 cup sour cream (4 ounces/113 grams), plus a little more if needed

Apple Filling

1 1/2 pounds (about 4 medium) apples* (by volume, about 4 cups/1 litre)
1/4 cup (1.75 ounces/50 grams) sugar
1 tablespoon (0.31 ounce/9 grams) unbleached all-purpose flour
1/2 teaspoon cinnamon
Pinch salt 

* I usually use half each of two varieties; such as, Fuji and Pink Lady, Granny Smith and Golden Delicious, or Braeburn and Pippin.

1 In medium bowl, whisk together flour, salt and baking powder. With coarse grater over bowl, shred the butter over the flour. (Don't try to shred the very last—you'll shred your fingers; just cut it up.) Stir with a large dinner fork, making sure all the shredded butter is coated with flour. Mixture should be very chunky.

2 With the fork, stir in the sour cream. If you pinch some of the crumbly dough and it holds together and there isn't a lot of dry flour in the bowl, you've used enough sour cream. If not, either add a bit more or sprinkle on up to a tablespoon or so of cold milk, a teaspoon at a time.

3 Turn the crumbly dough out onto a square of plastic wrap and shape it into a 5-inch disk. Wrap tightly in the plastic wrap and chill in the refrigerator for at least 30 minutes or up to 3 days.

4 If you've chilled the dough for just 30 minutes or so, you can roll it out without waiting. You'll need to let thoroughly chilled dough stand at room temperature for 10 to 20 minutes before rolling. Save the square of plastic wrap; you'll be using it again. (I'm very sparing in my use of plastic wrap and like to get as much use out of a piece as possible!)

5 Preheat oven to 425F/220C/Gas7. Prepare the filling just before you roll out the pastry. In tiny bowl, whisk together sugar, flour, cinnamon and salt. Peel (or not—sometimes I don't) and core the apples, and slice them into a medium bowl. I slice them like this: Peel the apples, cut them in half through the stem end. With a melon baller, remove the core from each half; with paring knife, trim away the peel from the ends. Cut each half in half lengthwise and slice thinly crosswise. You should have about 4 cups. Stir in the sugar mixture.

6 Lightly flour a square of parchment paper on the counter. Place the disk of dough in the center and sprinkle it lightly with flour. If you like, place the reserved piece of plastic wrap on top of the dough. With floured rolling pin, roll out the disk, rolling from center to edge and rotating by quarter-turns to make a round shape, to a 14-inch circle. Don't worry about ragged edges; this is a rustic tart.

7 Butter a 9-inch glass pie plate, using about 1/2 teaspoon of butter. Transfer dough to pie plate, paper side up; remove paper. Press dough into the pie plate without stretching, leaving the raggedy-edged overhang untrimmed.

8 Pour in the apple filling in an even layer. Bring the overhang up over the apples a little at a time, sort of "pleating" as you go. Don't try to be cute—we're going for rustic here! Bake for 20 minutes; reduce heat to 350F/180C/Gas4 and continue baking for about 45 to 50 minutes, until crust is golden brown and juices are bubbling. Can be served from the pie plate or lifted out and placed on a serving plate.


Apple Galette - ThermoWorks TimeStack Giveaway (this photo, the TimeStack) / www.delightfulrepast.com

ThermoWorks TimeStack Giveaway


This giveaway is open to readers in the US* who are 18 years of age or older. To enter, leave a comment below (one entry per person). Tell me why you want a TimeStack. Please include your email address in the body of your comment. If your name is drawn and I have no way to contact you, you will be disqualified. Must enter by 11:59 p.m. Eastern time Wednesday July 7.

* If you are outside the US but would like to have this sent to someone you know in the US (you would have to send them a gift card separately on your own), go ahead and enter!

Winner will be chosen by random drawing and be announced here in the comments before noon Eastern time on Thursday July 8. If I don't hear back from the winner of the random drawing by noon Eastern time Saturday July 10, a new winner will be selected from the original entrants (those who commented before the giveaway deadline).

Disclosure: ThermoWorks provided a TimeStack for review purposes and one for the giveaway. The views expressed here are entirely my own. I always tell my readers what I really think!

Disclosure: We are a participant in the Amazon Services LLC Associates Program, an affiliate advertising program designed to provide a means for us to earn fees by linking to Amazon .com and affiliated sites. We are a ThermoWorks affiliate, earning a small commission at no cost to you on purchases made through our links. This helps cover some of the costs of running the blog. Thank you for your support.

Jean

10 June 2021

Blueberry Crumble - Blueberry Crisp

Blueberry Crumble - Blueberry Crisp - with the crispiest crumble ever / www.delightfulrepast.com

Blueberry Crumble. Blueberry Crisp. Whatever you call it, it's the quickest and easiest blueberry dessert. Making it with melted butter not only eliminates the more time-consuming cutting in of the butter, it makes the crumble—or crisp—topping even crispier.

I don't bother to refrigerate the leftover crumble if we'll be eating it the next day. I just store it in the cold oven, and the next day the crumble topping is still crispy. Covering it and refrigerating it would, I'm sure, spoil that.

Blueberry Crumble - Blueberry Crisp - with the crispiest crumble ever (this image, my watercolor sketch of blueberries and lemon) / www.delightfulrepast.com
Couldn't resist doing a quick sketch of the groceries before baking them into a crumble!

We like apple crumble and rhubarb crumble, too, though they take a bit more prep than the blueberry. And blueberry pie is wonderful, but a lot more work. So when you need a dessert that comes together quickly, think Blueberry Crumble.

Blueberry Crumble - Blueberry Crisp - with the crispiest crumble ever / www.delightfulrepast.com


Blueberry Crumble - Blueberry Crisp


(Makes 5 servings)

The Fruit

3 1/2 cups (18 ounces/510 grams) fresh blueberries or frozen* unthawed
1 tablespoon freshly squeezed lemon or lime juice
1 teaspoon finely grated lemon or lime zest
2 tablespoons (0.875 ounces/25 grams) sugar (you might like a bit more)
1 tablespoon unbleached all-purpose flour
1/4 teaspoon cinnamon
Pinch of salt

The Crumble

3/4 cup (3.75 ounces/106 grams) unbleached all-purpose flour
1/2 cup (1.75 ounce/50 grams) old-fashioned rolled oats
1/4 packed cup (1.75 ounce/50 grams) dark brown sugar
1/4 teaspoon cinnamon
1/8 teaspoon salt
6 tablespoons (3 ounces/85 grams) unsalted butter, melted

* If using frozen, I would get the regular full-sized blueberries rather than the tiny "wild" blueberries. Do not thaw them! Follow the recipe as for fresh, but perhaps add a little extra flour to the berries and a few minutes to the baking time.

1 Preheat oven to 375F/190C/Gas5. Butter well a 9-inch glass pie plate.

2 To a 1.5-quart mixing bowl, add the blueberries, lemon or lime juice, and lemon or lime zest. In a small bowl, stir together the sugar, flour, cinnamon, and salt. Sprinkle it over the berries and toss lightly to combine. Transfer to buttered pie plate.

3 Wipe out mixing bowl, no need to wash it. Add flour, oats, brown sugar, cinnamon, and salt; mix together with a fork, and then stir in melted butter. With your hand, sprinkle the crumbles—of all different sizes and shapes—over the berries.

4 Bake in preheated oven for about 30 to 35 minutes (my new favorite ThermoWorks timer—be sure to come back in two weeks for my review and giveaway!), or until the berries are bubbling and the crumble is golden. Frozen berries might add 5 minutes to the cooking time. Let stand 30 minutes before serving to allow time for the juices to thicken a bit. Serve with whipped cream or vanilla ice cream or, as we like it, all by itself.

Disclosure: We are a participant in the Amazon Services LLC Associates Program, an affiliate advertising program designed to provide a means for us to earn fees by linking to Amazon .com and affiliated sites. We are a ThermoWorks affiliate, earning a small commission at no cost to you on purchases made through our links. This helps cover some of the costs of running the blog. Thank you for your support.

Jean

13 May 2021

Burrito Bowls - Carne Molida Burrito Bowls

Burrito Bowls - Carne Molida Burrito Bowls / www.delightfulrepast.com

This post is thanks to the prodding of my friend, Jo, who is a huge fan of
The Bowl. What I like about bowls, besides great flavor, is you can prepare all the components a day or more ahead, then have a wonderful meal on a busy weeknight with no muss no fuss.

It's perfect for make-ahead meals. I put the rice, meat, beans, and corn in microwavable Pyrex 3-cup rectangular storage dishes, put the lid on, and refrigerate until serving time. Put the cold add-ons—avocado, tomato, shredded cheese, sauce, etc—in a separate smaller container.
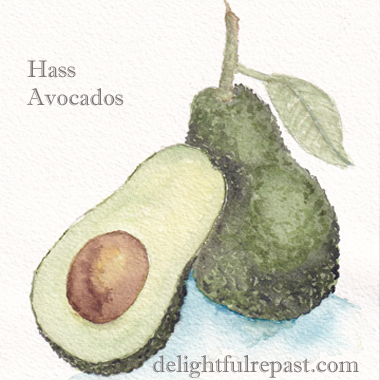

Burrito Bowls (this image, my watercolor sketch of the avocados) / www.delightfulrepast.com
Couldn't resist doing a little watercolor sketch of the avocados!


I'm thinking ahead to when we might actually be able to have people over again. And the great thing about bowls is they are easily customizable. With everyone eating differently these days, with the right assortment of components you can have something for everyone, whether they're paleo, keto, vegetarian, vegan, pegan, gluten-free, grain-free, whatever.

But this bowl is just rice, beans, corn, ground beef, avocado, tomato, cheese, and a zesty creamy sauce, plus whatever garnishes you like. I chopped the red bell pepper, onion, and jalapeno very finely by hand for the sauce because I prefer that texture; but you could just chop it coarsely if you wanted to throw everything in the blender and make a perfectly smooth sauce.

Are you a fan of The Bowl? I'm pretty particular about tortillas, and unless I'm making my Homemade Flour Tortillas, most of the time I just as soon skip the flour tortillas, so a burrito bowl is perfect for me. What other kinds of bowls do you like?


Burrito Bowls - Carne Molida Burrito Bowls / www.delightfulrepast.com
If you like it, please Pin it and share it!

Burrito Bowls - Carne Molida Burrito Bowls


(Makes 4 generous servings)

The Sauce

(Makes about 1 cup)

2 teaspoons extra virgin olive oil
1/3 cup (2 ounces/57 grams) finely chopped red bell pepper
2 tablespoons (0.625 ounces/18 grams) finely chopped onion
2 tablespoons (0.625 ounces/18 grams/1 medium, about 3 inches long) jalapeno pepper, finely chopped
1/3 cup (2.45 ounces/69 grams) mayonnaise
Scant 1/2 cup (4 ounces/113 grams) sour cream
1 tablespoon red wine vinegar
1/4 teaspoon coarsely ground black pepper
1/4 teaspoon cumin
1/4 teaspoon oregano
A bit of water, if needed, to thin the sauce

The Cilantro-Lime Rice

1 cup (6.625 ounces/188 grams) white basmati rice
1 1/2 cups (12 fluid ounces/355 ml) water
1/4 teaspoon salt
1 small bay leaf
2 tablespoons chopped cilantro
1 tablespoon freshly squeezed lime juice
1/2 teaspoon extra virgin olive oil

The Carne Molida

(Makes about 2 2/3 cups)

1/2 teaspoon salt
1/2 teaspoon coarsely ground black pepper
1/2 teaspoon oregano
1/2 teaspoon powdered ancho chiles
1/2 teaspoon powdered anaheim chiles
1/4 teaspoon cumin
1/8 teaspoon crushed red peppers
2 tablespoons extra virgin olive oil
1 pound (16 ounces/454 grams) very lean ground beef (or turkey)
1 tablespoon unbleached all-purpose flour
1/2 cup water
4 teaspoons organic ketchup

The Other Stuff

1 15-ounce (425 grams) can black beans, rinsed and drained
1 15-ounce (425 grams) can organic whole kernel corn, drained
1 1/2 packed cups (6 ounces/170 grams) coarsely shredded cheddar cheese
Chopped tomato, sliced or diced avocado, shredded lettuce, sour cream, white corn tortilla chips

1 In 1-quart saucepan, cook red bell pepper, onion, and jalapeno in olive oil about 8 minutes, until very soft; let cool. Stir in remaining sauce ingredients. Cover and refrigerate for at least 3 hours. Taste and adjust seasoning.

2 In 2-quart saucepan, bring rice, water, salt, and bay leaf to a boil. Reduce heat to very low, cover, and simmer for 15 minutes. Let stand off heat, covered, for 10 minutes. Uncover, remove bay leaf, fluff with fork, then stir in cilantro, lime juice, and olive oil.

3 In small bowl, stir together sugar, salt and spices. Heat skillet (I use this All-Clad stainless steel 12-inch fry pan), and add oil. If you like, cook a little chopped onion before adding beef to the skillet. Add the beef, breaking it up quite finely and browning it well. (Really well. I mean, I think ground beef that is merely "grayed" rather than browned is seriously unappetizing!)

Note: If using ground beef or turkey with more fat, you will need to drain off the fat once the meat is thoroughly browned.

4 Stir in the seasoning mixture, cooking for a minute to bloom the spices. Stir in the flour, mixing it in well with the meat, cooking for a minute. Stir in the water and ketchup, and cook until water is nearly gone. (This little touch of ketchup is not enough to make the meat taste "ketchup-y;" it's just enough to add a certain something.)

5 Get "the other stuff" ready. Divide ingredients among four bowls or glass storage dishes that hold 3 to 4 cups. You can just eyeball it, but these are the approximate measurements:

The Rice: About 2/3 cup per bowl
The Meat: About 2/3 cup per bowl
The Beans: About 3/8 cup per bowl
The Corn: About 3/8 cup per bowl
*The Cheese: About 3/8 cup per bowl
The Sauce: About 1/4 cup per bowl, at the most

Garnish with: cilantro, tomato, avocado, sour cream, tortilla chips, pico de gallo, red bell pepper, whatever you like.

* I just use regular cheddar cheese, but a good brand of non-dairy vegan cheese is Miyoko's Creamery cultured vegan farmhouse cheddar.

Disclosure: We are a participant in the Amazon Services LLC Associates Program, an affiliate advertising program designed to provide a means for us to earn fees by linking to Amazon .com and affiliated sites. We are a ThermoWorks affiliate, earning a small commission at no cost to you on purchases made through our links. This helps cover some of the costs of running the blog. Thank you for your support.

Jean

29 April 2021

Fresh Strawberry Scones

Fresh Strawberry Scones / www.delightfulrepast.com

Fresh strawberry scones popped into my head when I realized it was nearly May, the official, or traditional, start of Strawberry Season in the UK.

It will soon be time for tea in the garden, and these will be on the menu often. I'm dreaming of afternoon tea parties when we're able to do that once again.

Don't use frozen strawberries for this as there is too much liquid, and don't put any sugar on the fresh berries as that will draw out the juices.

If your strawberries seem especially juicy, place the diced berries between two layers of paper towels for about 20 minutes to prevent soggy scones.

Fresh Strawberry Scones (this photo, my watercolor sketch of two strawberries) / www.delightfulrepast.com

If you're one of those people who like a glaze on their scones, you're on your own for that because I am one of those people who don't!

You may or may not want to put a bit of strawberry jam on your Fresh Strawberry Scones—for me, that would be "gilding the lily," as Jacques Pepin would say—but a little Clotted Cream is always in order!

Fresh Strawberry Scones / www.delightfulrepast.com
If you like it, please Pin it and share it!

Fresh Strawberry Scones


(Makes 16 scones)

1 to 1 1/2 cups (5.75 to 8.625 ounces/163 to 245 grams) diced fresh strawberries (1/4-inch dice)
Finely grated zest of a medium orange
3/4 cup (6 fluid ounces/177 ml) milk
2 teaspoons cider vinegar
2 1/2 dip-and-sweep cups (12.5 ounces/354 grams) unbleached all-purpose flour
1/3 cup (2.33 ounces/66 grams) sugar
2 teaspoons baking powder
1/2 teaspoon baking soda
1/2 teaspoon salt
8 tablespoons (4 ounces/113 grams) cold unsalted butter, coarsely shredded or cut into little cubes
1 large egg (medium, if you're in the UK)*
1 teaspoon vanilla extract

* Pay attention to step 3 if you don't want to be one of those people who wastes an egg for the egg wash.

1 Wash and dice the strawberries. Zest the orange. Preheat oven to 500F/260C/Gas10.

2 In 1-cup glass measuring cup stir together milk and cider vinegar; let stand to thicken a bit for 5 minutes or so as you proceed. Line a large baking sheet with parchment and sprinkle a bit of flour lightly in two 6-inch circles.

Tip: My OXO Good Grips bench scraper has a 6-inch ruler on the edge of its stainless steel blade, making it a perfect multi-use tool for making scones.

3 In medium mixing bowl whisk together the flour, sugar, baking powder, baking soda and salt. With your fingers, rub the butter (shredded with the Microplane extra coarse grater) into the flour mixture until it resembles coarse meal or fine breadcrumbs. Mix in the orange zest and diced strawberries to coat and separate. Add the egg to the soured milk and whisk together; remove 1 tablespoon of the mixture to use as an egg wash. Add the vanilla extract to the measuring cup.

Tip: It’s best to keep ingredients cool. If it’s a hot day, or your hot little hands are making the butter melt, pop your mixing bowl in the fridge or freezer for a few minutes.

4 With a large fork stir the wet mixture, a little at a time, into the dry mixture and gently mix until just combined. You may not need to use all of it (or you might need to add a bit more milk); use just enough to make a soft, but not wet or sticky, dough. Do the final mixing with your hand; the dough should not be sticking to your hand or the bowl. Do not knead; there's no need to knead!

5 Divide the dough into two roughly equal smooth balls (no need to weigh, but I love my food scale and know that each half weighs a pound!) and place them on the floured circles and gently pat the dough, dusting with flour as needed, into two 6- to 6.25-inch (15 to 16 cm) rounds. Take a moment to make sure your discs are smooth and flat, almost 1-inch (2.5 cm) thick, and have smooth, straight edges. With a bench scraper or long sharp knife, cut each round into 8 wedges. Pull the wedges out and space them an inch or two apart.

Tip: Again, if it’s a hot day, or the heat of your hands has softened the dough, pop your baking sheet in the fridge to cool the discs off before cutting them into wedges.

6 With silicone pastry brush, brush tops only with the reserved tablespoon of milk-egg mixture. Place in oven, and immediately reduce oven temperature to 400F/205C/Gas6. Bake for about 18 to 20 minutes or until lightly golden brown. Serve with Clotted Cream (or Clotted Cream - Stovetop Method) and Strawberry Jam.

Note: If you are one who prefers your tea in a mug, I recommend a mug with a lid and stainless steel infuser. Makes using loose leaf tea just as easy and convenient as using tea bags.


Disclosure: We are a participant in the Amazon Services LLC Associates Program, an affiliate advertising program designed to provide a means for us to earn fees by linking to Amazon .com and affiliated sites. We are a ThermoWorks affiliate, earning a small commission at no cost to you on purchases made through our links. This helps cover some of the costs of running the blog. Thank you for your support.

Jean

01 April 2021

Persimmon Oat Cookies

Persimmon Oat Cookies  / www.delightfulrepast.com


Persimmon Oat Cookies hit the menu in springtime because I had the foresight in autumn to puree and freeze my surplus of ripe Hachiya persimmons. I can't resist buying some every week while they're in season and end up freezing a nice little stockpile of half-pint jars to bring out whenever I like.

Oatmeal cookies are just about my favorite because I love the chewy texture and the fact that they're a bit more nutritious than most. The persimmons are just an added bonus in both flavor and nutrition. A cookie you really can have for breakfast!


Persimmon Oat Cookies  / www.delightfulrepast.com
Of course, I couldn't put up a painting of a jar of puree,
so here's one I did of the fruit when it was in season.

I packed up a dozen of them and trotted them down to a neighbor as a little thank-you. You see, there was an incident just the day before. I opened my door to see if a package had been delivered and a neighbor cat tried to sneak in. I did my usual maneuver where I partially close the door behind me and go out and pet the cat.

Of course, you know what happened next. The door slammed shut behind me, and there I was, home alone, locked out, no mask, no keys, no phone. It would be anywhere from 2 1/2 to 4 hours before my husband would be coming home. I'll skip all the amusing details and just say that the guy three doors down really looked after me, brought me a chair, etc. 

Sitting on the door mat for 2 1/2 hours would not have been too comfy. Still, I was glad it wasn't 4 hours. Good thing the neighbor cat who started all the ruckus stuck around to keep me company the whole time!

Another persimmon recipe: Steamed Persimmon Pudding - Instant Pot or Not.

Persimmon Oat Cookies  / www.delightfulrepast.com

If you like it, please Pin it and share it!


Persimmon Oat Cookies


(Makes 3 1/2 dozen)

1 1/2 dip-and-sweep cups (7.5 ounces/213 grams) unbleached all-purpose flour
1 teaspoon baking soda
1/2 teaspoon salt
3/4 teaspoon cinnamon
1/4 teaspoon nutmeg
1/4 teaspoon cloves
3 cups (10.5 ounces/300 grams) old-fashioned rolled oats
3/4 cup (3 ounces/85 grams) chopped pecans
3/4 packed cup (3.75 ounces/106 grams) raisins
1 stick (4 ounces/113 grams) unsalted butter, cool room temperature
1 1/4 cup (8.75 ounces/248 grams) sugar
1 tablespoon unsulphured molasses
2 large eggs (medium in UK)
1 teaspoon vanilla extract
3/4 cup (6.625 ounces/188 grams) persimmon puree

1 In medium bowl, whisk together flour, baking soda, salt, and spices. In small bowl, stir a tablespoon of flour mixture into the raisins, separating the clumps. Stir the floured raisins, along with the oats and nuts, into the flour mixture.

2 In large bowl with electric hand mixer, beat butter on medium speed for 30 seconds. Add sugars and beat until light and fluffy. Use a wooden spoon if you need to; mixture must be smooth and well creamed. Beat in eggs and vanilla, then the persimmon puree. Stir in the flour-oat mixture. Cover and refrigerate for 1 hour or up to a few days. (Very cold dough will need to sit at room temperature for a bit to become more scoopable.)

3 Preheat oven to 350F/180C/Gas4. Drop #40 scoops* (0.8 ounces or approximately 1.5 tablespoons) of dough 3 inches apart on parchment-lined cookie sheets. With a glass (I use a 2 1/4-inch diameter flat-bottomed 1/3-cup from my stainless steel measuring cup sets), press each scoop into a 2 1/4-inch round. Bake for about 13 to 15 minutes, or until brown around the edges but still a little soft in the center.

Note: My favorite kitchen timer of all time!

4 Remove to wire racks to cool completely. Store in airtight container. I use these Pyrex 11-cup rectangular storage dishes with lids as cookie jars, among other

things. One holds half a batch of these cookies.
 
* If you don't have one of these #40 scoops, you need to get one now! How do people make cookies without it!

To freeze dough: Drop scoops of dough on foil-lined cookie sheet and flatten slightly, as directed above. Freeze, then wrap.

Disclosure: We are a participant in the Amazon Services LLC Associates Program, an affiliate advertising program designed to provide a means for us to earn fees by linking to Amazon .com and affiliated sites. We are a ThermoWorks affiliate, earning a small commission at no cost to you on purchases made through our links. This helps cover some of the costs of running the blog. Thank you for your support.

Jean