22 June 2023

Maple-Walnut Snacking Cake

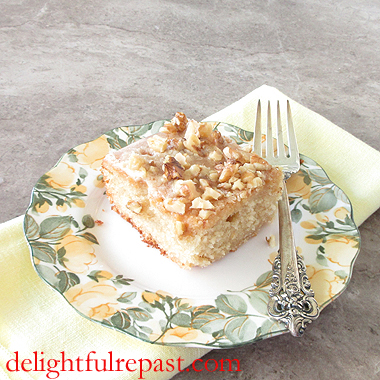
Maple-Walnut Snacking Cake / www.delightfulrepast.com


Maple-Walnut Snacking Cake was inspired by a cake found on the delicious blog The English Kitchen, where Marie made a recipe from The Small-Batch Snacking Cake Cookbook by Aimee Broussard. 

Looking at the ingredients list I could tell that the cake was far too sweet for my taste, and Marie described it as dense and sweet, like a brownie or blondie. If you have more of a sweet tooth than I, it might be just what you're looking for.

But I was in the mood for a cake that was light and less sweet, so decided to take the maple flavor inspiration and apply it to my Grandma's Little Yellow Cake that I call the "little black dress" of cakes because it can be "accessorized" lots of different ways to suit any occasion.


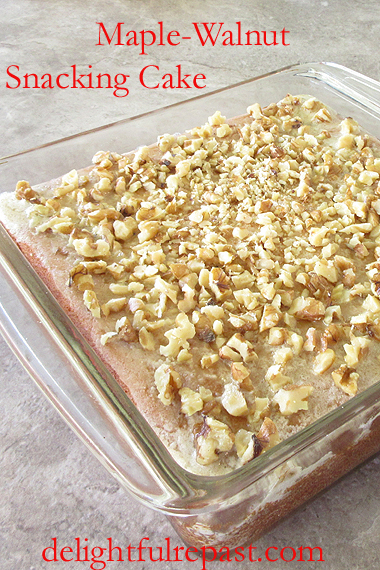
Maple-Walnut Snacking Cake / www.delightfulrepast.com


To me, "snacking cake" means a cake that is quick and easy; can be made by hand with no need for special equipment; is baked in, and often served from, the baking dish or tin; and calls for ingredients we generally have on hand.

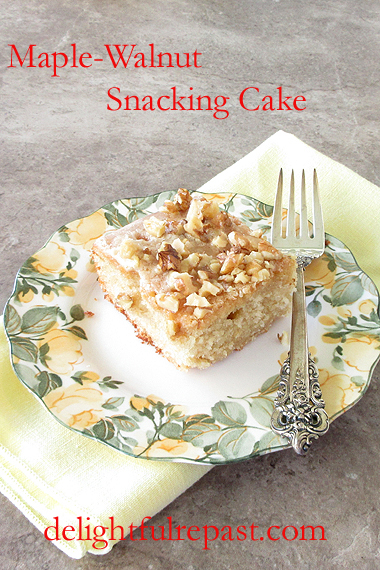
My maple snacking cake has a subtle real maple flavor (don't try this with maple-flavored pancake syrup!) that I thought would be enhanced by a sprinkle of chopped walnuts over the icing (more of a glaze really). It was!

As my "regulars" know, I switched to blogging just once a month (second Thursday of every month). But since I already said I'll be posting a bread recipe next month, I decided to slip this post in this week as an "extra."

Need I tell you that a square of maple-walnut snacking cake goes beautifully with a cup of tea!


Maple-Walnut Snacking Cake / www.delightfulrepast.com


Maple-Walnut Snacking Cake 

(Makes one 8-inch/20-cm square layer, 9 servings)  

The Maple Cake 

1 tablespoon cider vinegar
Enough milk to make 1 cup (8 fluid ounces/237 ml)
1 1/4 dip-and-sweep cups (6.25 ounces/177 grams) unbleached all-purpose flour
1/4 dip-and-sweep cup (1.25 ounces/35 grams) non-GMO cornstarch
1/2 cup (3.5 ounces/99 grams) sugar
1 teaspoon baking powder
3/4 teaspoon baking soda
1/2 teaspoon salt
8 tablespoons (4 ounces/113 grams) unsalted butter, softened
2 large eggs, room temperature
1/4 cup (2 fluid ounces/59 ml) real maple syrup 
1 teaspoon vanilla extract

The Maple-Walnut Icing

1/3 packed cup (1.33 ounces/38 grams) powdered sugar
2 tablespoons (1 ounce/28 grams) unsalted butter, room temperature
2 tablespoons (1 fluid ounce/30 ml) real maple syrup
Small pinch* of salt
1/2 cup (2 ounces/57 grams) chopped walnuts, toasted or not 

* I actually have a "Pinch" measuring spoon. It holds 1/16 teaspoon. A "small" pinch is half that.


1
 Preheat oven to 350F/180C/Gas4. Grease well and lightly flour an 8x8x2-inch baking dish or tin. Measure vinegar into a 1-cup glass measure; add enough milk to make 1 cup. Stir and let stand about 5 minutes while you proceed.

2
 In mixing bowl, whisk together flour, cornstarch, sugar, baking powder, baking soda and salt. Cut in the butter as if making biscuits (I work it in with my impeccably clean fingers). Add soured milk, eggs, maple syrup, and vanilla. With electric mixer (or by hand with a large spoon, as I do), mix on low speed for 30 seconds to combine, then on medium speed for 1 minute. 

3
 Pour into prepared pan. Bake for about 40 minutes, or until golden and a toothpick inserted in the center comes out clean. 

4
 Cool in pan on wire rack for 10 minutes. Remove from pan and place on wire rack to cool. Grandma usually just served cakes like this directly from the pan, and that's what I did here. 

5 After the cake has been cooling for about 30 minutes, put the powdered sugar, soft butter, maple syrup, and salt in a 2- to 3-cup mixing bowl and whisk until smooth. Scrape onto top of the warm cake and spread to cover top only. Sprinkle chopped walnuts evenly over the top and lightly press them.
 Cool completely. Cut into 9 squares.
 

Disclosure: We are a participant in the Amazon Services LLC Associates Program, an affiliate advertising program designed to provide a means for us to earn fees at no cost to you by linking to Amazon .com and affiliated sites. This helps cover some of the costs of running the blog. Thank you for your support. 

Jean

If you liked this post, please Pin it and share it!

08 June 2023

Pain Perdu - French Toast - Eggy Bread

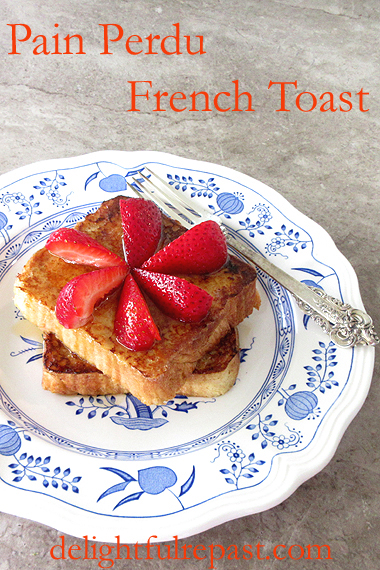
Pain Perdu - French Toast - Eggy Bread / www.delightfulrepast.com


My family called it French Toast. Though my English grandmother might have known it first as Eggy Bread, she would have quickly adopted French Toast since she was a fervid Francophile. Mr Delightful's family from Québec probably called it Pain Doré (golden bread).

Whatever you call it, it is at once simple and basic and rather elegant and special. It is best made with a sturdy bread that is not too fresh. Fresh bread does not stand up well to soaking. If your bread is fresh, lay the slices on a plate the night before and leave them uncovered in your cold oven overnight.

I make a couple of homemade breads that are especially good for Pain Perdu - French Toast: Fallue - The Traditional Norman Brioche and Classic White Sandwich Bread, and also a variation of it about which I will post next time. 

French Toast is all about the texture—and it's easy to get it wrong—dry with crispy edges on the outside and soft and creamy, but never soggy, on the inside. Time and temperature are the two keys to the proper texture. Doing it properly only takes about 15 minutes, so don't rush it.

And resist the temptation to overdo the sugar and flavorings. This is breakfast, not dessert. I just use the teaspoon of sugar to moosh up the spices so they blend in. If you just add them to the batter, they will float on top. 

What did your family call this popular brunch dish?

Update 07/13/23: Here is my favorite bread for French Toast, the bread used in these photos, Pullman Loaf - Pain de Mie.
 

Pain Perdu - French Toast - Eggy Bread / www.delightfulrepast.com

If you like it, please Pin it and share it!


Pain Perdu - French Toast


(Makes 4 slices)

1 teaspoon sugar
1/4 teaspoon cinnamon
1/8 teaspoon salt
1/8 teaspoon nutmeg, mace, or cardamom
2 large eggs (medium in UK and some other places)
1/2 cup (4 fluid ounces/118 ml) whole or 2% milk*
1/4 teaspoon vanilla extract
4 3/4-inch (2 cm) slices of brioche or challah or other good bread a few days old (I used a homemade white bread)
1 tablespoon unsalted butter


1 In a tiny bowl, combine well the sugar, cinnamon, salt, and spices (this helps prevent the spices floating on top of the batter). In dish large enough to hold the four slices of bread, thoroughly whisk together the eggs and sugar mixture; then whisk in the milk and vanilla extract. But don't soak the bread yet.

2 Lightly oil the griddle (I use about 1/2 teaspoon extra virgin olive oil on my All-Clad 11-inch nonstick griddle) and heat over medium heat. As with pancakes, preheating the griddle properly is a must; it takes about 5 minutes, not a minute less. Don't try to speed it up by turning the heat on high, especially if you're using a nonstick griddle. And I give it an extra minute when the bread I use takes 6 minutes to soak.

Note: Unlike with other pans, never preheat a nonstick pan empty or over high heat. Rub a little oil or butter (I use about 1/2 teaspoon) onto the cold pan—don’t use cooking spray—and heat over low to moderate heat. With proper care, a good nonstick pan can last for many years. My griddle is more than ten years old and gets used every week, but due to proper use and care is just like new.

3 During the 5- or 6-minute preheating, whisk the egg mixture again and add the bread slices to the dish. Soak the bread for 3 minutes* on each side. Nearly all of the liquid will be absorbed.

Note: As I said in the post, that time is for the specific bread I used. If you're using a different bread, you'll have to experiment and see what works best for that bread. 

4 Put the butter on the griddle and brush to cover the surface. Place the soaked bread slices on the griddle and cook until golden brown on the bottom, about 3 minutes. Use a pastry brush to redistribute the butter on the pan again as you turn each slice. Turn the heat down to medium-low and cook the second side until golden brown, about 3 minutes. Lower the heat even more if they are browning too quickly because you want to get the inside of the toast cooked well.

Note: Test a "corner" and see if the inside is properly cooked. If not, you can finish off over very low heat or in the oven; and you'll know for next time to adjust your soaking time and cooking time and temperature accordingly for that particular bread.

5 Serve with more butter (or not) and warmed real maple syrup or jam. 

Disclosure: We are a participant in the Amazon Services LLC Associates Program, an affiliate advertising program designed to provide a means for us to earn fees at no cost to you by linking to Amazon .com and affiliated sites. This helps cover some of the costs of running the blog. Thank you for your support. 


Jean

If you liked this post, please Pin it and share it!