28 February 2010

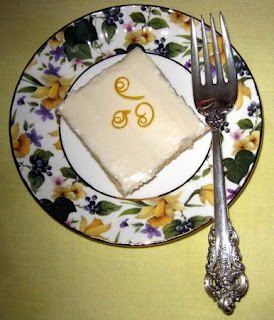
Quick and Easy Meyer Lemon Sheet Cake

Quick and Easy Meyer Lemon Sheet Cake / www.delightfulrepast.com


Years ago I took a long series of cake decorating lessons and spent many hours converting my cake, frosting and filling recipes (I don't "do" mixes) to work with all the various sized pans I might be using for different numbers of people. I had all the equipment one would need to make all sorts of beautiful cakes for any occasion, including weddings. I am so over all that! Sure, I'll still do a fancy cake once in a while, if I happen to get in the mood. Usually, I just make a layer cake (homemade, of course) frosted and filled with a buttery icing and maybe do a simple piped border.

But for days when even that is too much effort ... there's always my quick and easy feeds-a-crowd lemon sheet cake that is served right from the pan--perfect for any large casual party. The only special equipment required is an 18x13x1-inch half-sheet pan.

It is quite a flat cake, dense and velvety, and can be cut into about seven or eight dozen 1 1/2-inch squares as a quick and easy stand-in for petits fours (I don't make those anymore either!) at your next large tea party.


Don't forget to Pin it and share it!

Meyer Lemon Sheet Cake

(Makes 18x13x1-inch half-sheet, 32 servings)

The Cake


4 large eggs
1 1/3 cups buttermilk, divided
1 1/2 teaspoons vanilla extract
2 1/2 dip-and-sweep cups (12.5 ounces/354 grams) unbleached all-purpose flour
1 3/4 cups (12.25 ounces/347 grams) sugar
4 teaspoons baking powder
3/4 teaspoon salt
1 3/4 sticks (7 ounces/198 grams) unsalted butter, room temperature
Finely grated zest of 3 Meyer lemons

The Frosting

6 tablespoons (3 ounces/85 grams) unsalted butter, room temperature

3 cups (12 ounces/340 grams) confectioner's sugar
1/16 teaspoon salt
1 teaspoon vanilla extract
3 tablespoons fresh Meyer lemon juice

1 Preheat oven to 350F/180C/Gas4. Spray an 18x13x1-inch half-sheet pan with cooking spray; don’t try to make-do with a smaller pan, or the batter will overflow.

2 In medium bowl, lightly combine the eggs, 1/3 cup of the buttermilk and the vanilla.

3 In large mixing bowl, combine flour, sugar, baking powder and salt; with electric mixer on low speed, mix for 1 minute to blend (it rather takes the place of sifting). Add the softened butter and remaining buttermilk. Mix on low speed until combined. Mix on medium-high speed for 1 1/2 minutes. Beat in the egg mixture in three batches, beating for 20 seconds after each addition. Stir in the lemon zest by hand; otherwise, the zest gets all tangled up in the beaters.

(I often use this two-stage mixing method I first learned about from The Cake Bible by Rose Levy Beranbaum.)


4 Pour into prepared pan. Bake for about 25 to 30 minutes, or until toothpick inserted in center comes out clean. Cool slightly on wire rack, about 15 minutes, before frosting. While the cake is cooling just a bit, make the frosting.

5 In large mixing bowl, beat softened butter. Gradually beat in confectioner's sugar, then salt, vanilla and lemon juice. With offset spatula, apply thinly to the slightly cooled cake. It will melt a bit into a smooth, shiny glaze. Let cool thoroughly, 3 to 4 hours, before serving.

Disclosure: We are a participant in the Amazon Services LLC Associates Program, an affiliate advertising program designed to provide a means for us to earn fees by linking to Amazon .com and affiliated sites. We are a ThermoWorks affiliate, earning a small commission at no cost to you on purchases made through our links. This helps cover some of the costs of running the blog. Thank you for your support. 

Jean

24 February 2010

How to Make a Proper Cup of Tea

How to Make a Proper Cup of Tea / www.delightfulrepast.com
Delightful Repast is subtitled "A Tradition of Comfort Food with Flair." In my family, that tradition includes what my maternal grandmother called "a proper cup of tea." It is nearly impossible to get such a thing in the U.S. without doing it yourself. Most restaurants give you a tiny stainless steel pot of water that has been warmed, not boiled, on one of the burners of their coffee maker, along with a teabag of uncertain quality for you to dunk into the tepid water. The result is so insipid that people who have never had properly made tea think they don't like tea.

Though I enjoy many types of herbal infusions, they are not tea; they are tisanes. I sometimes enjoy a green tea or oolong or some of the specialty teas that have recently come to the fore. But when I say "a proper cup of tea," that means a good black tea, such as Darjeeling, Earl Grey or English breakfast--organic, if possible.


I usually prefer loose teas, but occasionally use teabags, such as the "sachets" from Harney & Sons. Not only can you see the quality of the tea through the fabric, there is room enough for the tea leaves to unfurl properly. I had the pleasure of having afternoon tea with the charming John Harney (the Harney of Harney & Sons) last September when he gave a presentation on my favorite subject to a small group of tea aficionados. His knowledge of tea is amazing!


How to Make a Proper Cup of Tea / www.delightfulrepast.com
Please Pin it and share it!

You will need a tea kettle and a ceramic teapot, both of a capacity to make the quantity you desire. I have a 4-quart kettle and a 3-quart teapot for large crowds, but I mostly use my nearly 30-year-old 1.8-quart white enamel-on-steel Chantal Classic tea kettle and one of my average-size teapots. Everyone loves the Chantal's two-tone Hohner harmonica whistle!

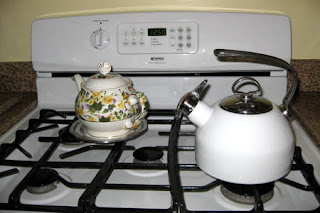
To make a proper pot of black tea, just before a kettle of freshly drawn water comes to the boil, warm the teapot with hot water, empty it, add one teaspoon* of tea leaves for each 8 ounces of water. Immediately (that's why the teapot is on the stove in the photo above) pour in the freshly boiling water, let it stand for 5 minutes, stir, and then strain into cups. If you prefer to use a tea ball, be sure it is large enough to allow the tea leaves to unfurl. Serve with sugar or sugar cubes, thin slices (not wedges) of lemon and a small pitcher of milk (never cream).

* That amount will vary according to the size of the tea leaves. Just experiment with each new tea and when you get it the way you like it, use the same amount of that tea each time.

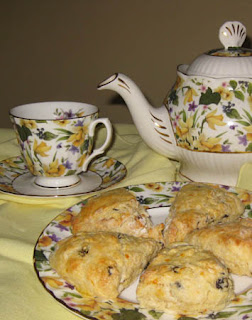
A proper cup of tea and a warm scone (scone recipe) make a delightful repast!


Update 12/07/16: For how to throw an afternoon tea party and a roundup of afternoon tea recipes, see Afternoon Tea Party Tips.

Jean

19 February 2010

Tea and Scones

Tea and Scones - Classic Scones (with tips to make them the best you've ever made) / www.delightfulrepast.com


I read a great blog the other day, "Meal Malapropism," by The Ulterior Epicure. Apparently, when he sees the misuse of the word entree, he has the same nails-on-a-blackboard reaction that I have whenever someone refers to afternoon tea as high tea. I understand why it happens. High tea sounds ever so much more "haute" than afternoon tea. But it is actually just the informal main evening meal sometimes called a meat tea.

The stylish event is called afternoon tea. While I thoroughly enjoy every delightful repast of the day, none cheers me up quite so much as afternoon tea. As Henry James wrote in The Portrait of a Lady, "Under certain circumstances there are few hours in life more agreeable than the hour dedicated to the ceremony known as afternoon tea."

But on this busy Monday there's no time for an afternoon tea, so I'll just bake some scones to have with my everyday tea in the afternoon or for elevenses (British English for midmorning tea break), which I usually have around ten since I start my day so early. For an afternoon tea, I serve clotted cream, lemon curd and raspberry or strawberry jam with the scones. For everyday tea, though, I'll save the calories and have them plain. But can you really call that currant-filled, orange-scented, buttery goodness plain? 


Once in a while I might make a 2-inch (maximum) round scone, but nearly always I make the wedge-shaped scones because that is what my mother and grandmother did AND because it uses all the dough the first time around, so there are no scraps of dough that have to be worked together for a second cutting; those are never quite as pretty or tender as the first rounds cut. 

Update 12/07/16: For how to throw an afternoon tea party and a roundup of afternoon tea recipes, see Afternoon Tea Party Tips.

Update 08/02/18: For a tutorial, including step-by-step details and photos, see Classic Scones - Traditional Scones - A Tutorial.


Classic Scones


(Makes 16 scones)

2 dip-and-sweep cups (10 ounces/283 grams) unbleached all-purpose flour
1/4 cup (1.75 ounces/50 grams) sugar
1 1/2 teaspoons baking powder
1/2 teaspoon baking soda
1/4 teaspoon salt
6 tablespoons (3 ounces/85 grams) cold unsalted butter, cut into cubes
Zest of one orange
1/2 cup (1.75 ounces/50 grams) currants or other chopped dried fruit
2/3 cup (5.33 fluid ounces/158 ml) buttermilk (or milk with 2 teaspoons cider vinegar stirred in and left standing for 5 minutes)
1 large egg*
1 teaspoon vanilla extract

1 Preheat oven to 400F/200C/Gas6. In medium bowl whisk together the flour, sugar, baking powder, baking soda and salt. Cut the butter into the flour mixture until it resembles coarse meal. Stir in orange zest and dried fruit to coat and separate. Whisk together buttermilk, egg and vanilla; pour into dry mixture and gently mix until just combined.


*If you prefer to glaze the tops of your scones (I do not), beat the egg lightly and reserve one tablespoon to mix with a teaspoon of water to brush on tops only just before baking.

2 Line a large baking sheet with parchment and sprinkle lightly with flour. Scrape the dough onto the floured parchment and gently pat the dough, dusting with flour as needed, into two 6-inch rounds. Cut each round into 8 wedges. Pull the wedges out and space them an inch or two apart. Bake for about 15 minutes or until golden brown.

Now put on the kettle and make a proper cup of tea. Enjoy the delightful repast!


18 February 2010

An Early Lesson in Mise en Place

Mise en Place - Pizza / www.delightfulrepast.com
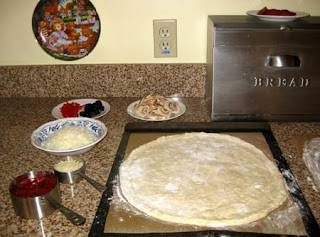
This photo of my latest pizza-making session reminded me of an early lesson in mise en place (which is pronounced MEEZ ahn plahs, "putting in place"), a French culinary term that refers to arranging all the necessary ingredients and equipment ahead of time. My mother's friend Maggie was visiting when I decided to make spaghetti for the first time. I was 13 and had been cooking for several years, so when the subject of spaghetti came up in our discussion I was ready to dive right in.

Besides telling me how to make spaghetti, Maggie gave me a few pointers that day I've never forgotten. She said she always spread a sheet of newspaper on the counter and got out all the ingredients before she started cooking. Since I don't subscribe to a newspaper, I have to skip that step. But that day, years ago, I spread out the paper, gathered all the ingredients and equipment, then proceeded to do all my peeling and chopping with the newspaper catching all the mess. As the sauce simmered and the pasta water boiled, clean-up was a snap. It took mere seconds to fold up the newspaper and toss it.

Of course, I didn't know it was called mise en place until years later. But it's a wonderful concept! If you've ever just jumped right into making something and then had to turn off the stove and run out to the store for a missing ingredient, you can appreciate the efficiency of having everything in place ahead of time.

17 February 2010

Enough Already with the Garlic!


Hummus - with just the right amount of garlic / www.delightfulrepast.com

Okay, I know this is going to ruffle a lot of feathers, but it must be said. Too many cooks, home and professional, think Garlic Equals Gourmet. And it just doesn't. I don't spend all this time, money and effort procuring the best ingredients I can find only to take them home and bash them over the head with a boatload of garlic.

Take my pizza recipe on this blog, for example. I make it with no garlic at all (except what is in the pepperoni), and some of the biggest garlic users I know don't even miss the garlic. They exclaim over the taste and texture of the crust and how they can really taste the tomatoes and cheese. Yes! There are other flavors in the world besides garlic, but they can only be tasted and appreciated when they are not completely overwhelmed by too much garlic.

This is not to say that I don't like garlic. I do. But when something is not the main ingredient in a dish, it should enhance the main ingredient, not steal the spotlight. And a meal should have a variety of flavors. If one dish has garlic, the others need not. I've been disappointed by many an expensive meal when everything--bread, main dish, side dishes and salad--was loaded with garlic. I want to march in and tell the chef, Don't be a Johnny One Note in the kitchen!

Many dishes that typically have garlic can be greatly improved by using less or, in some cases, no garlic. However, there are some things that even I think simply must have a little garlic. (And when I say garlic, I don't mean garlic salt or garlic powder or chopped garlic from a jar. Those are three items that need to be ... Oops, I don't want to get into one of those Oprah versus the Beef Industry things!) One of these is hummus. There is no hummus without garlic, but it only needs a tiny bit.

Hummus - Classic Hummus - no nonsense! / www.delightfulrepast.com


Hummus


(Makes 2 cups)

1 15-ounce can garbanzo beans, rinsed and drained
1/2 cup unsalted tahini
1/3 cup extra virgin olive oil

1/3 cup fresh Meyer lemon juice
1/2 teaspoon salt
1/4 teaspoon (1/2 small clove) minced garlic

In bowl of food processor, place all ingredients. Process until smooth. If you prefer a thinner consistency, add a little more lemon juice, olive oil or water. Taste, and make adjustments accordingly. Put into serving dish and cover with plastic wrap directly on the surface. Refrigerate for at least a few hours before serving or overnight. Garnish with a drizzle of olive oil and a little finely chopped mint, flat-leaf parsley or pistachios. Serve with whole wheat pita wedges, Armenian cracker bread and raw vegetable strips.

Enjoy the delightful repast! 

Jean

16 February 2010

Make "Real" Pizza at Home, Part Three

Make "Real" Pizza at Home, Part Three - Making and Baking / www.delightfulrepast.com


If my friends who have raved about my pizza knew how easy it is to make, it would spoil my fun. And it takes little in the way of special equipment. My stand mixer and food processor stand idle on the counter as I stir up the dough with a big spoon and bowl, not even having to muster up the energy to knead. My Lodge Pro Logic Pizza Pan, so much easier to handle than a stone, and a rimless cookie sheet standing in for a pizza peel are all that's needed. (If you haven't done so, read Part One and Part Two.)

With the dough, sauce and toppings ready to go, just follow these final steps:

1 A half hour prior to baking time, place 14-inch round cast-iron pizza pan (or a pizza stone) in oven and preheat oven to 475 for 30 minutes.


2 Make the pizzas one at a time, starting with the dough on the rimless baking sheet. With floured hands, press the dough into 13-inch round. (Actually, since the parchment is only 12 inches wide, it will be a little out-of-round, but not noticeably so.) If the dough keeps springing back, let it rest for 5 minutes so the gluten can relax, and try again. Let stand 10 minutes before saucing and topping.


3 Leaving the edge clear, lightly top it with room-temperature sauce and then with toppings.


4 Slide the pizza (on the parchment) onto the hot cast-iron pan (or pizza stone) in the oven and close the door. Bake for about 15 minutes. After first pizza has been baking for 5 minutes, move second crust to rimless baking sheet and press it out; let stand 10 minutes before saucing and topping.


5 Remove the pizza from the oven and transfer to a wire cooling rack. Wait about 3 minutes before transferring to a cutting board for slicing and serving. Meanwhile, sauce and top second pizza and put it in oven. Makes two 13-inch medium-thick-crust pizzas.


And here's my precision plan for getting the two pizzas made and served in a timely fashion:

3:00 Remove dough from refrigerator, partially press out and let rest
5:30 Heat oven and pan to 475
5:45 Press out the first pizza crust, let stand 10 minutes
5:55 Sauce and top first pizza
6:00 Put first pizza in oven to bake 15 minutes
6:05 Press out the second pizza crust, let stand 10 minutes
6:15 Remove first pizza from oven to wire cooling rack for 5 minutes
6:15 Sauce and top second pizza
6:20 Put second pizza in oven to bake 15 minutes
6:20 Slice and serve first pizza
6:35 Remove second pizza from oven to wire cooling rack for 5 minutes
6:40 Slice and serve second pizza

Enjoy the delightful repast!

Make "Real" Pizza at Home, Part Two

Make "Real" Pizza at Home, Part Two - Pizza Sauce / www.delightfulrepast.com


On the day you plan to make the pizzas, remove the dough from the refrigerator 3 hours before you want the first one to go into the oven. Place a 14-inch-long piece of 12-inch-wide unbleached natural parchment paper on a rimless baking sheet--that's what I use for a peel--and dust lightly with flour. 

Place a second piece of parchment on the counter and dust lightly with flour. Place the two balls of dough on the two pieces of parchment and sprinkle them with flour; dust your hands with flour. Gently press the dough into rounds about 9 inches in diameter; sprinkle with flour and cover loosely with oil-sprayed plastic wrap. Let rest for 2 3/4 hours. 

In Part Three, the final episode, I'll give you my detailed timeline for getting two pizzas on the table in a timely fashion. (If you haven't already, read Part One.)

In the meantime, make your sauce. You only need about 2/3 cup of a fairly thick sauce for each pizza. My recipe makes just the right amount for two 13-inch pizzas.


Pizza Sauce


(Makes about 1 1/3 cups)

1 tablespoon olive oil
1/4 cup chopped onion
14.5-ounce can fire roasted crushed tomatoes
1/2 teaspoon sugar
1/2 teaspoon salt
1/4 teaspoon pepper
1/4 teaspoon basil
1/4 teaspoon oregano
1/4 teaspoon parsley
1/8 teaspoon crushed red pepper flakes

(That's right, no garlic. I want you to taste the tomatoes. If you must have garlic, use just 1/8 teaspoon of finely minced fresh garlic. No garlic powder, no garlic salt, no chopped garlic from a jar. But do try it without garlic. I think you'll be surprised.)

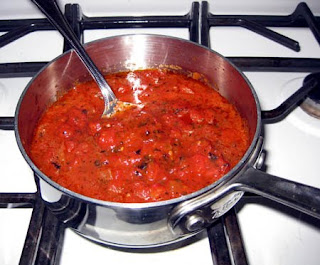
In 1-quart saucepan, heat oil and cook onion for a few minutes until soft. Stir in remaining ingredients. Simmer, loosely covered, for 1 hour, stirring occasionally. Let cool to room temperature. If the crushed tomatoes are quite chunky, you can use an immersion blender to quickly smooth out the sauce.

Then get the cheeses and other toppings ready. I think where most home cooks go wrong with pizza is in using too much sauce and too much in the way of toppings. To avoid having a soggy pizza, use much less of everything than you think you need.

For each pizza, add these ingredients, in order, to just-sauced crust:

1/4 cup shredded parmesan
4 ounces shredded mozzarella or mozzarella-provolone combination
1/2 3.5-ounce package pepperoni, microwaved in single layer between paper towels for 30 seconds1/2 2.25-ounce can sliced black olives, drained and patted dry
3 ounces mushrooms, thinly sliced
2 tablespoons finely julienned red bell pepper, squeezed dry with paper towel

Of course, you can use any toppings you like. These are just our favorites, and this gives you some idea of the quantities to be used--the more toppings, the less of each.

I'll be back tomorrow with the third and final episode of Make "Real" Pizza at Home.

15 February 2010

Make "Real" Pizza at Home, Part One

Make "Real" Pizza at Home, Part One / www.delightfulrepast.com

It was about this time last year when I got on my pizza kick. Before then I was making pizza once, maybe twice, a year. But for some reason I became obsessed with perfecting my dough and sauce. My little yellow kitchen became a laboratory, the countertops and refrigerator lined with bowls of dough in various stages of fermentation. I’m never happier than when I’m developing new recipes, and my husband was never happier than when I was developing my ultimate pizza recipe. He could have gone on for many months having pizza four times a week. I, on the other hand, was thrilled to be able to move on to my next obsession.

The dough recipe, pretty much the same one I’ve been making for decades, doesn’t sound like anything special—no “secret” ingredient. But it makes just the right amount of dough to make two pizzas of the perfect size and thickness to serve 4 or 5 people. And the three days in the refrigerator gives the rather wet dough the perfect texture as well as the most wonderful flavor. If there is a “secret” to it, I suppose it’s in the baking. I’ve tried all kinds of pizza pans, with decent results. But I was determined to find the ultimate pan or baking stone or whatever.

Not a huge fan of unwieldy pizza stones, I racked my brain till I came up with the perfect solution—cast iron. Searching for a 13- to 14-inch round cast iron griddle, I found that Lodge actually makes exactly what I had in mind and calls it the Lodge Pro Logic Pizza Pan. Unfortunately, the recipes included with the pan did not make the best use of the pan. They called for using it as, well, just a pan. What I had in mind, on the other hand, was to use it as a pizza stone! Believe me, if you want to make “real” pizza at home without any other special equipment, you need to get this pan!

So go ahead and stir up the dough, and I’ll be back within three days (the dough is made three days ahead) with the rest of the story.


Make "Real" Pizza at Home, Part Two
Make "Real" Pizza at Home, Part Three

Pizza Dough


(Makes two 18-ounce crusts for two 13-inch pizzas)


4 packed cups (20 ounces/567 grams) unbleached all-purpose flour, divided
1 tablespoon (12.5 grams) sugar

1 1/2 teaspoons (9 grams) salt
1 teaspoon (0.125 ounces/3.5 grams) instant yeast
1/4 cup (2 fluid ounces/59 ml) extra virgin olive oil
1 3/4 cups (14 fluid ounces/414 ml) water, room temperature

1 In large bowl, stir together 2 cups flour, sugar, salt and instant yeast. With dough whisk or wooden spoon, stir in the oil and water until thoroughly combined. Stir for a minute. Stir in remaining flour a half cup at a time. The finished dough will be elastic and sticky.


2 Oil two 1.5-quart lidded bowls and their lids; set aside. Sprinkle flour on the counter and transfer the dough to the counter. Cut the dough into 2 equal (18-ounce) pieces. Sprinkle flour over the dough. With floured hands, gently round each piece into a ball.


3 Dip each dough ball into one of the oiled bowls, rolling the dough in the oil, and then put the lid on. Rest the dough in the refrigerator for three days.