30 September 2021

Stuffed Shells - Conchiglie Ripiene al Forno

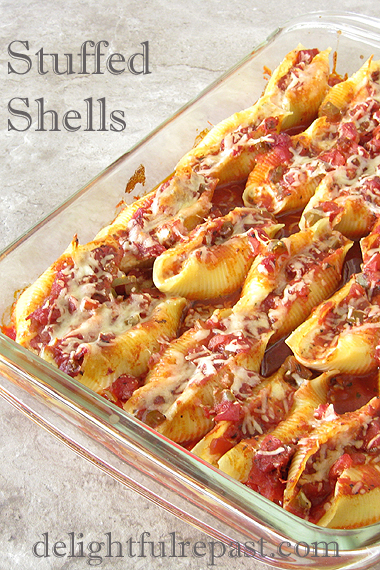
Stuffed Shells - Conchiglie Ripiene al Forno / www.delightfulrepast.com

It had been several years since I last made stuffed shells, so I wanted to do a little research as to quantities. As my regular readers know, I hate food waste. I wanted to make 20 stuffed jumbo shells, and so I wanted to make exactly the amount of sauce and filling for those 20 shells. My research proved disappointing.

Most recipes I saw, including ones from companies that make jumbo shells, made far more filling than needed for the number of shells indicated. I remember one that made an enormous quantity of filling and then said to fill each shell with a level tablespoon! Well, I knew what I wanted to put in the filling, so I did my own math and got it right the first time.

Stuffed Shells - Conchiglie Ripiene al Forno - perfect for make-ahead freezer meals / www.delightfulrepast.com

I scaled down my basic marinara sauce to make exactly 3 1/2 cups so that there would be no leftover sauce either. Funny thing, too, was that the math on the Barilla box was wrong, too! The nutrition label on the 12-ounce box said "about 7 servings per container, serving size 5 pieces." On my planet, that adds up to 35 shells; there are actually 45 shells in a box.

Anyway ... This is my usual cheese-stuffed jumbo shells, which I really love. But next time I'm going to experiment with a sausage filling. What sort of fillings have you tried?

Stuffed Shells - Conchiglie Ripiene al Forno / www.delightfulrepast.com

If you like it, please Pin it and share it!

Stuffed Shells


(Makes 20 stuffed jumbo shells)

The Shells

1/2 12-ounce box Barilla jumbo shells (about 44 in a box)

The Sauce

1 tablespoon extra virgin olive oil
1/3 cup (1.5 ounces/43 grams) finely minced onion
1/3 cup (1.75 ounces/50 grams) finely minced green bell pepper
1/3 cup (1.75 ounces/50 grams) finely minced peeled carrot
1 14.5-ounce can organic fire roasted crushed tomatoes
1 8-ounce can tomato sauce
1/2 cup (4 fluid ounces/118 ml) drinkable dry red wine
1/2 cup (4 fluid ounces/118 ml) water
1 teaspoon sugar
1/2 teaspoon salt
1/4 teaspoon coarsely ground black pepper
1/4 teaspoon basil
1/4 teaspoon oregano
1/4 teaspoon parsley flakes
1/8 teaspoon crushed red pepper flakes

The Cheese Filling

1 15-ounce container ricotta
1 firmly packed cup (4 ounces/113 grams) finely shredded mozzarella
1/2 cup (2 ounces/ grams) grated parmesan
2 teaspoons parsley flakes
1/4 teaspoon coarsely ground black pepper
1/8 teaspoon nutmeg
3 tablespoons (1.5 ounces/44 ml) milk

The Top

1/2 firmly packed cup (2 ounces/57 grams) finely shredded mozzarella
1/4 cup (1 ounce/28 grams) grated parmesan


1 Put the salted water, 1 1/2 teaspoons salt and 2 quarts water, on to boil for cooking the shells according to package directions.

2 In 2-quart saucepan, heat the olive oil and cook the onion, bell pepper, and carrot until soft, about 5 minutes. Add remaining ingredients. Bring to boil; reduce heat to very low and simmer, loosely covered, for 45 minutes.

3 When shells are done, drain and place them on a quarter sheet pan to cool. When sauce is done, remove from heat and let cool.

4 In 1-quart glass measure, stir together the cheese filling ingredients; cover and refrigerate until ready to assemble. Preheat oven to 350F/180C/Gas4.

5 To assemble: very lightly oil a 13x9x2-inch baking dish. Spread 1 cup of the sauce over the bottom of the dish. Using a #40 scoop (2 tablespoons, slightly rounded), fill shells, handling them carefully. Place in baking dish, open side up. Pour remaining sauce evenly over shells. Cover with foil and bake for 25 minutes. Remove foil and top with a sprinkling of mozzarella and parmesan. Bake uncovered for 20 minutes. Let stand 5 minutes before serving.

Note: I like to use these Pyrex 3-cup rectangular storage dishes (shown in second photo) for my make-ahead freezer meals for two.

Disclosure: We are a participant in the Amazon Services LLC Associates Program, an affiliate advertising program designed to provide a means for us to earn fees by linking to Amazon .com and affiliated sites. We are a ThermoWorks affiliate, earning a small commission at no cost to you on purchases made through our links. This helps cover some of the costs of running the blog. Thank you for your support.

Jean

If you liked this post, please Pin it and share it!

16 September 2021

Oven-Dried Figs

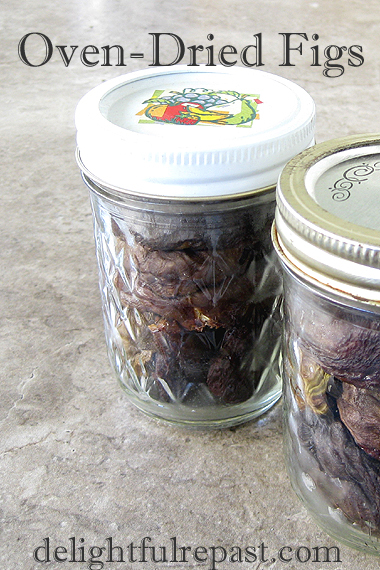
Oven-Dried Figs - How to Dry Fruit in Your Conventional Oven / www.delightfulrepast.com

Fresh figs are a favorite of mine, but not all of my friends share that opinion. Yesterday a friend brought me a huge bowl of fresh figs and hinted broadly about what I might do with them, saying another friend of ours only likes figs in fig newtons (fig rolls in UK).

I have several projects going this week and have no time for extra baking, and I always make my Fig Rolls - Fig Newtons with dried figs. So I thought I'd just dry these figs for a future baking day.


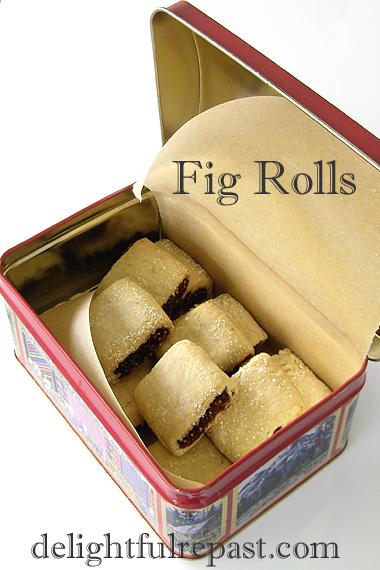
Oven-Dried Figs - How to Dry Fruit in Your Conventional Oven (this photo, Fig Rolls - Fig Newtons) / www.delightfulrepast.com


I've never had a dehydrator, and have turned down one or two that have been offered to me, since I wouldn't use it often enough. It would just be taking up space 364 days a year. My toaster oven does convection, which would be great for this, and I could probably do two quarter sheet pans in it, but I don't have wire racks for that size pan.

So here's how I did it in the regular oven. At a "cool oven" temperature of 200F/95C/Gas1/8. No special equipment. Just a half sheet pan and a wire cooling rack.


Oven-Dried Figs - How to Dry Fruit in Your Conventional Oven / www.delightfulrepast.com


You can find all sorts of methods for doing this, everything from quickly at higher temperatures to 36 hours at extremely low temperatures. The former made no sense to me, and the latter seemed unnecessarily slow and would tie up my oven for far too long. Some recommend propping the oven door open a bit to let out moisture. No, I wasn't going to be doing that.

The reason I chose to store the dried figs in half-pint jars (tightly packed) is because that is the amount needed for a batch of Fig Rolls - Fig Newtons, which I'll be making in a couple weeks for a small autumn tea party in the gazebo. Might use the other jar for a batch of Homemade Granola


Oven-Dried Figs - How to Dry Fruit in Your Conventional Oven / www.delightfulrepast.com

If you like it, please Pin it and share it! 

Oven-Dried Figs


(Makes 2 half-pint jars with a bit leftover)

Up to about 2 3/4 pounds fresh figs (however many will fit, halved, on the rack)

1 Preheat oven to 200F/95C/Gas1/8.

2 Line an 18x13x1-inch half sheet pan with baking parchment paper, then set a wire cooling rack on top of the paper.

3 Wash and dry the figs. Cut off the top stem and trim away any bad spots. Cut in half lengthwise.

4 Place the halves cut side up on the wire rack.

5 Bake in the center of the oven for about 6 hours. This will vary, depending on the size and juiciness of the figs and the peculiarities of your oven. Check at 5 hours, then maybe every 20 minutes after that until they are done. The figs are done when they are quite dry, but not hard, and still a bit sticky to the touch in the center.

6 Cool completely and put in canning jar(s). Refrigerate for short-term storage or freeze for up to several months. I chose half-pint jars because they held, tightly packed, the amount (5 ounces) needed for a batch of fig rolls.


Oven-Dried Figs - How to Dry Fruit in Your Conventional Oven (this image, my original watercolor of a fig) / www.delightfulrepast.com


Disclosure: We are a participant in the Amazon Services LLC Associates Program, an affiliate advertising program designed to provide a means for us to earn fees by linking to Amazon .com and affiliated sites. We are a ThermoWorks affiliate, earning a small commission at no cost to you on purchases made through our links. This helps cover some of the costs of running the blog. Thank you for your support.

Jean


If you liked this post, please Pin it and share it!

02 September 2021

Belgian Waffles - or Regular Waffles - Freezing and Reheating

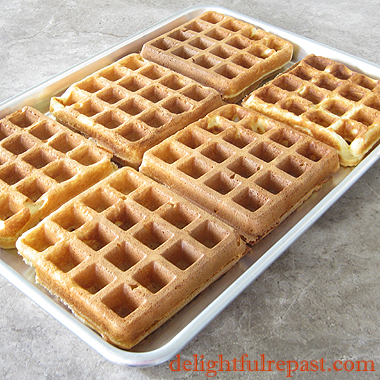
Belgian Waffles - or Regular Waffles - with directions for freezing and reheating / www.delightfulrepast.com

Belgian waffles might be the perfect comfort food breakfast, but we make them for dinner! And I don't mean a savory version, I mean the breakfast version with just butter and maple syrup. 

Years ago we had a stovetop Belgian waffle maker that we wore completely out. We couldn't find another like it, so I researched all the electric ones and decided on the Cuisinart 4-Slice Belgian Waffle Maker.

Besides all the other good things about it, it takes 2 cups of batter. So the recipe I had developed for regular waffles, and which works just as well for Belgian waffles, will make two of these. Exactly. No leftover batter. That's important to me. I hate waste. And the leftovers are great! I mean it. Great.


Belgian Waffles - or Regular Waffles - with directions for freezing and reheating / www.delightfulrepast.com


Just put the leftover squares in the refrigerator and heat them in the toaster the next day (or up to 3 days), good as new! I've even stirred up a batch specifically for freezing. Just thaw the desired number of squares in the refrigerator overnight (or in the microwave in the morning), pop them in the toaster, and there you go! No need to ever eat a store-bought frozen waffle again. Ever.

If more than one or two people are having waffles, it makes more sense to heat the waffles in the oven. Preheat oven to 300F/150C/Gas2. Lay the waffle squares on a baking sheet, or directly on the oven rack, and heat for about 10 minutes, if thawed, or about 15 minutes, if frozen.

My recipe makes two Cuisinart WAF-150 square Belgian waffles, each making four 1-inch deep 4.5-inch squares. If you prefer regular waffles, it makes six 7-inch round regular waffles.


Belgian Waffles - or Regular Waffles - with directions for freezing and reheating / www.delightfulrepast.com


Yesterday I stirred up a batch for a solo lunch. Since I eat two squares, that means I can refrigerate or freeze six squares. So I cooled them to room temperature on a wire rack, then laid them out on a 15x10x1-inch jelly roll pan, covered them (you can use a lid or another jelly roll pan or a piece of foil), and popped them into the freezer for a couple hours. Then transferred them to one-gallon freezer bags, which holds four perfectly, so next time I make a batch I'll add two more squares to the one bag.

This is my basic recipe. Sometimes I use different whole grain flours or throw in some very finely chopped pecans, but I always use this formula. We like to think the three eggs transform it into a seriously nutritious, high-protein meal. Tell me: How do you like your waffles? And do you prefer Belgian or regular? People tend to feel very strongly about that!


Belgian Waffles - or Regular Waffles - with directions for freezing and reheating / www.delightfulrepast.com

If you like it, please Pin it and share it!
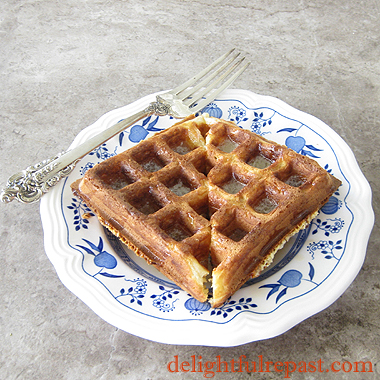
Belgian Waffles - or Regular Waffles


(Makes two Cuisinart WAF-150 Belgian waffles or six 7-inch round regular waffles)

1 2/3 cups (13.33 fluid ounces/394 ml) milk
1 1/2 tablespoons 0.75 fluid ounce/22 ml) apple cider vinegar
3 tablespoons (1.5 ounces/43 grams) unsalted butter
1 2/3 dip-and-sweep cups (8.33 ounces/236 grams) unbleached all-purpose flour
1 tablespoon sugar (optional but improves browning)
2 teaspoons non-GMO baking powder
1/2 teaspoon baking soda
1/2 teaspoon salt
3 large eggs (medium, in the UK), room temperature

1 In a 2-cup glass measure, stir together milk and vinegar; let stand for several minutes while proceeding with recipe. Melt the butter and allow it to cool.

2 In a 2-quart glass measure, whisk together dry ingredients. In a 1-quart glass measure, whisk together the eggs, soured milk, and melted and cooled butter. Pour into dry mixture and combine. Let batter rest 15 minutes before using.

3 Your waffle iron becomes "seasoned" after a few uses and requires no greasing. But if your waffle iron is new, spray both upper and lower grids with cooking spray, or apply a little canola oil with a paper towel or pastry brush. During last 5 or 6 minutes of the batter's rest, preheat waffle iron. I use the medium setting.

4 Pour 2 level cups of batter (this might differ for your model) onto center of waffle iron; quickly spread batter evenly over the grid (doesn't need to be perfect). Close the lid and bake until the green light comes on and the audible tone sounds, about 5 to 6 minutes. When the tone sounds (another signal is that the steam stops or slows way down), open lid and remove the waffle. Close lid and wait just a minute for iron to reheat. Repeat with remaining batter. Serve with cold unsalted butter and warm real maple syrup or my Homemade Blueberry Syrup or Sauce.

Tip: Since my freezer is my best friend, I recently treated myself to two ThermoWorks digital refrigerator/freezer thermometers to replace the nearly impossible to read analog thermometer I switched back and forth between fridge and freezer for years.

Disclosure: We are a participant in the Amazon Services LLC Associates Program, an affiliate advertising program designed to provide a means for us to earn fees by linking to Amazon .com and affiliated sites. We are a ThermoWorks affiliate, earning a small commission at no cost to you on purchases made through our links. This helps cover some of the costs of running the blog. Thank you for your support.

Jean

If you liked this post, please Pin it and share it!