19 August 2021

Microwave Cauliflower Cheese for One

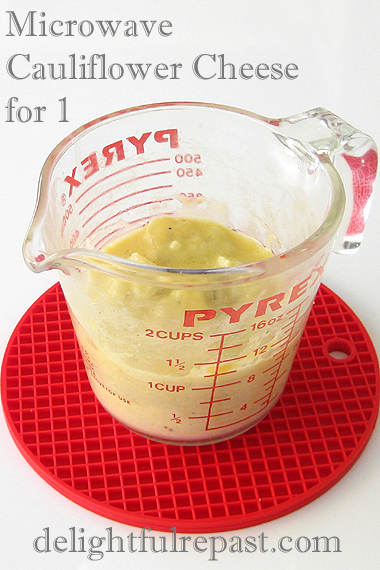
Microwave Cauliflower Cheese for One - A Quick and Easy Homemade Solo Lunch / www.delightfulrepast.com

Microwave Cauliflower Cheese for One is one of my favorite lunches. If you work from home and usually have a quick lunch on your own as I do, it's great. And it gives my microwave something to do besides heat up our microwavable moist-heat hot pads we're always laying on one injury or another!

It took me a long time to come around to microwave ovens. I think I was the last person on the planet to get one, after being urged to by my elderly father! Still, I don't cook in it. All I ever use it for is to heat up those hot pads or a plate of leftovers, or to melt a bit of butter. Glad to find another use for it.

Microwave Cauliflower Cheese for One - A Quick and Easy Homemade Solo Lunch / www.delightfulrepast.com


This is so quick and easy and doesn't make a big cooking mess in the middle of the day. Just cut up the cauliflower, stir up the seasonings and water, pour it on, cover, and pop it into the microwave for 6 minutes. 

While it's cooking, shred the cheese, stir the cornstarch into the milk. When the microwave dings, take out the cauliflower, drain off the liquid, stir in the cheese and milk, zap it for another 2 minutes, and Bob's your uncle!

Of course, microwave ovens are all different, so your times might not be the same as those that I figured out for mine. What do you use a microwave for? What sort of things do you usually have for lunch?

Microwave Cauliflower Cheese for One - A Quick and Easy Homemade Solo Lunch / www.delightfulrepast.com

If you like it, please Pin it and share it!

Microwave Cauliflower Cheese for One


(Makes a bit over 1 cup)

1 1/2 cups (6 ounces/170 grams—about quarter of a 2-pound/1 kg cauliflower) cauliflower florets
1/8 teaspoon salt
Pinch of coarsely ground black pepper
Pinch of cayenne
Pinch of dry mustard
2 tablespoons (1 ounce/30 ml) water
1/2 tablespoon (0.25 ounce/7 grams) unsalted butter
1/2 packed cup (2 ounces/57 grams) shredded cheddar or other cheese
1/4 cup (2 fluid ounces/59 ml) milk
1 teaspoon cornstarch or tapioca flour

Note: You can use all cheddar, if you like, or a combination of cheeses. I think using half Monterey jack makes it creamier. And, at the same time, you can toast a few fresh breadcrumbs on the stovetop for a pretty topping. 😉

1 Put the bite-size cauliflower florets in a 2-cup glass measure (I love my Pyrex glass measuring cups!). In a tiny bowl, stir together salt, pepper, cayenne, and dry mustard; stir in the water. Pour over the cauliflower and add the butter. Cover (I use a 6-inch silicone lid) and microwave on full power for 6 minutes (your oven might differ), until tender or nearly so (whatever you prefer). Drain off the liquid.

2 Add the cheese to the cooking cup. In a little bowl, stir the milk and cornstarch together. Stir it and the cheese into the cauliflower. With the lid ajar, microwave on full power for 2 minutes (your oven might differ), until the cheese has melted and a smooth sauce has formed. 

3 Stir and serve on a small plate and, if you're feeling fancy, garnish with toasted breadcrumbs. Or just eat it out of the measuring cup; I won't tell! 😁 

BTW, that's one of my pretty ThermoWorks hot pad/trivets (my favorite pot holders) in the photos.

Disclosure: We are a participant in the Amazon Services LLC Associates Program, an affiliate advertising program designed to provide a means for us to earn fees by linking to Amazon .com and affiliated sites. We are a ThermoWorks affiliate, earning a small commission at no cost to you on purchases made through our links. This helps cover some of the costs of running the blog. Thank you for your support.

Jean

If you liked this post, please Pin it and share it!

05 August 2021

Summer Peach Cake

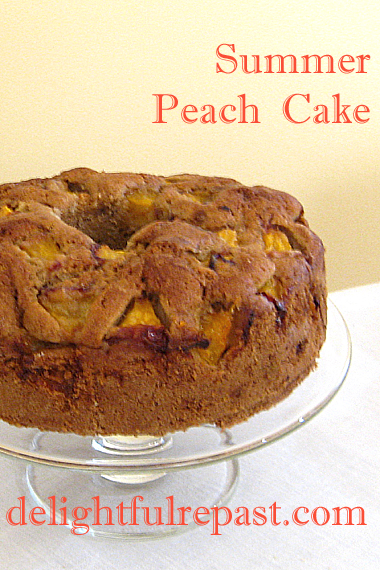
Summer Peach Cake / www.delightfulrepast.com

It's the height of summer, it's hot, but bake I must! After being out of commission following hand surgery, I simply had to bake at the first opportunity. And what better to bake than something with peaches (or nectarines), my favorite summer fruit.

But I needed to break-in the hand with something easy-breezy, no-muss-no-fuss, which means no machines, no peeling, no laborious whisking, just stir up the simple ingredients and throw it in the oven!

The only thing I really like about summer is the summer fruit! And, while I might occasionally enjoy the mild flavor of a white peach or nectarine on its own, the yellow varieties are much better in cakes and pies. And please don't peel them. The peel adds color and makes it even prettier.


Summer Peach Cake (this image, my original watercolor of a yellow peach) / www.delightfulrepast.com
Loved painting this perfectly ripe yellow peach; it smelled soooo good!


I developed this recipe for a 7-inch springform or push-bottom pan (also called a cheesecake pan). And I use an Ateco Stainless Steel 2x3-inches-high Round Form that turns any pan into a tube pan to prevent those center-of-the-cake baking challenges of deep pans and/or heavy batters, but I've also made the cake without it.

Thank you for all your good wishes on my hand surgery. I hope you're enjoying a beautiful summer and will make this, or something peachy, before they're gone. I love peach anything, but I am particularly fond of Peach Pie with Lattice Crust. How about you?


Summer Peach Cake / www.delightfulrepast.com

If you like it, please Pin it and share it!

Summer Peach Cake


(Makes one 7-inch cake)

1 stick (4 ounces/113 grams) unsalted butter, melted
1 1/4 dip-and-sweep cups (6.25 ounces/177 grams) unbleached all-purpose flour
2/3 cup (4.67 ounces/132 grams) sugar
1 teaspoon non-GMO baking powder
1/2 teaspoon baking soda
1/2 teaspoon salt
3/4 teaspoon cinnamon
1/8 teaspoon mace or nutmeg
2 large eggs, room temperature
1 pound (16 ounces/454 grams/2 large) yellow peaches or nectarines, cut into 1/2-inch chunks
1 tablespoon dark brown sugar

1 Grease well and flour a 7-inch springform or push-bottom pan. I use my Ateco Stainless Steel 2x3-inches-high Round Form to turn my 3-inch deep 7-inch pan into a tube pan to prevent those center-of-the-cake baking challenges of deep pans and/or heavy batters like this. Just grease and flour it and center it in the pan and hold it steady while you fill in the batter around it. Preheat oven to 350F/180C/Gas4. Melt the butter and set aside to cool. 

Tip: A circle of baking parchment in the bottom of the pan is always good, though I forgot to do it today.

2 In 2- to 3-quart bowl, combine flour, sugar, baking powder, baking soda, salt, cinnamon, and mace or nutmeg. Whisk together well to "sift."

3 Scrub well—don't peel—and dice the ripe but firm peaches or nectarines into a small mixing bowl; set aside. You'll have about 3 cups. Take out 1 cup of the fruit to put on the top.

Note: I almost never peel organic peaches. I just wash them very well and rub off the fuzz. The colorful skin adds nutrition and a beautiful color to whatever you're making.

4 Add the eggs and cooled melted butter to the flour mixture. With a large spoon, beat well until thoroughly combined. Stir the fruit (except the 1 cup) into the batter.

5 Scrape the thick batter into prepared pan, press down and smooth the top, and press the reserved cup of diced fruit into the top of the batter. Sprinkle with the brown sugar. Bake for about 65 to 75 minutes, until it passes "the toothpick test" or is pulling away from the sides of the pan a bit. Do not underbake!

Note: I love this TimeStack quad timer sooooo much!

6 Cool in pan on wire rack for 10 minutes, then turn cake out of pan right side up and continue cooling on wire rack for 2 hours. If you remembered to use a circle of parchment, it will be much easier to lift the cake off the springform pan bottom! Before serving, you might give it a dusting of powdered sugar. And a little whipped cream is never a bad idea.

Disclosure: We are a participant in the Amazon Services LLC Associates Program, an affiliate advertising program designed to provide a means for us to earn fees by linking to Amazon .com and affiliated sites. We are a ThermoWorks affiliate, earning a small commission at no cost to you on purchases made through our links. This helps cover some of the costs of running the blog. Thank you for your support.

Jean