Showing posts with label desserts. Show all posts

27 February 2025

Tiramisu - A Classic Italian Dessert

Tiramisu - A Classic Italian Dessert / www.delightfulrepast.com

Hadn't made tiramisu in a few years, but when a friend asked me to bring a dessert to her Italian-themed dinner, well ... It's my favorite Italian dessert, but I often have to say No to it because so many people make it with raw eggs. Not a problem for many people, but it is for me. So if I am craving tiramisu, I have to make it myself.

It's one of those desserts that never fails to impress because people seem to think it's difficult. But it's really easy (though not what you'd call quick), so I'm going to start making it more often. Sure, cooking the egg yolks is an extra step, but no problem. And I have a number of uses for the egg whites, so they won't go to waste: Angel Food Loaf Cake, Financiers and Visitandines, my Wonderful White Cupcakes (the 6 egg whites will make a double batch).

Sooooo sorry there are no photos this time. Yet. Never in my 15 years of blogging (Yes, I just had my 15th blogiversary this month!), never, have I put up a post without photos! But time got away from me and I wasn't going to be able to do any individual serving photos because I wasn't serving it at home, so ... But I'll be making up a half-recipe soon and will take photos and add them to the post. In the meantime, if you read every word, you'll be able to picture it in your mind. It's pretty!

As you can see now, a week or so later, I've made a half-batch of my recipe and taken photos! Yay, me!

If you've ever made zabaglione or sabayon, it's the same process. But I'll include the step-by-step in the directions below for those who haven't. The store-bought Italian savoiardi ladyfinger cookies are a must. They are crunchy, unlike "regular" ladyfingers that you can make or buy in some grocery stores. Those ladyfingers will get soggy in a tiramisu.

Not finding any locally, I turned to Amazon and found these Italian savoiardi ladyfingers that turned out to be the perfect choice. The package contains 5 individual packages of 12. Their size means that 20 of them make a perfect layer in my Pyrex 13x9x2-inch baking dish, and my recipe calls for 2 layers, leaving 20 cookies for another use, like enjoying with a cup of tea or making a half-recipe.

For the half-recipe, I used this Pyrex 11-cup rectangular storage dish with lid, which took precisely all 20 of my leftover ladyfingers!

Tiramisu - A Classic Italian Dessert / www.delightfulrepast.com

If you like it, please Pin it and share it!
 

Tiramisu 

(Makes one 13x9x2-inch cake/16 servings)

6 large egg yolks, whites reserved for another use
2 8-ounce (total 16 ounces/454 grams) containers mascarpone 
3 cups (24 fluid ounces/710 ml) double-strength coffee
3 tablespoons (1.5 fluid ounce/44 ml) coffee liqueur, optional
2/3 cup (4.67 ounces/132 grams) sugar
2 tablespoons (1 fluid ounce/30 ml) rum or coffee liqueur, optional
1 teaspoon vanilla extract
1/4 teaspoon salt
1 1/2 cups (12 fluid ounces/355 ml) heavy whipping cream, very cold
About 40 savoiardi biscuits or ladyfingers (or enough to make 2 layers)*
3 tablespoons unsweetened cocoa powder, divided

* Savoiardi biscuits and ladyfingers come in various sizes, so before you start, see how many it takes to make a layer of them in your 13x9x2 baking dish, if you don't already know. And, double it, of course, because there are two layers.
 
1 Make the day before; it needs to chill for at least 8 hours or so and up to a bit over 24 (my preference). It is easier to separate eggs while they are cold. Break the eggs, putting the whites in a small bowl to store in the refrigerator for another purpose and the yolks in the heatproof bowl you'll be cooking them in. I use the 1.5-quart in this Pyrex mixing bowl set. Cover the bowl and allow the yolks to warm up a bit. Also, bring out the mascarpone and put it in a larger mixing bowl. I use the 2.5-quart Pyrex mixing bowl. Let both items come to room temperature, 30 minutes to not more than 1 hour.

2 In a 1-quart bowl just wide enough to dip horizontally whatever ladyfingers you're using, stir together the double-strength coffee and coffee liqueur. 

Note: Making 3 cups of coffee mixture will leave you with a little left over (cook's treat!), but you'll need to make 3 cups for, well, dipping purposes. It really depends on the shape of your bowl. Measure how much coffee mixture you have left over, and reduce by nearly that amount next time you make it.
 
3 In a 2- to 3-quart saucepan, bring an inch or so of water to a simmer. The water must not be deep enough to touch the bottom of the heatproof glass or stainless bowl you'll be cooking the egg mixture in. 

4 With a whisk or a hand mixer on low speed, beat the yolks just until smooth. Add the sugar and rum or coffee liqueur (if using); whisk until the mixture becomes pale yellow. Place the bowl over the saucepan of gently simmering water. Whisk gently or beat with a hand mixer on low speed until thickened and registering 160 to 175F/71 to 79C on an instant-read thermometer. Remove from heat immediately and whisk in the vanilla extract and salt. Scrape the custard into another bowl (a chilled bowl might be nice!) to help it cool. Continue to cool for 15 minutes or so to room temperature.

5 Stir the mascarpone just a bit. Pour the room temperature egg yolk mixture into the mascarpone; whisk gently just until combined.

6 In a separate chilled bowl (yes, there are 3 mixing bowls involved in this!), whip the cream until it reaches stiff peaks. Add the whipped cream, a third at a time, to mascarpone mixture, folding gently with a silicone spatula so as not to knock the air out of it.

7 Now it's time to assemble. One ladyfinger at a time, form the first layer, giving each ladyfinger a quick horizontal dip in the coffee on both sides (just half a second per side or they will be soggy). Evenly spread on half the mascarpone cream. Smooth the top and sift 1 tablespoon the unsweetened cocoa powder evenly over the cream. Add a second layer of quickly dipped ladyfingers. Top with remaining mascarpone cream. Smooth the top, clean the edge of the dish, and cover the baking dish. Refrigerate for at least 8 hours or overnight, up to 24 hours or so.

8 When ready to serve, sift the remaining cocoa powder evenly on top. This is a rich dessert, so I cut it into 16 squares. When I made the half-batch I cut it into 12 even smaller squares and used this handy set of two small spatulas to serve it. 

Disclosure: We are a participant in the Amazon Services LLC Associates Program, an affiliate advertising program designed to provide a means for us to earn fees by linking to Amazon .com at no cost to you on purchases made through our links. This helps cover some of the costs of running the blog. Thank you for your support. 

Jean 

12 January 2023

Lemon Cakes with Raspberry Sauce

Lemon Cakes with Raspberry Sauce / www.delightfulrepast.com

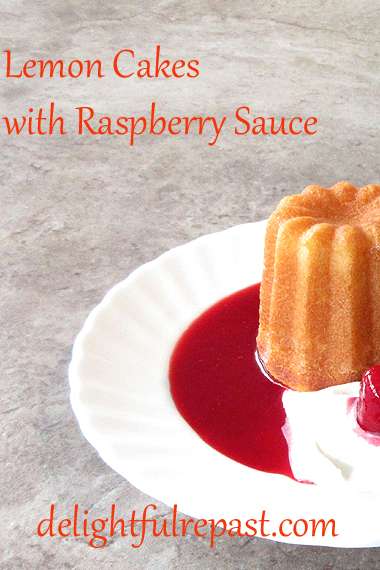
Lemon Cakes—or Lemon Cupcakes, if you don't have the 
cannelés pan—look a little "dressy" without having to go to the mess and bother of making icing and getting out the piping bag and all that. Making a little batch of raspberry sauce is a doddle.

I was in the mood for Lemon Drizzle Cake, but I wanted to experiment with other uses for my new cannelés pan that has barely had time to cool off in the month I've had it. It has turned out batch after batch of perfect Cannelés

Anticipating my 13th blogiversary next month here at Delightful Repast, I was in the mood for something a little special, a little festive. Lemon Cakes with Raspberry Sauce and Whipped Cream filled the bill nicely. I hope you'll make them soon.


Lemon Cakes with Raspberry Sauce / www.delightfulrepast.com


For the first ten years of Delightful Repast, I posted every Thursday. Then I went to every other Thursday, then every third Thursday. Well, I'm going to reward myself for keeping this lark going for 13 years by going to monthly posting, the second Thursday of every month. 

I hope you'll carry on with me monthly, marking it on your calendar or however you remind yourself of things. Or just come back every week and read one of more than 600 posts. Wishing you a delightful 2023!


Lemon Cakes with Raspberry Sauce / www.delightfulrepast.com

If you like it, please Pin it and share it!


Lemon Cakes


(Makes 12)

1 large egg, room temperature
1 large egg white, room temperature
1/2 cup (4 fluid ounces/118 ml) milk, divided
1 teaspoon vanilla extract
1 dip-and-sweep cup (5 ounces/142 grams) unbleached all-purpose flour
3/4 cup (5.25 ounces/149 grams) sugar
2 teaspoons baking powder
1/4 teaspoon salt
5 tablespoons (2.5 ounces/71 grams) unsalted butter, room temperature
1 1/2 teaspoons freshly squeezed lemon juice
1 1/2 teaspoons grated lemon zest

1 Preheat oven to 350F/180C/Gas4. Prepare* the cannelés pan. Or put 2½-inch paper bake cups in a standard muffin tin. In small bowl, lightly combine the egg and yolk, a quarter of the milk, and the vanilla extract.

* You can use a baking spray—not a cooking spray—that contains flour or do what I do: grease (with Crisco shortening) and flour each of the 12 molds. Cooking sprays cause a gummy film to eventually build up on nonstick pans and ruins them. 

2 In medium mixing bowl, combine all the dry ingredients and mix on low speed for a minute to "sift." Add the softened butter and remaining milk. Mix on low speed until combined. With mixer on medium-high speed, beat for a minute and a half. Scrape the bowl.

3 Beat in the egg mixture in three batches, beating for 20 seconds after each addition. Scrape the bowl and, with spatula, stir in lemon juice and zest (I do it by hand because zest tends to get tangled up in the beaters).

4 Using a 1/4-cup measure as a scoop, divide the batter evenly among the 12 molds. Fill each with a scant (or level) 1/4 cup of batter, then scrape the bowl and spoon it in. Bake for about 20 to 22 minutes or until they are golden and one in the center tests done with a toothpick.

5 Cool in the cannelés pan for 5 minutes before turning them out to cool completely on a wire rack for an hour.


Raspberry Sauce


(Makes about 3/4 cup)

1 10-ounce package frozen whole raspberries unsweetened
1/4 cup (1.75 ounces/50 grams) sugar
1/4 cup (2 fluid ounces/59 ml) water
1 tablespoon (0.5 fluid ounce/15 ml) freshly squeezed lemon juice

1 In a small saucepan over medium heat, bring all the ingredients to a boil for 2 minutes, then reduce heat and simmer for 10 minutes, all the while stirring frequently.

2 With a silicone spatula, press the sauce through a fine-mesh strainer to remove the seeds. Cover and cool to room temperature, then refrigerate for at least an hour.

Disclosure: We are a participant in the Amazon Services LLC Associates Program, an affiliate advertising program designed to provide a means for us to earn fees by linking to Amazon .com and affiliated sites. We are a ThermoWorks affiliate, earning a small commission at no cost to you on purchases made through our links. This helps cover some of the costs of running the blog. Thank you for your support.

Jean

If you liked this post, please Pin it and share it! 

16 December 2022

Cannelés - A Small French Pastry That Originated in Bordeaux

Canneles - A Small French Pastry That Originated in Bordeaux / www.delightfulrepast.com

Cannelés
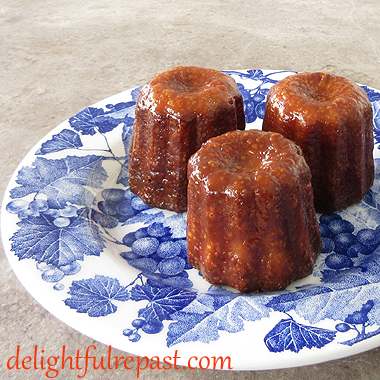
(sometimes spelled canelés, and pronounced CANuhLEE, actually not quite LEE and not quite LAY) have been on my must-make list for literally (and I don't use that word lightly) decades. 

But every time they occur to me happens to coincide with a time when I am trying mightily to not add another specialty item to my batterie de cuisine collection! Some of you know what I'm talking about, right?

As recently as perhaps 15 years ago, I would have only been satisfied with the very pricey individual tin-lined copper molds and would have gone to great lengths to procure food-grade beeswax to coat the interiors, etc, etc. Well, I am soooo over all that!

When my latest reminder of cannelés came from David at Cocoa and Lavender, well, I could hold out no longer and ordered the same pan he recently acquired. He started his blog at the same time I did, with recipes ranging from simple to complex, like mine; and a love of food that, like mine, goes back to his childhood and his mother's amazing cooking. He also has an allergy, like mine, to garlic! So naturally I assumed that I could trust his choice of cannelés molds.


Canneles - A Small French Pastry That Originated in Bordeaux / www.delightfulrepast.com


So I ordered a pan and started digging through my files, remembering that I had come up with a recipe many years ago that was a mishmash of ones I had looked at and added my own touches to. The main differences between recipes is in the baking time and temperature. 

Most call for at least the first 10 to 20 minutes at a very high (some as high as 500F/260C/Gas10) temperature. One recipe said to bake at 400F/205C/Gas6) for 2 hours! Really?! 

Every recipe I've seen calls for way more sugar than I like. First batch I made, I cut the sugar to 3/4 cup but found them still a bit too sweet (you won't!), so next time I went to 1/2 cup. It was plenty sweet enough for me, but it made the texture all wrong, no longer cannelés, so I'm going to stick with my original 3/4 cup.

One type of cannelés molds I never considered is the silicone. I have never tried a silicone baking "pan" of any kind. They just do not appeal to me in any way. If you like them, fine. But I just, no, just, no. A baking tin, or pan, should not be squishy!

A delightful after-dinner dessert or coffee go-with, cannelés are perfect for the afternoon tea table, along with Fruit Tartlets and petite Cream Puffs.  

So tell me, have you ever made cannelés? What kind of molds—silicone, tin-lined copper, other metal? What degree of caramelization do you prefer—golden, light brown, dark brown, black?


Canneles - A Small French Pastry That Originated in Bordeaux / www.delightfulrepast.com

If you like it, please Pin it and share it!

Cannelés


(Makes 12, if you're using the same size molds)

2 cups (16 fluid ounces/473 ml) milk
3 tablespoons (1.5 ounces/43 grams) unsalted butter
3/4 dip-and-sweep cup (5.25 ounces/106 grams) unbleached all-purpose flour
3/4 cup (5.25 ounces/149 grams) sugar
1/4 teaspoon salt
2 large eggs (medium, in UK and some other places)
2 large egg yolks
1/4 cup (2 fluid ounces/59 ml) dark rum
2 teaspoons vanilla extract

1 In 1-quart saucepan, heat the milk and butter until the butter is melted and the milk is up to a simmer; do not boil.

2 In medium mixing bowl, whisk together the flour, sugar, and salt vigorously for 1 minute to "sift."

3 Add the eggs, yolks, rum, and vanilla extract to the flour mixture and whisk vigorously until smooth. When smooth, whisk in the hot milk a third at a time. This ensures a lump-free batter that doesn't need straining.

4 Cover and refrigerate for 24 to 72 hours.

5 When ready to bake, put a sheet of aluminum foil on the shelf beneath the shelf you'll be placing the pan on (the foil will catch any butter drips) and preheat oven to 425F/220C/Gas7. In small bowl (microwave) or pan (stovetop), melt 2 teaspoons of solid shortening* and brush the molds with it.

* I keep a stick of Crisco in my refrigerator strictly for greasing certain pans. Many pans do a great job of releasing cakes that have been buttered, buttered and floured, oiled, or sprayed. But for pans that are molds (such as these and Bundt cakes), shortening always gives me a good result and does not gum up the pan as some oils do.

6 Whisk the batter a bit. If a skin has formed, just whisk it in. Fill each mold to within about 3/8 inch (1 cm) of the top.

Note: For this pan, I use a 1/3-cup measuring cup as a ladle to fill the molds with the 1/4 cup of batter they need. Using a 1/4-cup measuring cup as a ladle actually fills them with less than 1/4 cup due to the concave meniscus of the liquid (or something like that!). 

7 Place the cannelés pan in the preheated oven. Bake for 20 minutes, then reduce heat to 375F/190C/Gas5 and bake for about 50 to 60 minutes, or until they are as deeply caramelized as you like them. Some people go for nearly black. Rotate pan halfway through for more even baking.

8 Turn the cannelés out onto a wire rack to cool. If any of the cannelés are not adequately or evenly caramelized, set them right side up on a small baking sheet and return them to the oven for 5 minutes or so. Allow them to cool for 2 hours before serving. This allows time for the exterior to crisp and the interior to set to the proper consistency. The crispy exterior will last for perhaps 6 hours. After that it will soften, and the cannelés will still be delicious but the characteristic crunch will be gone. They can be reheated and left to cool again to refresh them.

* Pan details: ChefMade WK9158 carbon steel 12-cup nonstick cannele mould, oven safe up to 450F/230C/Gas8, handwash only, made in China.

Disclosure: We are a participant in the Amazon Services LLC Associates Program, an affiliate advertising program designed to provide a means for us to earn fees by linking to Amazon .com and affiliated sites. We are a ThermoWorks affiliate, earning a small commission at no cost to you on purchases made through our links. This helps cover some of the costs of running the blog. Thank you for your support.

Jean

If you liked this post, please Pin it and share it!

26 May 2022

Chocolate Tart - Tarte au Chocolat

Chocolate Tart - Tarte au Chocolat / www.delightfulrepast.com

Mr Delightful doesn't usually comment on food when we're watching a movie or video, but he did so when a travel vlogger was eating and describing a chocolate dessert on a train journey. So I knew it had been too long since I'd made a Chocolate Tart.

I've made it with chocolate pastry before, but to me that is overkill. A filling with this much chocolate does not need a chocolate crust. To fancy it up for a dinner party, I might garnish with a bit of whipped cream and a few raspberries; but they are not needed and I've photographed for you the plain-jane slice that can stand alone.

Not just intensely chocolatey, this tart is ethereally light. Take a bite, put it in your mouth and the chocolate filling seems to disappear in your mouth. I hope you'll try it soon and let me know if you agree!


Chocolate Tart - Tarte au Chocolat / www.delightfulrepast.com

If you like it, please Pin it and share it!


Chocolate Tart - Tarte au Chocolat


(Makes one 9-inch/23cm tart, 8 servings)

The Pastry - Pâte Sucrée (a sweet shortcrust pastry)

1 1/4 dip-and-sweep cups (6.25 ounces/177 grams) unbleached all-purpose flour
1/4 packed cup (1 ounce/28 grams) unsifted powdered sugar
1/4 teaspoon salt
8 tablespoons (4 ounces/113 grams) cold unsalted butter, cut into 1/2-inch cubes
1 large egg

The Filling

1 3/4 sticks (7 ounces/198 grams) unsalted butter, cut into 7 chunks
10.5 ounces (298 grams) bittersweet (68 to 78%) chocolate, coarsely chopped
1/8 teaspoon salt
3 large eggs, room temperature
2 large egg yolks, room temperature
1/3 cup (2.33 ounces/66 grams) sugar


1 Add flour, powdered sugar and salt to work bowl of food processor; turn on for about 3 or 4 seconds to combine. Add chunks of butter; pulse to a crumb texture. Add egg; pulse until the dough starts clumping together. This is to be a crisp, more cookie-like crust, rather than a flaky pastry; so there's not quite the concern about over-processing. Flatten slightly into a 5-inch round disk, wrap and refrigerate for 30 to 60 minutes.

2 Lightly butter a 9-inch/23cm tart tin and set it on a baking sheet. On lightly floured 12-inch square of aluminum foil, roll out the pastry to a 12-inch circle. Transfer dough to tart tin, pressing dough (but not stretching it) to fit the tin. Save the foil; you're not done with it. With scissors or knife, trim the overhang to 1/2 inch all around. Fold it in and press it to the sides to form a thicker side crust. Trim the edges by rolling the rolling pin over the top. Press the pastry into the flutes so that it rises a bit above the edge (in case of shrinkage). Pop it in the freezer for 15 minutes while you preheat the oven to 375F/190C/Gas5.

3 Cover chilled pastry with reserved piece of foil, clean side up, pressing it to fit well. Spread 2 cups of ceramic pie weights (that's two packages of Mrs. Anderson's ceramic pie weights) over the foil. Bake for 15 minutes. Remove foil and weights; continue baking for 10 minutes, until lightly browned to a pale golden.

4 While the pastry is baking, start the filling. In a heavy-bottomed 3-quart saucepan over medium-low heat, heat the butter until melted and small bubbles begin to form around the edge. Remove from heat; add the chopped chocolate and stir until thoroughly smooth. Stir in salt. The melted mixture needs to be tepid when you fold in the egg mixture. If at some point it begins to solidify a bit, you might need to apply a bit of low heat just to thin the mixture, not warm it.

5 Remove tart shell from the oven and turn the temperature down to 325F/165C/Gas3. While the pastry is cooling, continue with the filling. In a 2-quart bowl, beat the eggs, egg yolks, and sugar with an electric mixer on high speed for about 10 minutes, until the mixture is light and airy and doubled or tripled in volume. You may also use a heavy-duty stand mixer with the whisk attachment, and it may take less time.

6 Fold about a third of the egg mixture into the chocolate mixture, gently but rather thoroughly. Then very gently fold in the remaining egg mixture, just until no visible streaks of egg remain. Try not to deflate the eggs.

7 Pour filling into prebaked pastry shell. Bake (with tart tin on baking sheet) for about 25 minutes, until just set but still with a bit of a wobble. Do not overbake. Cool on wire rack at room temperature for at least 2 hours. If you make it a day or two ahead, refrigerate it until 2 hours before serving time; allow it to come to room temperature. Cut into 8 to 12 wedges and serve with a dollop of unsweetened or barely sweetened whipped cream.

Disclosure: We are a participant in the Amazon Services LLC Associates Program, an affiliate advertising program designed to provide a means for us to earn fees by linking to Amazon .com and affiliated sites. We are a ThermoWorks affiliate, earning a small commission at no cost to you on purchases made through our links. This helps cover some of the costs of running the blog. Thank you for your support.

Jean

If you liked this post, please Pin it and share it!

28 April 2022

Swedish Pancakes - Pannkakor

Swedish Pancakes - Pannkakor / www.delightfulrepast.com

Swedish pancakes came about because a friend asked if I could pick up an order of Swedish pancakes from a local restaurant for her visiting grandchildren because it was one of their favorites. And I, of course, said "Why don't I just make some?"

So I read all about how they differed from crepes and then adjusted my carefully formulated crepes recipe accordingly. Some people use no sugar in Swedish pancakes, but others use crazy amounts of the stuff! Let me assure you the lone half tablespoon of sugar in my recipe is plenty for a sweet pancake.

Lingonberry jam is the traditional accompaniment and cannot be improved upon. The small sour berries make a delightfully tart jam that goes so well with a meal of Swedish meatballs as well as with Swedish pancakes. Some say it is raspberry jam that is "authentic."

But any berry jam will work. That and a light dusting of powdered sugar and a little whipped cream never go amiss. Wonderful for breakfast, but also great for dessert. In fact, they are the dessert following pea soup for a traditional Thursday night Swedish dinner.

And my British readers will notice straight away that Swedish pancakes themselves are the same as British pancakes! But the traditional accompaniment to British pancakes is a tiny sprinkle of sugar and a squeeze of lemon. Scrummy!

Do leave a comment and tell me about your favorite pancakes—Swedish, British, American, or otherwise—because I love them all! 


Swedish Pancakes - Pannkakor / www.delightfulrepast.com

If you like it, please Pin it and share it!

Swedish Pancakes - Pannkakor


(Makes 12 8-inch pancakes)

1 2/3 dip-and-sweep cups (8.33 ounces/236 grams) unbleached all-purpose flour
1 1/2 teaspoons sugar
1/2 teaspoon salt
3 large eggs
2 1/4 cups (18 fluid ounces/532 ml) milk
2 tablespoons (1 ounce/28 grams) unsalted butter, melted and slightly cooled

1 In 1-quart glass measure, vigorously whisk together flour, sugar, and salt.

2 In a bowl, whisk eggs together, then whisk in milk and melted butter.

3 To get a really smooth batter, whisk no more than half the milk mixture into the flour mixture until smooth before adding the rest. Whisk well. The batter (about 4 cups) should be about as thick as heavy cream. Cover and refrigerate for at least 1 hour or up to 24 hours.

4 Use a 10-inch nonstick fry pan (I love this tri-ply stainless steel pan!) with flared (not straight) sides to make 8-inch pancakes. Put a tiny piece of butter in the pan and brush it around as it melts. Heat the pan over medium heat until it is thoroughly heated (droplets of water sprinkled onto the pan will sizzle and disappear immediately), about 3 minutes, depending on your pan and your stove. 

Tip: People are always saying the first pancake is just a tester. But your very first pancake will be perfect if you just have the patience to heat your pan properly. Don't waste your batter in an insufficiently heated pan. And remember to gently stir the batter before using it. Give it a stir before each pancake. Tender and seemingly delicate, the pancakes are really quite easy to handle.

5 Here it is now, The Swirl: Holding pan off heat, quickly pour into the center of the pan 1/3 cup of batter, and immediately begin swirling, tilting and rolling, the pan until the batter covers the bottom of the pan evenly. Cook until lightly browned on the bottom and looking dry on the top, particularly the edge. The time will vary, depending on your pan and your stove; 1 to 1 1/2 minutes is about right for mine. Using both hands, lift the edge with your fingers and turn it over. The second side will need less time, about half, to cook.

Tip: I use a 1/3-cup measure, from my stainless steel measuring cup set, for just the right amount of batter. And I use a mini silicone spatula to start lifting the edge, then take hold of it with the thumb and index finger of both hands and quickly flip it over. To remove the finished pancake from the pan, just tilt it over the plate you're stacking them on and let it slide out.

6 Repeat until all the batter is used. This recipe makes precisely enough batter for 12 pancakes. For immediate use, stack pancakes and keep covered. Or stack on a plate and store, wrapped, in the refrigerator until ready to use, up to 2 or 3 days; may also be frozen for up to 2 months. Allow frozen pancakes to thaw completely before unwrapping, separating, and reheating.

7 Serve with lingonberry jam or another type of berry jam, a dusting of powdered sugar, a dollop of whipped cream, or whatever you like.

Disclosure: We are a participant in the Amazon Services LLC Associates Program, an affiliate advertising program designed to provide a means for us to earn fees by linking to Amazon .com and affiliated sites. We are a ThermoWorks affiliate, earning a small commission at no cost to you on purchases made through our links. This helps cover some of the costs of running the blog. Thank you for your support. 

Jean
If you liked this post, please Pin it and share it!

17 February 2022

Chocolate Cream Pie

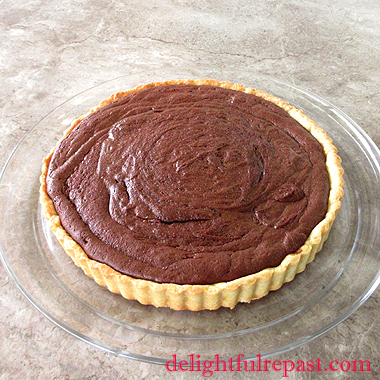
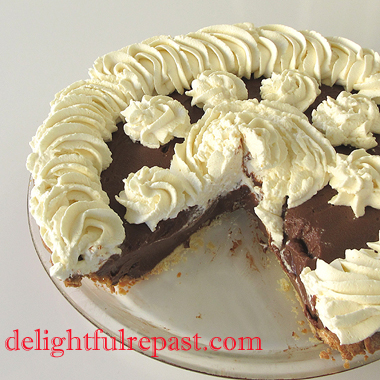
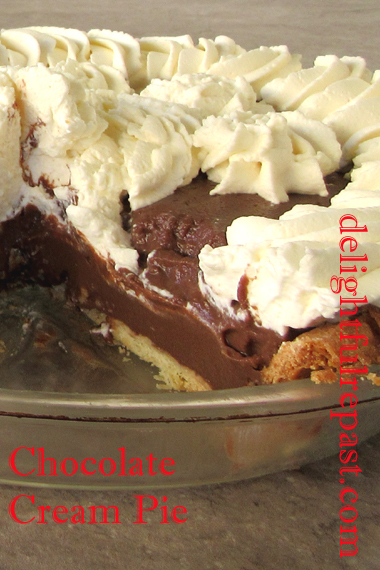
Chocolate Cream Pie - Made with Cocoa / www.delightfulrepast.com

Chocolate Cream Pie turned up on my to-do list when a friend told me she had been craving it, didn't have a good recipe, and couldn't find a single restaurant in town that made a good one.

You'll see recipes that call for huge amounts of expensive dark chocolate. I've had those pies, and they're good. But I make mine with cocoa and it gets raves.

I developed my recipe many years ago when I was a chocolate fan but haven't made it in several years. I made it for my friend this week and she loved it, so I'm posting it on the blog.

Speaking of the blog, this week is my 12th blogiversary. For 10 years I posted every week, and for 2 years every other week. I had no idea when I started Delightful Repast that I would still be doing it 12 years later!

Do leave a comment about pie or anything at all. I hope, wherever you are, you're enjoying life each day despite the difficulties. 
 

Chocolate Cream Pie - Made with Cocoa / www.delightfulrepast.com

If you like it, please Pin it and share it!

Chocolate Cream Pie 


(Makes one 9-inch/23cm pie, 8 servings) 

The Pastry - Pâte Sucrée (a sweet shortcrust pastry) 

1 1/4 dip-and-sweep cups (6.25 ounces/177 grams) unbleached all-purpose flour
1/4 packed cup (1 ounce/28 grams) unsifted powdered sugar 
1/4 teaspoon salt 
8 tablespoons (4 ounces/113 grams) cold unsalted butter, cut into 1/2-inch cubes
1 large egg
1/2 teaspoon vanilla extract, optional

The Custard

3 cups (24 fluid ounces/710 ml) whole or 2% milk
1 cup (7 ounces/198 grams) sugar 
1/2 packed cup (1.5 ounces/42 grams) natural unsweetened cocoa
1/3 dip-and-sweep cup plus 1 tablespoon (2 ounces/57 grams) unbleached all-purpose flour
1/4 teaspoon salt
3 large eggs
2 tablespoons (1 fluid ounce/30 ml) Kahlua or triple-strength coffee*
3 tablespoons (1.5 ounces/43 grams) unsalted butter, cold
2 teaspoons vanilla extract

* For triple-strength coffee, I put a tablespoon of ground coffee in a one-cup paper filter and pour over 1/4 cup boiled water. (I don't really know if that's precisely "triple-strength," but that's what I decided to call it!

The Whipped Cream

1 1/2 cups (12 fluid ounces/355 ml) heavy whipping cream
2 tablespoons sugar
1 teaspoon vanilla extract


1 Add flour, powdered sugar, and salt to work bowl of food processor; turn on for about 3 or 4 seconds to combine. Add chunks of butter; pulse to a crumb texture, leaving some visible chunks of butter. Add egg and vanilla extract; pulse until the dough starts clumping together. This is to be a crisp, more cookie-like crust, rather than a flaky pastry, so there's not quite the concern about over-processing. Flatten slightly into a 5-inch round disk, wrap in square of plastic wrap and refrigerate for 30 to 60 minutes.

2 Very lightly butter a 9-inch glass pie plate; I usually just run the butter wrapper over it. On a lightly floured piece of parchment, roll out disk to a 13-inch circle about 1/8 inch thick. Place pastry in pie plate, being careful to not stretch the dough. Leave a 1-inch overhang of dough. Crimp and flute the edge. (Sometimes you need to chill the pastry a bit before crimping.) Cover loosely with the piece of plastic wrap and place in freezer for 15 minutes. Preheat oven to 375F/190C/Gas5.

3 Fit a square of baking parchment paper that has been crumpled into a ball then opened, or aluminum foil, in the shell and fill with ceramic pie weights (baking beans). Set on a rimmed baking sheet (to catch any butter drips). Bake the thoroughly chilled crust for 15 minutes, then remove the foil and pie weights, pop on the pie crust shield and bake for another 15 minutes.

Note: I use two boxes of the ceramic pie weights, and they just fit nicely into a 200-gram tea tin. If you're not a loose leaf tea drinker, though, a quart canning jar works.

4 Remove fully pre-baked pie shell from the oven; let cool completely before filling, at least 30 minutes or hours ahead, whatever suits your schedule.

Note: I have the Le Creuset stainless steel 3.5-quart saucier, but they seem to be out of stock. Here is an alternative, and it is less expensive: Demeyere 5-ply stainless steel 3.5-quart saucier. A saucier is far better than a straight-sided saucepan for making custards and sauces. No "corners" that your whisk can't reach! 

5 Make filling while pie shell is cooling. In 2-quart saucepan, heat the milk just to a simmer. (If you don't heat the milk, the custard will take three times longer.) In heavy-bottomed 3.5-quart saucier or 3-quart saucepan, whisk together sugar, cocoa, flour, and salt. Whisk in eggs and Kahlua or coffee until thoroughly combined. Gradually add hot milk, whisking constantly. Cook over medium-high heat, whisking constantly, until you see bubbles forming at the edge and the mixture thickening, about 5 minutes or so. Custard should be very thick, with the whisk leaving trails.

Note: Food safety guidelines are that any mixture with eggs should be cooked until it registers 160F/72C on instant-read thermometer.

6 Remove from heat. Whisk in cold butter and vanilla extract until butter is completely melted. Let cool at room temperature for 15 minutes, whisking occasionally, before whisking well and pouring into pie shell. Pour into cooled crust and smooth top. Press a piece of plastic wrap or a circle of parchment onto the surface of the custard and let cool at room temperature for 30 to 60 minutes, until cool; place in refrigerator for at least 6 hours or up to 24 hours before piping on the whipped cream, garnishing, and serving.

7 With a mixer, beat cold cream, sugar, and vanilla extract on medium speed. Pay attention when you start to see the cream thickening. Continue to beat at medium speed, watching for the soft peaks stage, then the firm peaks stage. If you're just spreading the whipped cream on the pie, stop there. If you want to pipe the whipped cream, beat to the stiff peaks stage. Pay close attention at every stage; it can turn to butter before you know it!

8 With a pastry bag fitted with a 2D tip or 1M tip, pipe rosettes of whipped cream onto pie.

Disclosure: We are a participant in the Amazon Services LLC Associates Program, an affiliate advertising program designed to provide a means for us to earn fees by linking to Amazon .com and affiliated sites. We are a ThermoWorks affiliate, earning a small commission at no cost to you on purchases made through our links. This helps cover some of the costs of running the blog. Thank you for your support. 

Jean

If you liked this post, please Pin it and share it!

05 August 2021

Summer Peach Cake

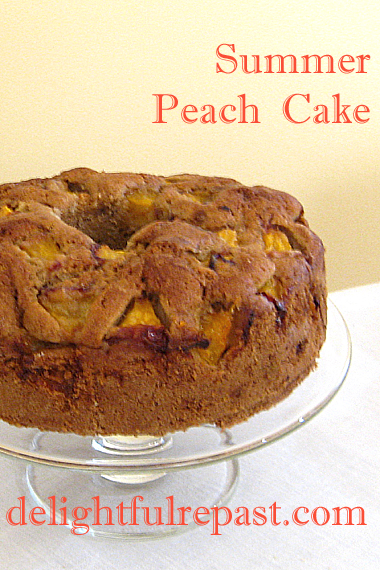
Summer Peach Cake / www.delightfulrepast.com

It's the height of summer, it's hot, but bake I must! After being out of commission following hand surgery, I simply had to bake at the first opportunity. And what better to bake than something with peaches (or nectarines), my favorite summer fruit.

But I needed to break-in the hand with something easy-breezy, no-muss-no-fuss, which means no machines, no peeling, no laborious whisking, just stir up the simple ingredients and throw it in the oven!

The only thing I really like about summer is the summer fruit! And, while I might occasionally enjoy the mild flavor of a white peach or nectarine on its own, the yellow varieties are much better in cakes and pies. And please don't peel them. The peel adds color and makes it even prettier.


Summer Peach Cake (this image, my original watercolor of a yellow peach) / www.delightfulrepast.com
Loved painting this perfectly ripe yellow peach; it smelled soooo good!


I developed this recipe for a 7-inch springform or push-bottom pan (also called a cheesecake pan). And I use an Ateco Stainless Steel 2x3-inches-high Round Form that turns any pan into a tube pan to prevent those center-of-the-cake baking challenges of deep pans and/or heavy batters, but I've also made the cake without it.

Thank you for all your good wishes on my hand surgery. I hope you're enjoying a beautiful summer and will make this, or something peachy, before they're gone. I love peach anything, but I am particularly fond of Peach Pie with Lattice Crust. How about you?


Summer Peach Cake / www.delightfulrepast.com

If you like it, please Pin it and share it!

Summer Peach Cake


(Makes one 7-inch cake)

1 stick (4 ounces/113 grams) unsalted butter, melted
1 1/4 dip-and-sweep cups (6.25 ounces/177 grams) unbleached all-purpose flour
2/3 cup (4.67 ounces/132 grams) sugar
1 teaspoon non-GMO baking powder
1/2 teaspoon baking soda
1/2 teaspoon salt
3/4 teaspoon cinnamon
1/8 teaspoon mace or nutmeg
2 large eggs, room temperature
1 pound (16 ounces/454 grams/2 large) yellow peaches or nectarines, cut into 1/2-inch chunks
1 tablespoon dark brown sugar

1 Grease well and flour a 7-inch springform or push-bottom pan. I use my Ateco Stainless Steel 2x3-inches-high Round Form to turn my 3-inch deep 7-inch pan into a tube pan to prevent those center-of-the-cake baking challenges of deep pans and/or heavy batters like this. Just grease and flour it and center it in the pan and hold it steady while you fill in the batter around it. Preheat oven to 350F/180C/Gas4. Melt the butter and set aside to cool. 

Tip: A circle of baking parchment in the bottom of the pan is always good, though I forgot to do it today.

2 In 2- to 3-quart bowl, combine flour, sugar, baking powder, baking soda, salt, cinnamon, and mace or nutmeg. Whisk together well to "sift."

3 Scrub well—don't peel—and dice the ripe but firm peaches or nectarines into a small mixing bowl; set aside. You'll have about 3 cups. Take out 1 cup of the fruit to put on the top.

Note: I almost never peel organic peaches. I just wash them very well and rub off the fuzz. The colorful skin adds nutrition and a beautiful color to whatever you're making.

4 Add the eggs and cooled melted butter to the flour mixture. With a large spoon, beat well until thoroughly combined. Stir the fruit (except the 1 cup) into the batter.

5 Scrape the thick batter into prepared pan, press down and smooth the top, and press the reserved cup of diced fruit into the top of the batter. Sprinkle with the brown sugar. Bake for about 65 to 75 minutes, until it passes "the toothpick test" or is pulling away from the sides of the pan a bit. Do not underbake!

Note: I love this TimeStack quad timer sooooo much!

6 Cool in pan on wire rack for 10 minutes, then turn cake out of pan right side up and continue cooling on wire rack for 2 hours. If you remembered to use a circle of parchment, it will be much easier to lift the cake off the springform pan bottom! Before serving, you might give it a dusting of powdered sugar. And a little whipped cream is never a bad idea.

Disclosure: We are a participant in the Amazon Services LLC Associates Program, an affiliate advertising program designed to provide a means for us to earn fees by linking to Amazon .com and affiliated sites. We are a ThermoWorks affiliate, earning a small commission at no cost to you on purchases made through our links. This helps cover some of the costs of running the blog. Thank you for your support.

Jean
24 June 2021

Apple Galette - ThermoWorks TimeStack Giveaway

Apple Galette - ThermoWorks TimeStack Giveaway / www.delightfulrepast.com

The Apple Galette

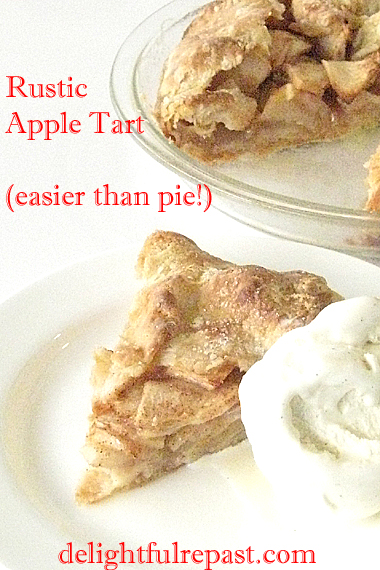
An apple galette is what I make when I don't have the time, or inclination, to make an Apple Pie—rolling out two crusts, peeling and slicing all those apples, making a pretty crimped edge. I just wasn't up for all that today.

The solution? A galette, or rustic tart, is quicker and easier than a double-crust pie or a tart. You can make it free-form on a baking sheet, as I did for my Rustic Peach Tart, or make it in a 9-inch glass pie plate.

Just make the same amount of dough you would for any 9-inch single-crust pie, but roll it a bit larger to about 14 inches. Center it in the pie plate, not worrying about evening up the ragged edges, pour in the filling, and then bring that raggedy overhanging pastry up over the apples.

I hope you'll leave a comment, enter the giveaway, and perhaps explore more of Delightful Repast while you're here. If you see something you like, be sure to Pin it, tweet it, whatever-social-media-you-have it.


Apple Galette - Rustic Apple Tart (this image, my watercolor sketch of apples on branch) / www.delightfulrepast.com
My watercolor version of a beautiful pencil drawing by UK artist Valerie Callen


The ThermoWorks TimeStack

Even though I had read about the TimeStack, I was shocked when it arrived. This thing is like the grandfather clock of kitchen timers! It's more than 6 inches tall and 4 inches wide, and it needs to be because it has four separate (independent) timers, each with four separate huge-digit, easy-to-read displays (no toggling).

Why do I need a four-channel timer in my home kitchen? Because we use a timer for everything: brewing tea several times a day, checking the rising bread dough, baking, getting the laundry out of the dryer, watering the fruit trees for a certain length of time. We even use a timer as an alarm clock on those rare occasions when we need one.

With four timers set, how do you know what each one is for? With this magnificent instrument, you can record a message for each one! 1. Check the dough. 2. Move the hose. 3. Take the casserole out. 4. Leave for appointment. No more sticky notes!

See the giveaway info below the recipe.


Apple Galette - ThermoWorks TimeStack Giveaway / www.delightfulrepast.com

If you like it, please Pin it and share it!

Apple Galette - Rustic Apple Tart


(Makes one 8.5-inch round tart, 6 servings)

Sour Cream Pastry

1 1/4 dip-and-sweep cups (6.25 ounces/177 grams) unbleached all-purpose flour
1/4 teaspoon salt
1/4 teaspoon baking powder
1 stick (4 ounces/113 grams) very cold unsalted butter
1/2 cup sour cream (4 ounces/113 grams), plus a little more if needed

Apple Filling

1 1/2 pounds (about 4 medium) apples* (by volume, about 4 cups/1 litre)
1/4 cup (1.75 ounces/50 grams) sugar
1 tablespoon (0.31 ounce/9 grams) unbleached all-purpose flour
1/2 teaspoon cinnamon
Pinch salt 

I usually use half each of two varieties; such as, Fuji and Pink Lady, Granny Smith and Golden Delicious, or Braeburn and Pippin.

1 In medium bowl, whisk together flour, salt and baking powder. With coarse grater over bowl, shred the butter over the flour. (Don't try to shred the very last—you'll shred your fingers; just cut it up.) Stir with a large dinner fork, making sure all the shredded butter is coated with flour. Mixture should be very chunky.

2 With the fork, stir in the sour cream. If you pinch some of the crumbly dough and it holds together and there isn't a lot of dry flour in the bowl, you've used enough sour cream. If not, either add a bit more or sprinkle on up to a tablespoon or so of cold milk, a teaspoon at a time.

3 Turn the crumbly dough out onto a square of plastic wrap and shape it into a 5-inch disk. Wrap tightly in the plastic wrap and chill in the refrigerator for at least 30 minutes or up to 3 days.

4 If you've chilled the dough for just 30 minutes or so, you can roll it out without waiting. You'll need to let thoroughly chilled dough stand at room temperature for 10 to 20 minutes before rolling. Save the square of plastic wrap; you'll be using it again. (I'm very sparing in my use of plastic wrap and like to get as much use out of a piece as possible!)

5 Preheat oven to 425F/220C/Gas7. Prepare the filling just before you roll out the pastry. In tiny bowl, whisk together sugar, flour, cinnamon and salt. Peel (or not—sometimes I don't) and core the apples, and slice them into a medium bowl. I slice them like this: Peel the apples, cut them in half through the stem end. With a melon baller, remove the core from each half; with paring knife, trim away the peel from the ends. Cut each half in half lengthwise and slice thinly crosswise. You should have about 4 cups. Stir in the sugar mixture.

6 Lightly flour a square of parchment paper on the counter. Place the disk of dough in the center and sprinkle it lightly with flour. If you like, place the reserved piece of plastic wrap on top of the dough. With floured rolling pin, roll out the disk, rolling from center to edge and rotating by quarter-turns to make a round shape, to a 14-inch circle. Don't worry about ragged edges; this is a rustic tart.

7 Butter a 9-inch glass pie plate, using about 1/2 teaspoon of butter. Transfer dough to pie plate, paper side up; remove paper. Press dough into the pie plate without stretching, leaving the raggedy-edged overhang untrimmed.

8 Pour in the apple filling in an even layer. Bring the overhang up over the apples a little at a time, sort of "pleating" as you go. Don't try to be cute—we're going for rustic here! Bake for 20 minutes; reduce heat to 350F/180C/Gas4 and continue baking for about 45 to 50 minutes, until crust is golden brown and juices are bubbling. Can be served from the pie plate or lifted out and placed on a serving plate.


Apple Galette - ThermoWorks TimeStack Giveaway (this photo, the TimeStack) / www.delightfulrepast.com

ThermoWorks TimeStack Giveaway


This giveaway is open to readers in the US* who are 18 years of age or older. To enter, leave a comment below (one entry per person). Tell me why you want a TimeStack. Please include your email address in the body of your comment. If your name is drawn and I have no way to contact you, you will be disqualified. Must enter by 11:59 p.m. Eastern time Wednesday July 7.

* If you are outside the US but would like to have this sent to someone you know in the US (you would have to send them a gift card separately on your own), go ahead and enter!

Winner will be chosen by random drawing and be announced here in the comments before noon Eastern time on Thursday July 8. If I don't hear back from the winner of the random drawing by noon Eastern time Saturday July 10, a new winner will be selected from the original entrants (those who commented before the giveaway deadline).

Disclosure: ThermoWorks provided a TimeStack for review purposes and one for the giveaway. The views expressed here are entirely my own. I always tell my readers what I really think!

Disclosure: We are a participant in the Amazon Services LLC Associates Program, an affiliate advertising program designed to provide a means for us to earn fees by linking to Amazon .com and affiliated sites. We are a ThermoWorks affiliate, earning a small commission at no cost to you on purchases made through our links. This helps cover some of the costs of running the blog. Thank you for your support.

Jean