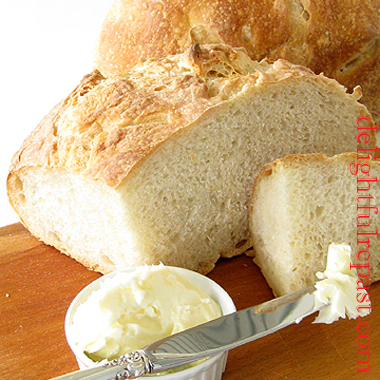
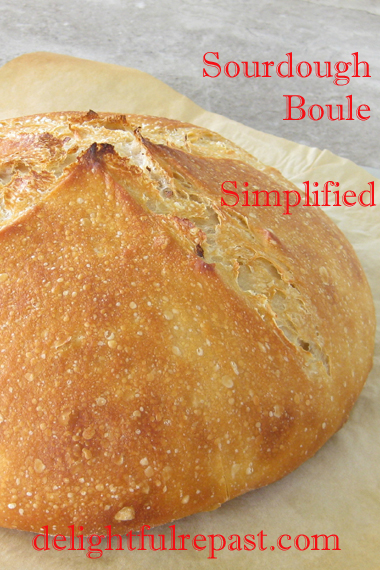
I developed my simplified sourdough a few years ago to shorten the process from the typical way I used to make sourdough bread, which was either a 28- or 36-hour process (from first feeding of the starter to time to shape the loaf). That was fine for me at that time, but when that became inconvenient I came up with my Sourdough Simplified method.
For quite some time, that was wonderful. Still is, but as my starter matured and the two rise times shortened, the bread was just not the same. While still good, it lost most of its characteristic tang and chewiness. And I'm afraid Mr Delightful has gotten spoiled with his homemade sourdough toast every morning of his life and has gotten quite particular!
Well, I was not inclined to go back to the original process, so I added a step—a pre-ferment—to my simplified sourdough process. And it worked! So I wanted to write up this postscript for you so that if you are working with a mature starter but want to speed things up as much as you can without sacrificing flavor and texture, you can. This shortens the usual method by 10 to 18 hours from start to shaping.
If you think sourdough is too much trouble, you will be amazed at how trouble-free this method really is. There is none of that annoying feeding and discarding, no having to cater to your starter to keep it going. Just put your little pint jar in the refrigerator and neglect it for weeks or months at a time until you want to make bread. Then stir it up, take out what you need, replenish it, and forget about it until next time.
The following schedule is my schedule. You can pick any time you want. And these times are approximate because there are many variables. The main thing is that you pick a time, probably in the morning, on a day that you want to make the bread; subtract 12 hours from that and start your pre-ferment at that time.
My schedule for this is:
Day 1 — 6:00pm Make the pre-ferment and let rise for 12 hours. Replenish the jar of starter.
Day 2 — 6:00am Make the dough. Let rise until doubled (variable, but mine currently takes 5 1/2 hours).
Day 2 —11:30am (variable) Shape the loaf. Let rise until doubled (variable, but mine currently takes 2 hours).
Day 2 — 1:30pm (variable) Bake.
For me, this schedule means I can stir up the pre-ferment after dinner (I do Intermittent Fasting and don't eat after 6:00pm) and forget about it till I get up the next morning and make the dough. Then I have several hours to myself before it's time to shape the loaf and then 2 hours till I need to preheat the oven, bake, and take it out of the oven. So by 2:15pm, the finished loaf is cooling off and so am I!
If you're new to wild yeast (no added commercial yeast) sourdough baking or you just don't currently have a starter, I've outlined my streamlined starting a starter process in the Sourdough Simplified post. If you already have a starter but want to learn how to maintain it in a pint canning jar with no discarding or other faffing about (basically, just ignoring it!), see the directions below. Happy baking!
Sourdough Sandwich Loaf or Boule
The Pre-Ferment
1/2 cup (4.5 ounces/128 grams) mature stirred-down 100% hydration starter5.5 fluid ounces (163 grams or ml) room temperature water
1 dip-and-sweep cup (5 ounces/142 grams) unbleached all-purpose flour
The Dough
7 fluid ounces (207 grams or ml) room temperature water1 1/2 teaspoons to 1 3/4 teaspoons (0.35 ounce/10 grams) salt (I use 1 1/2 teaspoons)
3 dip-and-sweep cups (15 ounces/425 grams) unbleached all-purpose flour
Note: Before we get started, let me say one more thing. If you do not have a kitchen scale, get one. It is something else that will simplify your life. I've used one for decades, probably because I grew up with English cookery books, and switched to this digital one, OXO Good Grips 11-pound digital scale (pictured below), when I found it years ago.
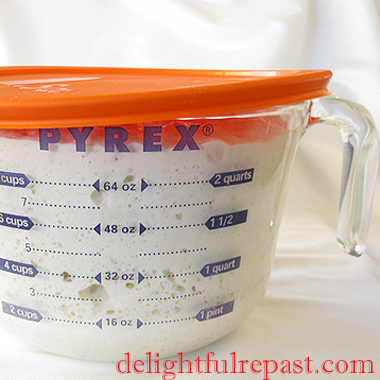
1 For the pre-ferment: At 6:00 pm (or whatever your chosen time is), in 2-quart glass measure, stir together the starter and water, then flour. Cover loosely and let stand at room temperature for 12 hours. Replenish the starter.
Maintaining Starter: Unless you're baking bread every day or two, keep the starter in the refrigerator and feed only to replenish. I keep about 3/4 cup (6.75 ounces/192 grams) of starter in a pint canning jar. Though I won't be feeding the starter, after taking out 1/2 cup (4.5 ounces/128 grams) for the loaf, I need to replenish the starter in the jar and so feed it with 2.25 ounces (64 grams) each flour and water, stir it vigorously and let stand at room temperature for about 1 to 4 hours (you should see some bubbles, but not too many), then refrigerate until the next bake.
As the starter matures, the rise time shortens. At some point, the first rise might take only 5 hours and the second, less than 2 hours. If longer rise times better suit your schedule, you can reduce the amount of starter used in the dough.
3a For Sandwich Loaf: Grease the bread pan. I use a 9x4x4-inch (1.5-pound) pullman pan. It's about the same capacity as a 9x5x3-inch loaf pan. Using no more than 1/8 cup altogether, sprinkle countertop with some flour. Gently scrape the dough onto the floured countertop. Sprinkle with flour. Press gently into a roughly 12-by-8-inch rectangle. Using a bench scraper, fold one third of the rectangle toward the center, then fold the other end to the center, like a letter. With the bench scraper, place folded dough in the pan, pressing it into the corners. Brush on a little water. Cover it loosely with an oiled or cooking-sprayed piece of plastic wrap.
3b For Boule: Place a square of parchment paper on a rimless baking sheet (which will act as a "peel" later). Sprinkle 1/2 teaspoon of flour in a 9-inch circle in the center of the parchment and 2 tablespoons of flour on your work surface. Scrape the dough out onto the work surface. Put a little of the flour on top of the dough and with floured hands, press dough lightly into a 10-inch square. Fold it in thirds like a letter; then fold that rectangle into thirds, forming a square. Tuck the edges under, working the dough into a smooth round. Place the dough on the parchment. Turn a large glass bowl over it, or cover it loosely with an oiled or cooking-sprayed piece of plastic wrap.
4a Let rise until doubled. If using 9x5x3-inch loaf pan, it should rise an inch or two above the rim of the pan. If using the 9x4x4-inch pullman pan (minus its lid), the dough should rise to below or just even with the top of pan. This can take anywhere from 2 to 5 hours. The dough needs to rise until the dough doesn't quickly spring back when poked with a floured finger or knuckle.
4b The boule will spread as well as rise and not appear to rise very high. Not to worry! It will rise in the oven (called oven spring) and be a lovely, well-risen loaf.
Tip: Check on the dough's progress regularly. After making it a few times, you'll have a better idea of how long it will take. And that will change as the weather changes.
5a Toward the end of the rising time, preheat oven to 450F/230C/Gas8. Just before baking, brush the loaf with a little water. Bake for 10 minutes. Reduce heat to 400F/205C/Gas6 and continue baking for about 30 minutes or until crust is beautifully golden and middle of loaf registers 210F/99C on instant-read thermometer. Remove from pan immediately and let cool on wire rack for 1 1/2 to 2 hours before slicing.
5b When you’ve got about 30 to 45 minutes left, place oven rack in lower-middle position and place pizza stone or Lodge Pro-Logic 14-Inch Cast Iron Pizza Pan on rack. Preheat oven to 475F/245C/Gas9 for at least 30 minutes. With a sharp blade, cut a "+" about 1/4-inch deep on the top and slide the boule on its parchment square onto the hot stone. Reduce temperature to 425F/220C/Gas7. Bake for about 45 minutes, or until crust is beautifully golden and middle of loaf is 210F/99C. If it's getting too brown, cover loosely with foil. Remove from oven, using the rimless baking sheet or pizza peel to lift the boule off the pizza stone. Let cool on wire rack for 1 1/2 to 2 hours.
PS For those who care about such things, this is a 69% hydration dough.
Disclosure: We are a participant in the Amazon Services LLC Associates Program, an affiliate advertising program designed to provide a means for us to earn fees at no cost to you by linking to Amazon .com and affiliated sites. This helps cover some of the costs of running the blog. Thank you for your support.
If you liked this post, please Pin it and share it!


22 comments:
These loaves look spectacular. I have never made sourdough bread - nor have I ever used a starter! I was once given a starter for a friendship bread but I killed the starter... Ugh. I was young. Should I get a good starter I will definitely look to your recipe! I really appreciate the timetable!
Thank you, David. You can easily make your own sourdough starter following the directions in the linked post. So easy, not a lot of wasteful discarding as you build it up. Then maintaining it is so easy. No feeding. Just let it languish in the refrigerator until the day before you'd like to bake a loaf.
Knowing your high standards, uncompromising methods, and tireless efforts, I completely trust this. Can’t say that for most of the culinary world. It’s just human nature (and the nature of restaurants and chefs) to become unmotivated with the repetition of signature menu fare. And sourdough bread is one of the few I favor. Am currently (or maybe I should spell that “currant-ly” experimenting with cinnamon rolls. Yeah, I buy into the raw product from a bakery and just frig with the final process before baking, as “scatch stuff” if over my pay grade. Thanks for the savory recipe and tantalizing photos!
A couple of years ago I had an attempt at making bread by hand. No machinery involved. I was then bought a bread making machine. I can tell you that is a very boring way to make bread. I have been thining about making bread again, the proper way that is. Your sourdough mix sounds just right . I "WILL!!" have a go in 2024.
Have a great Christmas Jean and Mr Delightful. He is a lucky man to be married to an amazing cook and bread maker.
I just don’t eat enough bread to make it anymore these days and when I try with gluten free flour it’s very expensive and often doesn’t turn out that nice
Sully, thanks for the vote of confidence! How wonderful that you're experimenting with cinnamon rolls. Even with buying the dough from a bakery, that's quite a step for you! I assure you, though, you could do sourdough with *this* method. Nothing tricky.
Aawww, thank you, Tony. I'll be expecting to hear from you, photos included, about your 2024 Sourdough Adventure!
Anonymous, gluten-free bread can be tricky. One of the tips I can give you is to use this straight-sided bread pan pictured in this post. It gives GF dough just the support it needs to rise well and make a nice loaf. In fact, that was why I bought the pan initially. Also, some gluten-intolerant (not celiac) people are finding that they can digest wild yeast sourdough bread, though not other conventional breads.
I don't bake bread but I'm the happy recipient of our daughter in laws sourdough loaves. Your loaves are beautiful!
Thank you, Ellen. If I had someone nearby making sourdough loaves for me, I might be tempted to skip it—except it's too much fun! :D
I am forwarding your tutorial to my husband as he wants to start baking bread again. I know he will find it very interesting. Wishing you and your family a Merry Christmas.
Karen, thanks so much! Tell him I want to hear from him in the comments! I hope you're both having a lovely time, and let's all have a wonderful 2024!
Well Jean, my husband has his first boule in the oven. For the present time, he decided not to make sour dough until he gets used to baking bread. What do you suggest as the best way to store bread once out of the oven. It will take up a while to eat a boule since it is just the two of us. Happy New Year.
Karen, if you're going to take more than a few days to eat it, you should try slicing it and freezing it in daily portions. Then the night before you plan to eat it, take the portion out of the freezer and let it thaw in its wrapping. I'm so excited for your husband, just starting out on his bread making journey! Keep me posted.
The loaves look amazing. I admire your process and diligence in finding the best method! Thanks for linking, and all the best for 2024.
I loved this Wild Yeast Sourdough tutorial! As a regular home baker, I often found sourdough intimidating, but this guide simplified the process beautifully. The step-by-step instructions, along with helpful tips, made working with wild yeast much less daunting. My loaves have never tasted better, and I'm grateful for this easy-to-follow guide. Highly recommended for anyone interested in the world of sourdough baking!
Thanks, Gail! Wishing you a wonderful year as well.
Thanks so much, Gari! Like other aspects of life, sourdough making doesn't have to be as complicated as we often make it!
Love this post Jean! I too make sourdough bread and have for years. Honestly, I'm at the point where I never measure, I just add flour and water, salt and go with it. I love how you have precise measurements. I do have a scale and want to try your recipe, it sounds wonderful! There is just nothing like homemade sourdough! I follow much the same procedure as you do, (even though I don't measure :)
Many blessings to you!
Marilyn, thank you. Yes, I think most of us who have been making bread for years go by "feel," but when developing recipes for clients or a food blog, I have to give measurements if I'm to be of any use at all! :D I want cooks at any experience level to be able to make one of my recipes and succeed, so I get very precise, even telling them how to measure their flour (dip-and-sweep) if they don't have a scale. I'm glad you're a sourdough baker too! Happy Winter!
Very interesting! I love the streamlining, and also love that you don't have to feed the starter. With such long rising times, this must be especially tasty bread.
Thanks so much, Jeff. Yes, I like to give my doughs time to build flavor naturally.
Post a Comment