Showing posts with label poultry. Show all posts

03 March 2022

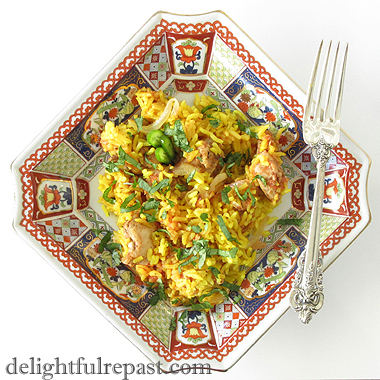
Chicken Biryani

Chicken Biryani / www.delightfulrepast.com

Chicken Biryani is a popular dish of India and beyond that originated in Persia. Biryani is also made with other meats, but I prefer chicken thighs. It varies from region to region (and from cook to cook) in both ingredients and method, and (disclaimer here) I make no claims whatever to authenticity!

If you have made, or even had, biryani of any type, I'd love to hear about it. I have much to learn. There's a great long list of spices used in biryanis, but no one recipe includes them all. I checked my bottle of garam masala to remind myself which spices were included in that blend and then added two that were not in it and extra of a couple that were.


Chicken Biryani / www.delightfulrepast.com


Many people add garlic, but I am allergic. And many people add way too much garlic, which can easily overpower a dish. So if you do add garlic, use just one small clove or even less, so your finished dish will have some subtlety! But it is very flavorful without it, and I doubt that you would miss it.

The Naan - Classic Yeasted Flatbread of India and Beyond that I posted a month ago is the perfect accompaniment.

Have you tried any new dishes or cuisines lately? I think many of us have during the last two years!
 

Chicken Biryani / www.delightfulrepast.com

If you like it, please Pin it and share it!

Chicken Biryani

(Makes 4 servings)

The Chicken

1 1/2 to 2 teaspoons garam masala
1/2 teaspoon fennel seeds, toasted and crushed
1/2 teaspoon salt
1/4 teaspoon coarsely ground black pepper
1/4 teaspoon cumin
1/8 teaspoon cayenne
1/3 cup (2.88 ounces/82 grams) plain yogurt
1 teaspoon grated fresh ginger
1 small clove garlic, crushed, optional
1 1/4 pounds (20 ounces/567 grams) boneless skinless chicken thighs, cut into 1-inch pieces
3/4 cup tomato puree (fresh or half a 14.5-ounce can diced tomatoes, pureed)

The Rice

1 cup (6.625 ounces/188 grams) white basmati rice
1 1/2 cups (12 fluid ounces/355 ml) water
1 tablespoon unsalted butter
1/4 teaspoon salt
1 small bay leaf 
1/2 teaspoon turmeric

The Onion

1 tablespoon extra virgin olive oil
1 tablespoon unsalted butter
1 medium (12 ounces/340 grams) onion*, quartered and thinly sliced 

* I used a yellow onion, but red or white are fine.

The Garnish

2 packed tablespoons cilantro (fresh coriander)


1 In 1.5-quart mixing bowl, whisk together garam masala, fennel, salt, pepper, cumin, and cayenne. Gradually whisk in yogurt and grated ginger. Add chicken, coating well. Cover and refrigerate several hours or overnight.

2 In 2-quart saucepan, bring rice, water, butter, salt, bay leaf, and turmeric to a boil. Stir once and cover tightly with lid. Reduce heat to maintain a low simmer and cook for 15 minutes. Remove from heat, leave covered, and let stand for 10 minutes. Fluff with fork and remove bay leaf. Cover and set aside. 

3 In 12-inch skillet (that has a lid), heat oil and butter over medium-high heat and fry the onion slices until golden brown; this might take up to 20 minutes. Drain on paper towels. Set aside 1/3 of the prettiest fried onions for the garnish.

4 Add the chicken and marinade to the skillet and cook over medium to medium-high heat for about 7 minutes. Add the tomato puree and continue cooking for about 3 minutes. Stir in half of the remaining fried onions to the mix and continue cooking for 3 minutes.

5 Spread the rice over the chicken. Scatter the remaining onions (but not the 1/3 reserved for the garnish) over the rice. Cover with lid and cook over low heat for 15 minutes.

6 Stir lightly. Leave in skillet or transfer to serving dish. Garnish with reserved fried onions and chopped cilantro. The cilantro is not just a garnish, it is an important part of the dish, so don't skip it or substitute parsley (unless you're one of those people who really don't like cilantro).

Disclosure: We are a participant in the Amazon Services LLC Associates Program, an affiliate advertising program designed to provide a means for us to earn fees by linking to Amazon .com and affiliated sites. We are a ThermoWorks affiliate, earning a small commission at no cost to you on purchases made through our links. This helps cover some of the costs of running the blog. Thank you for your support. 

Jean

If you liked this post, please Pin it and share it!
  

28 October 2020

Chicken Pot Pie — Double-Crusted Classic Comfort Food

Chicken Pot Pie — Double-Crusted Classic Comfort Food / www.delightfulrepast.com


Chicken Pot Pie is one of my all-time favorite cold-weather comfort foods. Pie and dinner all in one! I know the name "Chicken Pot Pie" is not appealing to anyone who associates that name with the mid-century modern frozen version.

The first frozen chicken pot pie came out in 1951 and has had various iterations over the ensuing decades of convenience foods. Some have crusts top and bottom, some just a top crust, but all are heavy on the sauce and light on the chicken and vegetables.  

When I make my little individual chicken pot pies, I give them just a top crust to leave more room in the ramekins for the filling. But a regular pot pie must have both crusts. And the bottom crust does not have to be soggy.

There are various ways to avoid the "soggy bottom" problem. You can prebake ("blind" bake) the bottom crust before filling and adding the top crust. Or you can brush the bottom crust with egg wash before filling and bake your pot pie on the lowest rack of the oven at an initial high temperature. The fact that I am in the habit of lightly buttering the glass pie plate might also contribute to browning. 

Let me know in the comments whether you are a fan of savory pies as well as sweet, and any pie tips you'd like to share, or pie questions you might have. 

Chicken Pot Pie — Double-Crusted Classic Comfort Food / www.delightfulrepast.com
Please remember to Pin it and share it!

Chicken Pot Pie 


(Makes one 9-inch pie, 6 servings)

The Pastry

1 1/2 sticks (6 ounces/170 grams) cold unsalted butter
1/2 cup (4 fluid ounces/118 ml) milk
1 1/2 teaspoons cider vinegar
2 1/2 dip-and-sweep cups (12.5 ounces/354 grams) unbleached all-purpose flour
1 teaspoon salt
1/2 teaspoon non-GMO baking powder
1 large egg

The Chicken Filling

4 tablespoons (2 ounces/57 grams) unsalted butter
1/3 cup chopped onion
1/3 cup chopped celery
1/3 cup chopped red bell pepper
2/3 cup chopped carrots
1/3 dip-and-sweep cup (1.67 ounces/47 grams) unbleached all-purpose flour
1/2 teaspoon salt
1/2 teaspoon coarsely ground black pepper
1 1/2 cups (12 fluid ounces/355 ml) chicken broth
1/4 cup (2 fluid ounces/59 ml) milk
1/4 cup (2 fluid ounces/59 ml) heavy cream
1/4 teaspoon marjoram
1/4 teaspoon thyme
1 cup diced potato
2 1/2 cups cold diced cooked chicken*
3/4 cup frozen peas (not thawed)

The Egg Wash

1 large egg, beaten

* I cooked 1 pound (16 ounces/454 grams) boneless skinless chicken breasts (thighs are good, too) seasoned with 1/4 teaspoon salt and 1/2 teaspoon coarsely ground black pepper in skillet with 2 tablespoons extra virgin olive oil, cooled and diced the chicken, and refrigerated it several hours ahead. You could even cook it the day before and make the pastry a day or two before.

1 Cut butter into 1/2-inch cubes and place in freezer for 15 minutes. In 1-cup glass measure, stir together milk and vinegar; let stand at least 5 minutes while proceeding with pastry. With metal blade in place, add flour, salt and baking powder to work bowl of food processor. Turn on for three seconds to combine. Add half the frozen butter and pulse for six 1-second pulses or until the frozen butter is the size of large peas. Add remaining butter and pulse for three 1-second pulses.

2 Whisk the egg into the soured milk. Pour half of the liquid over the flour and pulse for three 1-second pulses. Add the rest of the liquid and pulse for up to six 1-second pulses, or just until the dough forms large clumps. Turn dough out onto lightly floured surface and sprinkle it with flour. Press it into an even piece and divide into 2 equal pieces. Place each half on a square of plastic wrap and flatten slightly into a 4- to 5-inch round disk; wrap; refrigerate for at least 60 minutes or up to 2 days.

3 Let thoroughly chilled dough stand at room temperature for 10 to 20 minutes before rolling. On a lightly floured piece of parchment, roll out one piece of dough (save the plastic wrap) to a 13-inch circle and transfer it to a lightly buttered 9-inch pie plate, pressing dough (but not stretching it) to fit pie plate with about a one-inch overhang (trim with knife or scissors), cover with reserved piece of plastic wrap and chill in the refrigerator.

4 Using the same piece of parchment, roll out the top crust just as for the bottom crust. Place it, parchment side down, on a half sheet pan, cover with reserved piece of plastic wrap and place in refrigerator for 30 minutes. 

5 In 3-quart saucepan, melt butter. Add chopped onions, celery and carrots. (Sometimes I use sliced mushrooms; you can use anything that adds up to the same amount.) Cook for 5 minutes. Stir in the flour, salt and pepper, and cook for a minute, while stirring. Stir in chicken broth, milk and, cream, marjoram and thyme. Bring to a boil. Reduce heat and simmer, stirring constantly, for 3 minutes, until thickened. Stir in the diced potato, and simmer for 8 minutes. Remove from heat and let cool a bit. Stir in the cold chicken, and then the frozen peas. Taste and adjust seasoning. 

6 Beat the egg to use as an egg wash. Brush some of the egg wash inside the bottom crust; you'll use the rest on the top crust. Let rest in refrigerator for 20 minutes, or in freezer for 10 minutes. Move oven rack to lowest position. Preheat oven to 450F/230C/Gas8.

7 Pour the chicken filling into the chilled egg-washed bottom crust. Put top crust in place, trim and crimp. To vent the pie, make six 2-inch slashes. Brush the top with a thin, even coat of egg wash; let rest in refrigerator for 15 minutes. If desired, do a second thin, even coat of egg wash. Place the pie in a 15x10x1-inch baking sheet or a half sheet pan. Bake for 20 minutes (an excellent and inexpensive  kitchen timer); reduce heat to 375F/190C/Gas5 and continue baking for 20 minutes until crust is golden brown. Cool on wire rack for about 20 minutes before serving.

Disclosure: We are a participant in the Amazon Services LLC Associates Program, an affiliate advertising program designed to provide a means for us to earn fees by linking to Amazon .com and affiliated sites, earning a small commission at no cost to you on purchases made through our links. This helps cover some of the costs of running the blog. Thank you for your support. 

Jean

12 March 2020

Chicken and Dumplings - Instant Pot (or Not)

Chicken and Dumplings - Instant Pot (or Not) / www.delightfulrepast.com

Chicken and Dumplings is a real comfort food classic! And if you’d like to make it on the stovetop rather than in the Instant Pot, go to my original Chicken and Dumplings post. 

Also, go to that post if you’d like to read about the great dumpling controversy—you know, fluffy versus flat, dropped versus rolled. As you can see, I make fluffy dumplings. 

And fluffy they are. Never stodgy (unpleasantly solid and heavy). Sometimes I use a tablespoon of apple cider vinegar in the milk, and sometimes not. Either way, they come out light, fluffy and delicious. 

Thing is, the Instant Pot is narrower in diameter than my Dutch oven, so there’s really only room for half the dumplings. If you’re serving it all at once (dinner for at least 6), you could transfer the finished stew to a wider pan that will hold all the dumplings. 


Chicken and Dumplings - Instant Pot (or Not) / www.delightfulrepast.com


I’ve often used bone-in chicken breasts and thighs rather than cutting up a whole chicken, but for this Instant Pot version I went with a whole chicken and did not cut it up. 

You see, I’m still on my Streamlined Cooking kick and not cutting up the chicken and not browning the pieces was a huge timesaver. The chicken comes out fall-apart tender and easy to remove from the bones. 

I was prepared to have to remove a lot of fat from the broth, but there didn’t seem to be a lot of fat, so I just went with it. That was another timesaver.

I hope you’ll try it soon and let me know how you like it. And, tell me, which dumpling team are you on, fluffy or flat?


Chicken and Dumplings - Instant Pot (or Not) / www.delightfulrepast.com


Chicken and Dumplings - Instant Pot


(Serves 6 to 8)

The Chicken Stew

1 whole organic free-range chicken (3.5 to 5 pounds/1.6 to 2.25 kg), giblets removed
1 teaspoon salt, divided
1 teaspoon coarsely ground black pepper, divided
1/2 teaspoon marjoram
1/2 teaspoon poultry seasoning
1 medium (about 12 ounces/340 grams) yellow onion, quartered and sliced (1 1/2 cups)
1 1/2 cups thinly diagonally sliced carrots (about 12 ounces/340 grams)
3 stalks (about 4 ounces/113 grams) celery, thinly diagonally sliced (1/2 cup)

2 cups (16 fluid ounces/473 ml) water
1/4 cup flour shaken with 1/2 cup water
2 tablespoons chopped flat-leaf parsley


The Dumplings


(Makes 18)

2 dip-and-sweep cups (10 ounces/283 grams) unbleached all-purpose flour
1 tablespoon non-GMO baking powder
1 teaspoon salt
4 tablespoons (2 ounces/57 grams) unsalted butter, melted
1 cup (8 fluid ounces/237 ml) milk (1 tablespoon of which can be apple cider vinegar)

1 In 6-quart Instant Pot inner cooking pot, place the chicken (mine was an even 4 pounds); sprinkle with 3/4 teaspoon salt, 3/4 teaspoon pepper, marjoram and poultry seasoning. Top with onions, carrots and celery; pour in the water.

2 Put the lid in place and turn the steam valve to Sealing. Plug in the Instant Pot. Press the Pressure Cook key. Leave the indicator lights on High Pressure and Normal temperature, and change the cooking time to 25 minutes.

Note: It took about 25 minutes to come up to pressure and begin the cooking time.

3 When the "It's done" beep sounds and the indicator says "Off," set a kitchen timer for 25 minutes and allow the pressure to release naturally, then do a quick release by turning the steam valve to Venting. 

4 When the float valve drops down, carefully remove the lid. Transfer the chicken to a large plate or bowl and let cool for about 20 minutes. When it's cool enough to handle, use 2 forks to remove the skin and take the meat off the bones. Cut it into bite-size (about 1-inch) pieces.

5 Shake together flour and water until mixture is as smooth as possible; then pour it through a strainer into the stew. Taste and adjust seasoning, adding the additional 1/4 teaspoon each salt and pepper, if needed; press Saute and continue cooking, stirring occasionally, for 5 minutes to thicken. Stir in the chicken.

Note: You can stop right here if you want to and finish the dish tomorrow or the next day. See the Note at the end before proceeding.

6 While stew returns to a simmer, make dumplings. In medium bowl, whisk together flour, baking powder and salt. Drizzle melted butter over flour mixture, stirring with large fork. Stir in milk. Let stand for 5 minutes before scooping onto stew.

7 Stir in the parsley (and a cup of frozen peas, if you like). Spray a #40 scoop (about 1.5 tablespoons) or round measuring tablespoon with cooking spray. Drop level scoops or rounded tablespoons of dough onto simmering stew. Cover and simmer dumplings for 20 minutes, then test one to see if toothpick inserted into the center comes out clean. If not, cover and simmer an additional 5 minutes.

Note:  Only half the dumplings will fit in the Instant Pot. If you want to cook all the dumplings, you will need to transfer the stew to a wider pot, such as a 5.5-quart Dutch oven. And, if you are not an experienced dumpling maker, you will likely find it easier to do that anyway because cooking the dumplings is a bit tricky in the Instant Pot. You have to go back and forth between Saute and Slow Cook to keep the stew at a simmer. I did it one time, just to see if and how it could be done, and it worked. But I'll do the dumplings on the stovetop next time.

Disclosure: We are a participant in the Amazon Services LLC Associates Program, an affiliate advertising program designed to provide a means for us to earn fees by linking to Amazon .com and affiliated sites. We are a ThermoWorks affiliate, earning a small commission at no cost to you on purchases made through our links. This helps cover some of the costs of running the blog. Thank you for your support. 

Jean

19 December 2019

One-Pan French Onion Chicken

One-Pan French Onion Chicken / www.delightfulrepast.com

One-Pan French Onion Chicken is a great dinner party dish. And for a speedy weeknight dinner, you can make the caramelized onions in advance to hurry things along. Caramelized onions can't be rushed, but the cooking time is pretty much hands-off. I like to make a double batch and freeze half for future convenience.

You can easily double the recipe, but you'll need to cook the chicken in two batches. The chicken will not brown properly if the pan is crowded. It's okay to crowd the pan a bit for the broiling.

One-Pan French Onion Chicken / www.delightfulrepast.com


If your eyes are as sensitive to onions as mine are, you'll want to don a pair of these fabulous onion goggles before slicing the onions. Getting those goggles several years ago was life-changing! They come in several trim colors; mine have the lime green trim and really look quite cute!

The perfect "starch" to go with this for a dinner party is Pomme Rosti, but for family dinner I like Mashed Potatoes. Seasonal vegetables or salad round out the meal. We paired it with a decent French rosé, but lots of wines would work.

One-Pan French Onion Chicken / www.delightfulrepast.com

One-Pan French Onion Chicken 

Though I usually post strictly original recipes, this is one is adapted from one I saw on thekitchn website. I've made changes, added flavor and added a lot of my own info to the directions that I think will be helpful to you. 

(Makes 4 servings)

1 1/2 pounds (2 medium/24 ounces/680 grams) yellow onions, quartered and thinly sliced
2 tablespoons (1 ounce/28 grams) unsalted butter
3 tablespoons (1.5 fluid ounces/44 ml) extra virgin olive oil, divided
5/8 teaspoon salt, divided
1/2 teaspoon sugar 
2 boneless skinless chicken breasts (total weight 1.25 to 2 pounds/567 to 907 grams), halved horizontally starting at the thick end 
1/2 teaspoon coarsely ground black pepper 
2 tablespoons (1 fluid ounce/30 ml) dry sherry or brandy 
1 cup (8 fluid ounces/237 ml) low-sodium chicken broth 
2 teaspoons Dijon mustard
1/8 teaspoon marjoram
1/8 teaspoon thyme leaves
1/2 packed cup (2 ounces/57 grams) shredded Gruyere (or mozzarella)
2 tablespoons minced flat-leaf parsley 

1 In heavy-bottomed large skillet that is broiler-safe (I use the All-Clad Stainless 12-Inch Fry Pan), cook the onions in butter and 1 tablespoon of the olive oil over low heat, covered, for 15 minutes. No need to watch them, just set the timer and walk away. 

2 Stir in the sugar (helps with browning) and 1/8 teaspoon of the salt. Cook, uncovered, over moderate heat (onions should be sizzling), stirring occasionally,* for about 35 to 45 minutes or more, or until onions are well caramelized, evenly brown. Transfer onions to one side of a large plate. 

* Check the onions every 5 minutes, but do not stir until they're sticking to the pan a bit. You need to let the onions stick a little to brown, then stir and scrape the pan. Just do not let it burn, or it's all over! 

3 Pat the chicken dry and season with pepper and remaining 1/2 teaspoon of salt (or to taste). 

4 In same skillet, heat remaining 1 tablespoon of olive oil (and whatever oil is left in the pan from the onions) over medium-high heat until shimmering. Cook the chicken over medium-high heat until lightly browned and cooked through, about 5 to 7 minutes per side, depending on thickness. If the chicken is sticking to the pan, it's not ready to turn; keep cooking. It should register 165F/74C on an instant-read thermometer. Transfer chicken to plate with the onions. 

5 Place an oven rack about 6 inches from the broiler and turn oven to Broil. Add sherry or brandy to skillet to deglaze, scraping up any browned bits. Whisk in broth and Dijon mustard. Bring to a boil. Boil gently for 5 minutes or so until sauce is reduced by half. 

6 Return the four chicken pieces to the skillet. Top each with caramelized onions and shredded cheese. Broil until the cheese is melted and browned, about 2 minutes. Garnish with minced parsley.

Disclosure: We are a participant in the Amazon Services LLC Associates Program, an affiliate advertising program designed to provide a means for us to earn fees by linking to Amazon .com and affiliated sites. We are a ThermoWorks affiliate, earning a small commission at no cost to you on purchases made through our links. This helps cover some of the costs of running the blog. Thank you for your support. 

Jean 

28 November 2019

Slow Cooker Chicken Tikka Masala

Slow Cooker Chicken Tikka Masala / www.delightfulrepast.com

Chicken Tikka Masala was the first Indian food I attempted 8 years ago. Actually, some say it's not really Indian food, but rather the national dish of Britain!

In that Chicken Tikka Masala recipe, I used serrano chile. But in this streamlined slow cooker version, I opted for the always-on-hand cayenne pepper for a little heat.

Slow Cooker Chicken Tikka Masala / www.delightfulrepast.com


My next foray into Indian cookery was Dal Makhani, a vegetarian lentil curry I really like. And next up will be some of the wonderful flatbreads because, like my father before me, I can hardly consider dinner complete without bread on the table.

The chopped cilantro is more than a garnish to this dish; the flavor complements the sauce perfectly and is a must! 

I served it with Turmeric Rice. Just added 1/2 teaspoon of turmeric for 1 cup of uncooked rice to my usual recipe for plain rice. A spicy main dish calls for plain rice. 


Slow Cooker Chicken Tikka Masala / www.delightfulrepast.com

Slow Cooker Chicken Tikka Masala


(Makes 6 servings)

2 pounds (32 ounces/0.9 kg) boneless skinless chicken thighs, cut into 1-inch pieces
2/3 cup (6 ounces/170 grams) whole or low-fat (2%) plain yogurt
3/4 teaspoon salt, divided

2 tablespoons extra virgin olive oil 
1/2 small yellow onion, diced (1/2 cup)
1 1/2 teaspoons peeled and grated* fresh ginger 
1 teaspoon finely minced shallot
2 teaspoons garam masala
3/4 teaspoon coriander
1/2 teaspoon cumin
1/4 teaspoon turmeric
1/8 teaspoon cayenne pepper
3 or 4 tablespoons (3 ounces/85 grams) tomato paste
1 14.5-ounce (411 grams) can crushed tomatoes
1/4 cup (2 fluid ounces/59 ml) heavy cream

1/4 packed cup chopped fresh cilantro

* I use the Microplane Classic Zester/Grater.


1 Place the chicken, yogurt, and 1/2 teaspoon of the salt in a 4-quart or larger slow cooker or the 6-quart Instant Pot and stir to combine. (I used all organic ingredients except for a couple of the spices.)

2 In a large skillet over medium heat, add the oil and onion and cook, stirring occasionally, until tender, about 8 minutes. Add the ginger, shallot, garam masala, coriander, cumin, turmeric and cayenne pepper; cook for 1 minute. Add the tomato paste and cook about 1 minute. Add the crushed tomatoes and remaining 1/4 teaspoon of salt and bring to a simmer, scraping up the browned bits from the bottom of the pan. 

3 Add the cooked mixture to the slow cooker or Instant Pot and stir to combine with the chicken.

Note: With the Instant Pot, you can saute right in it, then switch it to Slow Cooker mode.

4 Put on the optional Instant Pot glass lid, or use the pressure cooking lid with the steam release handle turned to Venting. Select the Slow Cook program. Within 10 seconds, press Slow Cook to set temperature to Normal. Within 10 seconds, press “+ or –“ to set time to 6 hours.

Note: If using a slow cooker, cover and cook on Low for 6 hours. 

5 Stir in the cream. Leave the slow cooker uncovered and cook on the High setting for 30 minutes. Taste and adjust seasoning. Garnish with cilantro and serve with rice or naan or both. 

Disclosure: We are a participant in the Amazon Services LLC Associates Program, an affiliate advertising program designed to provide a means for us to earn fees by linking to Amazon .com and affiliated sites. We are a ThermoWorks affiliate, earning a small commission at no cost to you on purchases made through our links. This helps cover some of the costs of running the blog. Thank you for your support.

Jean

14 November 2019

Turkey and Dressing for Two - Classic Bread Stuffing

Turkey and Dressing for Two / www.delightfulrepast.com

We enjoy a turkey dinner a few times throughout the year, and since it's just the two of us most of the time, this is an easy way to do it. Just enough turkey for two and just enough dressing for two--if one of the two is crazy about dressing (that would be me!). 

My father would have appreciated this post. He was not a turkey fan, did not appreciate leftovers, and refused to eat turkey more than once a year. 

Do you call it stuffing or dressing? My family called it dressing, whether it was baked inside the turkey or in a dish. Like my mother before me, I've tried all kinds of variations/add-ins--sausage, dried fruits, nuts--someone even snuck an egg into it once; but my favorite is the classic bread stuffing.

Unfortunately, I'd used up my stash of Make-Ahead Turkey Gravy and Broth (in anticipation of having to switch everything to a new refrigerator last week), but we made do. But do make that first if you're going to be doing the full-on, big deal turkey dinner. 


To serve four people, use a 13x9x2-inch baking dish and two packages of cutlets; no need to double the dressing recipe. I might post just one more turkey dinner related recipe next week. What is your favorite item on the menu?

Turkey and Dressing for Two / www.delightfulrepast.com
May not look pretty or colorful in the baking dish, but when you plate
it up with gravy, sweet potatoes, cranberry sauce and green vegetables,
it looks verrrry photogenic!
Don't forget to Pin it and share it!

Turkey and Dressing for Two 


The Dressing

3/4 pound (12 ounces/340 grams) good white and/or French bread, sliced and cut into 1/2-inch cubes
1 stick (4 ounces/113 grams) unsalted butter
1 cup chopped celery
3/4 cup chopped onion
1/2 teaspoon salt, divided
1/2 teaspoon coarsely ground black pepper, divided
2 teaspoons poultry seasoning
1 3/4 cup (14 fluid ounces/414 ml) homemade turkey broth or low sodium chicken broth

The Turkey

1 14.4-ounce (408 grams) turkey breast cutlets (5 cutlets, boneless and skinless)

Note: Of course, you can skip the bread, salt, pepper and poultry seasoning AND Step 1 if you pick up a box of seasoned stuffing mix. There are even some organic brands now. It all depends on whether you can find one seasoned the way you like, and that might prove very difficult. 

1 Lay the cubed bread out on a sheet pan and place it in the cold oven for 48 hours, stirring twice a day, to dry it out. My mother always dried the bread out in a warm oven because she couldn't have her oven tied up for two days! Just preheat the oven to 325F/165C/Gas3, and pop the sheet pan in for 50 minutes or so, stirring halfway through; cool completely.

2 In a 3-quart saucepan, melt the butter and cook the chopped celery and onion, with 1/4 teaspoon each of the salt and pepper, until very soft, about 15 minutes. About 5 minutes in, preheat oven to 350F/180C/Gas4. Stir in the remaining 1/4 teaspoon each salt and pepper and the poultry seasoning. Add the bread cubes, lightly crushing some or all of the cubes, depending on what texture you prefer. Stir until bread and vegetable mixture are thoroughly combined, then gradually stir in broth. Taste and adjust seasoning. Add a bit more broth if you like a moister dressing. 

3 Transfer the dressing to a greased 8x8x2-inch baking dish, pressing it down lightly.* Season the cutlets on both sides with salt and pepper. Lay them on top of the dressing; they will be overlapping a bit. Cover the baking dish tightly with a square of aluminum foil. Bake for about 45 to 50 minutes. Both the cutlets and the dressing should register 165F/74C on an instant-read thermometer.

* You can do this a day ahead, then add the turkey cutlets just before baking.

Disclosure: We are a participant in the Amazon Services LLC Associates Program, an affiliate advertising program designed to provide a means for us to earn fees by linking to Amazon .com and affiliated sites. We are a ThermoWorks affiliate, earning a small commission at no cost to you on purchases made through our links. This helps cover some of the costs of running the blog. Thank you for your support.

Jean

31 October 2019

Make-Ahead Turkey Gravy and Broth

Make-Ahead Turkey Gravy and Broth / www.delightfulrepast.com

Turkey Gravy is the highlight of any turkey dinner. Whether you're hosting a turkey dinner or doing a make-and-take side for dinner at someone else's house, you can be in charge of the gravy!

(I first posted this three years ago, though I've been making it for decades. If you read it then but didn't try it, please read it again and give it a go now!)

If you've never made the gravy ahead of time, you're going to thank me for this. It's the only way to go when you've got a dozen things on the menu, some of which need doing at the last minute. 

You know what I'm talking about. The classic mashed potatoes are mashed at the last minute, the dinner rolls are heated at the last minute, so many things to see to. By the time you sit down at the table, you're exhausted! 

But you can get the turkey broth and gravy done well in advance. You'll have enough broth for stuffing/dressing as well as gravy. Just freeze both until a day or two before you need them. If you make it two or three days ahead, just refrigerate it.

Make-Ahead Turkey Gravy and Broth / www.delightfulrepast.com
Don't forget to Pin it! 


(You can make the Cranberry Sauce two days ahead. Try it! You'll never go back to canned! Actually, some people love the canned cut into slices, so I sometimes serve both.)

Though it's made with just 2 pounds of turkey, the gravy tastes wonderful. But, if you want added flavor or want to increase the amount of gravy, when you take your turkey out of the pan on the big day, combine the pan drippings (minus the fat) and make-ahead gravy for added oomph.

About the broth: I'm a huge fan of store-bought organic free-range low-sodium chicken broth, but NOT for anything to do with a turkey dinner. You MUST make turkey broth, whether this way or with the neck, etc, on the day you roast the turkey, or both.

Do you like to make things ahead or do it all on the day? My mother always did pretty much everything on the day, but she was made of sterner stuff. I have to stretch it out!

Make-Ahead Turkey Gravy and Broth (this photo - the roasted drumsticks) / www.delightfulrepast.com

Make-Ahead Turkey Gravy


(Makes about 4 cups)

The Turkey

2 turkey drumsticks* (about 2 pounds/0.91 kg total)
1/4 teaspoon salt
1/2 teaspoon coarsely ground black pepper

1 tablespoon dry sherry plus enough water to make 1/2 cup (4 fluid ounces/118 ml)


* Other parts might work, too, but I've only ever used drumsticks as they are more readily available where I shop.

The Broth


The Turkey, above, cooked
1 medium onion, peeled and halved
2 medium carrots, cut into 3-inch pieces
4 medium celery stalks, cut into 3-inch pieces
Handful of fresh parsley
1 bay leaf
1/2 teaspoon salt
1/2 teaspoon coarsely ground black pepper
1/2 teaspoon dried thyme leaves

2 1/2 quarts (80 fluid ounces/2.36 litres) water

The Gravy


1/3 dip-and-sweep cup (1.67 ounces/47 grams) unbleached all-purpose flour

4 cups (32 fluid ounces/946 ml) of The Broth

1 Preheat oven to 400F/205C/Gas6. Lightly oil (about 1/2 teaspoon) a heavy-duty quarter sheet pan. Pat the drumsticks dry and place them in the prepared pan. Sprinkle all sides with salt and pepper. Roast for 60 to 70 minutes. Sixty minutes would probably be enough, but I like to get maximum brown bits in the roasting pan.

Note: If you don't see lots of brown in your pan after 70 minutes, let it go longer. This is a crucial step. Just be sure you don't let it burn.

2 Transfer the drumsticks to a 5-quart pot (I use a Le Creuset 5.5-quart round French oven); set aside for the moment.

3 Place the roasting pan on the stove and pour in the liquid a little at a time, stirring and scraping up the browned bits. When pan is completely deglazed, pour the liquid into a jar, bowl or 1-cup glass measure; refrigerate. You'll see from the photo that I ended up with about 1/4 cup of fat, which is perfect!

Make-Ahead Turkey Gravy and Broth (this photo - pan drippings) / www.delightfulrepast.com


4 Add vegetables and seasonings to the pot, along with water. Bring to a boil, reduce heat and simmer with lid slightly ajar for 4 hours, checking liquid level after second and third hours and adding more water only if needed.

Make-Ahead Turkey Gravy and Broth (this photo - the broth) / www.delightfulrepast.com


5 Strain the broth into a 2-quart glass measure. You will have 6 to 8 cups of broth.

6 Transfer your refrigerated pan drippings to a 2-quart saucepan and begin heating. Add flour to pan drippings and cook, whisking or stirring constantly, for 2 minutes.

7 Add about 1/2 cup of the stock and whisk briskly until very smooth, then add remaining broth. Bring to a boil, whisking frequently, until the gravy thickens, 5 to 10 minutes. Taste and adjust seasoning.

8 Leave the gravy as is or strain into a 4-cup glass measure. Pour it into a 6-cup glass freezer container. Let cool a bit at room temperature, refrigerate until cold, then freeze until the day before you want to serve it.


9 The day before you want to use it, transfer the gravy from freezer to refrigerator. Reheat the thawed gravy, combining it with the defatted pan drippings for even more flavor.

Disclosure: We are a participant in the Amazon Services LLC Associates Program, an affiliate advertising program designed to provide a means for us to earn fees by linking to Amazon .com and affiliated sites. We are a ThermoWorks affiliate, earning a small commission at no cost to you on purchases made through our links. This helps cover some of the costs of running the blog. Thank you for your support. 

Jean

13 June 2019

Hummus-Crusted Chicken - Easy Sheet Pan Dinner

Hummus-Crusted Chicken - Easy Sheet Pan Dinner (for one or more) / www.delightfulrepast.com

Hummus-crusted chicken came onto my radar when I was trying to think of another easy Chicken Sheet Pan Dinner. Since I had just made a batch of hummus for myself (Mr Delightful doesn't do dips), I thought this chicken would be a good way to use it all up and sneak a little of it to Mr Delightful in a non-dip kind of way!

You can make it with your favorite store-bought hummus, if you have one. I don't, because they're all way too garlicky for me. And, besides, I just like my homemade Hummus better, and it's organic. I have to leave out the garlic altogether these days, but my recipe includes just the right amount of garlic for those who aren't allergic.


Hummus-Crusted Chicken - Easy Sheet Pan Dinner / www.delightfulrepast.com


I'm going to do one thing differently next time: Don't you think pressing on a sprinkling of sesame seeds for a little crunch would be a nice touch?


Hummus-Crusted Chicken - Easy Sheet Pan Dinner (for one or more) / www.delightfulrepast.com


I use a 15x10x1-inch jelly roll pan or an 18x13x1-inch half sheet pan for dinner for two or three, and a 13x9x1-inch quarter sheet pan when it's dinner for one. You just do a few minutes of prep in the morning, put it in the fridge, then pop it in the over when you're ready. The sort of streamlined cooking perfect for a busy day.

If you like this post, please be sure to Pin it and share it on your social media. And I always love your comments! 


Hummus-Crusted Chicken - Easy Sheet Pan Dinner (for one or more) / www.delightfulrepast.com

Hummus-Crusted Chicken Sheet Pan Dinner

(Makes one serving, just multiply for more)

1 1/2 tablespoons extra virgin olive oil
1 6-ounce (170 grams) boneless skinless chicken breast
About 1/8 teaspoon salt
About 1/8 teaspoon coarsely ground black pepper
1 to 2 tablespoons hummus, depending on the surface area of the chicken

About 1/8 teaspoon paprika or smoked paprika
Optional: 1/2 teaspoon or so of sesame seeds
6 ounces (170 grams) cauliflower and broccoli florets
6 ounces (170 grams) orange-flesh sweet potato, peeled and cut into 1/3- to 1/2-inch slices
Optional: a little cinnamon-sugar for the sweet potato slices 

1 Use a 1/2 tablespoon of the olive oil to oil a quarter sheet pan (foil-lined or not) for one or 1 tablespoon for jelly roll pan for two or half sheet pan for three. Place the chicken breast(s) in the middle of the pan. Season the top side with some of the salt and pepper. Spread the hummus on the top and sides, just a thin, even layer. Sprinkle with paprika and sesame seeds.


2 Spread the cauliflower and broccoli florets on one end of the pan and drizzle with 1/2 tablespoon of the olive oil per serving, tossing to coat well; sprinkle with the remaining salt and pepper. Spread the sweet potato slices at the other end of the pan and drizzle with 1/2 tablespoon of the olive oil per serving, turning to coat well; if desired, sprinkle the tops with a little cinnamon-sugar.

3 Cover and refrigerate until time to bake. Preheat oven to 400F/205C/Gas6. Bake uncovered for 30 minutes.

Disclosure: We are a participant in the Amazon Services LLC Associates Program, an affiliate advertising program designed to provide a means for us to earn fees by linking to Amazon .com and affiliated sites. We are a ThermoWorks affiliate, earning a small commission at no cost to you on purchases made through our links. This helps cover some of the costs of running the blog. Thank you for your support. 

Jean