28 April 2022

Swedish Pancakes - Pannkakor

Swedish Pancakes - Pannkakor / www.delightfulrepast.com

Swedish pancakes came about because a friend asked if I could pick up an order of Swedish pancakes from a local restaurant for her visiting grandchildren because it was one of their favorites. And I, of course, said "Why don't I just make some?"

So I read all about how they differed from crepes and then adjusted my carefully formulated crepes recipe accordingly. Some people use no sugar in Swedish pancakes, but others use crazy amounts of the stuff! Let me assure you the lone half tablespoon of sugar in my recipe is plenty for a sweet pancake.

Lingonberry jam is the traditional accompaniment and cannot be improved upon. The small sour berries make a delightfully tart jam that goes so well with a meal of Swedish meatballs as well as with Swedish pancakes. Some say it is raspberry jam that is "authentic."

But any berry jam will work. That and a light dusting of powdered sugar and a little whipped cream never go amiss. Wonderful for breakfast, but also great for dessert. In fact, they are the dessert following pea soup for a traditional Thursday night Swedish dinner.

And my British readers will notice straight away that Swedish pancakes themselves are the same as British pancakes! But the traditional accompaniment to British pancakes is a tiny sprinkle of sugar and a squeeze of lemon. Scrummy!

Do leave a comment and tell me about your favorite pancakes—Swedish, British, American, or otherwise—because I love them all! 


Swedish Pancakes - Pannkakor / www.delightfulrepast.com

If you like it, please Pin it and share it!

Swedish Pancakes - Pannkakor


(Makes 12 8-inch pancakes)

1 2/3 dip-and-sweep cups (8.33 ounces/236 grams) unbleached all-purpose flour
1 1/2 teaspoons sugar
1/2 teaspoon salt
3 large eggs
2 1/4 cups (18 fluid ounces/532 ml) milk
2 tablespoons (1 ounce/28 grams) unsalted butter, melted and slightly cooled

1 In 1-quart glass measure, vigorously whisk together flour, sugar, and salt.

2 In a bowl, whisk eggs together, then whisk in milk and melted butter.

3 To get a really smooth batter, whisk no more than half the milk mixture into the flour mixture until smooth before adding the rest. Whisk well. The batter (about 4 cups) should be about as thick as heavy cream. Cover and refrigerate for at least 1 hour or up to 24 hours.

4 Use a 10-inch nonstick fry pan (I love this tri-ply stainless steel pan!) with flared (not straight) sides to make 8-inch pancakes. Put a tiny piece of butter in the pan and brush it around as it melts. Heat the pan over medium heat until it is thoroughly heated (droplets of water sprinkled onto the pan will sizzle and disappear immediately), about 3 minutes, depending on your pan and your stove. 

Tip: People are always saying the first pancake is just a tester. But your very first pancake will be perfect if you just have the patience to heat your pan properly. Don't waste your batter in an insufficiently heated pan. And remember to gently stir the batter before using it. Give it a stir before each pancake. Tender and seemingly delicate, the pancakes are really quite easy to handle.

5 Here it is now, The Swirl: Holding pan off heat, quickly pour into the center of the pan 1/3 cup of batter, and immediately begin swirling, tilting and rolling, the pan until the batter covers the bottom of the pan evenly. Cook until lightly browned on the bottom and looking dry on the top, particularly the edge. The time will vary, depending on your pan and your stove; 1 to 1 1/2 minutes is about right for mine. Using both hands, lift the edge with your fingers and turn it over. The second side will need less time, about half, to cook.

Tip: I use a 1/3-cup measure, from my stainless steel measuring cup set, for just the right amount of batter. And I use a mini silicone spatula to start lifting the edge, then take hold of it with the thumb and index finger of both hands and quickly flip it over. To remove the finished pancake from the pan, just tilt it over the plate you're stacking them on and let it slide out.

6 Repeat until all the batter is used. This recipe makes precisely enough batter for 12 pancakes. For immediate use, stack pancakes and keep covered. Or stack on a plate and store, wrapped, in the refrigerator until ready to use, up to 2 or 3 days; may also be frozen for up to 2 months. Allow frozen pancakes to thaw completely before unwrapping, separating, and reheating.

7 Serve with lingonberry jam or another type of berry jam, a dusting of powdered sugar, a dollop of whipped cream, or whatever you like.

Disclosure: We are a participant in the Amazon Services LLC Associates Program, an affiliate advertising program designed to provide a means for us to earn fees by linking to Amazon .com and affiliated sites. We are a ThermoWorks affiliate, earning a small commission at no cost to you on purchases made through our links. This helps cover some of the costs of running the blog. Thank you for your support. 

Jean

If you liked this post, please Pin it and share it!

14 April 2022

One-Bowl Guinness Chocolate Cake

Guinness Chocolate Cake - Easy and Has No Eggs or Dairy / www.delightfulrepast.com

Guinness Chocolate Cake can be done as a single 8-inch layer with a simple icing or dusting of powdered sugar or as two 6-inch layers filled and frosted. But unless it's going on the afternoon tea table, I just make the single layer. With whipped cream, above, or a thin layer of icing, below.


Guinness Chocolate Cake - Easy, Egg-Free, Dairy-Free / www.delightfulrepast.com


Made without eggs or butter, Guinness Chocolate Cake also just happens to be vegan. I once saved a piece for four days, just for test purposes, and it was still fresh and fabulous! I had thought it might dry out since it has no eggs.

What does the Guinness add to the cake? What does it taste like? I can't really describe it, but it's different. The Guinness enhances the chocolate flavor and gives it a slightly tangy, malty flavor—a bit of an "edge," you might say.

Another thing you'll love about it is that it is so easy and no-muss-no-fuss. No need for a stand mixer or even a hand mixer. A one-bowl cake that will never wear you out or let you down!


Guinness Chocolate Cake - Easy and Has No Eggs or Dairy / www.delightfulrepast.com

If you like it, please Pin it and share it!

Guinness Chocolate Cake


(Makes one 8-inch round layer)

1 1/3 dip-and-sweep cups (6.67 ounces/189 grams) unbleached all-purpose flour
1 cup (7 ounces/198 grams) sugar
1/3 packed cup (1 ounce/28 grams) natural unsweetened cocoa
1 teaspoon baking soda
1/4 teaspoon salt
1 1/4 cup (10 fluid ounces/296 ml) Guinness stout
1/4 cup (2 fluid ounces/59 ml OR 1.875 ounces/53 grams) extra virgin olive oil
1 1/2 teaspoons vanilla extract

1 Grease and flour one 8-inch round 2-inch deep cake pan (Don't even bother with shallow cake pans!). And a circle of parchment paper in the bottom will ensure successful removal from the pan, if you have that concern. Preheat oven to 350F/180C/Gas4. 


Note: If you want to get fancy and make a sweet little layer cake (the size I make for an afternoon tea), divide the batter between two 6-inch round 2-inch deep cake pans and bake for 30 to 35 minutes. (I also love, and have several, Fat Daddio's cake pans.)

2 In a 2-quart bowl, whisk together flour, sugar, cocoa, baking soda, and salt. Add Guinness, oil, and vanilla extract. Whisk vigorously for about a minute, or until smooth. Pour into prepared pan. Run a knife through the batter a few times to break up any large air bubbles. Bake for about 35 to 45 minutes, or until it tests done with a toothpick.

Note: When measuring the stout in a 2-cup glass measure, let it stand a minute for the foam to settle and make sure the liquid, not the foam, comes up to the mark.

3 Let cool in pan on wire rack for 10 minutes. Invert onto the rack to cool completely. 


Disclosure: We are a participant in the Amazon Services LLC Associates Program, an affiliate advertising program designed to provide a means for us to earn fees by linking to Amazon .com and affiliated sites. We are a ThermoWorks affiliate, earning a small commission at no cost to you on purchases made through our links. This helps cover some of the costs of running the blog. Thank you for your support. 

Jean

If you liked this post, please Pin it and share it!

31 March 2022

Baba Ghanoush with Oven-Toasted Pita Wedges

Baba Ghanoush with Oven-Toasted Pita Wedges / www.delightfulrepast.com

Baba Ghanoush, my second favorite Middle Eastern food (after hummus) is another one of those things my texturally challenged husband won't even try. He's just not a dip/spread kinda guy. But since most people are, you should have some of this on hand over the weekend. Make a big batch, serve some tonight and the rest over the weekend. It keeps nicely for a few days.

As with the hummus, don't get too carried away with the garlic. Remember the garlic is just a minor player, the eggplant is the star. You'll have plenty of time to make the oven-toasted pita wedges (see below) while the baba ghanoush is chilling. Tell me, do you or someone you know have these texture issues, or is Mr Delightful the only person on the planet who doesn't like dips of any kind?

If you'd like to make your own pita bread for the Oven-Toasted Pita Wedges (below), it's really quite easy. I hope you'll try it soon. (And, yes, I do know that 'pita' means bread and that saying 'pita bread' is really saying 'bread bread'!)


Baba Ghanoush with Oven-Toasted Pita Wedges (watercolor by me) / www.delightfulrepast.com)

If you like this post, please Pin it and share it!

I have to admit, baba ghanoush is not the most photogenic food in the world and needs some serious styling, which I didn't have time to do, so I used my watercolor eggplant painting for the "Pinnable-size" image in this post!

Baba Ghanoush - Caviar d'Aubergine

(Makes 2 cups)

2 medium (1 1/2 to 2 pounds total) eggplants
2 tablespoons fresh lemon juice
1/4 teaspoon (1/2 small clove) minced garlic
1/4 cup unsalted tahini
1/2 teaspoon salt
1/4 teaspoon pepper
1/8 teaspoon cumin
1 tablespoon extra-virgin olive oil

1 Preheat oven to 450F/230C/Gas8. Cut eggplants in half, score tops with diamond pattern, rub with just enough oil to coat. Place on foil-lined baking sheet and roast about 30 minutes or until very soft. Cool slightly. Scoop out flesh into colander and let stand a few minutes to drain off any liquid.

2
 In bowl of food processor, place drained eggplant and all remaining ingredients. Pulse 8 to 12 times. Put into serving dish and cover with plastic wrap directly on the surface. Refrigerate for at least four hours before serving. Can be made a day or two ahead.

3
 Garnish with a drizzle of olive oil and some finely chopped mint, flat-leaf parsley or pistachios. (I didn't have any of those on hand, so I just used some paprika.) Serve with oven-toasted whole wheat pita wedges (see below), sliced baguette or Armenian cracker bread (I love ak-mak!) and raw vegetable strips.

Oven-Toasted Pita Wedges

(Makes 48 wedges)

Preheat oven to 375F/190C/Gas5. Brush a little extra-virgin olive oil on both sides of 6 whole wheat pitas (one package). Cut each into 8 wedges. Place on two large baking sheets. Sprinkle with a little salt, if you like. Bake for 6 to 10 minutes or until crisp; no need to turn. Can be made day ahead, cooled completely and stored in airtight container.

And here's my favorite kitchen timer, the TimeStack, 'cause if you're like me and have a lot going on at one time, you need more than one or two timers!

Disclosure: We are a participant in the Amazon Services LLC Associates Program, an affiliate advertising program designed to provide a means for us to earn fees by linking to Amazon .com and affiliated sites. We are a ThermoWorks affiliate, earning a small commission at no cost to you on purchases made through our links. This helps cover some of the costs of running the blog. Thank you for your support. 

Jean

If you liked this post, please Pin it and share it!

17 March 2022

Brown Butter Chocolate Chip Cookies

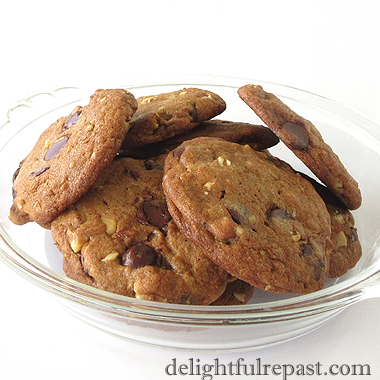
Brown Butter Chocolate Chip Cookies / www.delightfulrepast.com

Chocolate Chip Cookies seem to be at the top of every "favorite cookie" list I see. I developed my other Chocolate Chip Cookies recipe years ago, with a few additions/changes to the usual ingredients.

Cutting back on the sugar makes that cookie a bit more "adult," but I wanted to make them even more so. So I experimented with the greater variety of chocolate chips available today and favored the 60% cacao bittersweet chips.

Brown butter is one of my favorite ways to add depth to certain recipes, and they certainly add depth to these, so much so that I had to put it in the name: Brown Butter Chocolate Chip Cookies.

If you're among the one in three people who prefer a crisper cookie, bake the maximum time. But if you're like the two out of three people who favor a chewy chocolate chip cookie, take them out of the oven while they're still a bit underbaked; also, try adding 2 tablespoons of milk to the dough.

If you're gluten-free, I've included directions for one of my favorite homemade gluten-free blends. How do you like your chocolate chip cookies: gluten-free or regular, crisp or chewy, semisweet or bittersweet chips, big or small?

PS My favorite type of chocolate chip of all time is the mini chocolate chip. If you know of a mini bittersweet chip, please tell me!

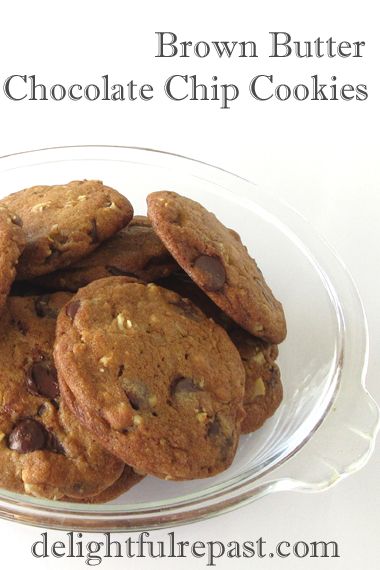
Brown Butter Chocolate Chip Cookies / www.delightfulrepast.com

If you like it, please Pin it and share it!


Brown Butter Chocolate Chip Cookies


(Makes 41 3-inch 30-gram cookies)

2 sticks (8 ounces/227 grams) unsalted butter
1 cup (4 ounces/113 grams) chopped walnuts or pecans
2 dip-and-sweep cups (10 ounces/283 grams) unbleached all-purpose flour*
1/4 cup oats (1 ounce/28 grams), ground to coarse meal in food processor
1 teaspoon baking soda
1/2 teaspoon salt
3/4 firmly packed cup (5.25 ounces/149 grams) dark brown sugar
1/2 cup (3.5 ounces/99 grams) sugar
2 large eggs 
1 tablespoon Kahlua or strong coffee
1 1/2 teaspoons vanilla extract
1 teaspoon cider vinegar
1 3/4 cups (10 ounces/283 grams) 60% cacao bittersweet chocolate chips

* For gluten-free, whisk together: 3/4 cup sorghum flour, 3/4 cup potato starch, 1/2 cup tapioca flour, 1 teaspoon xanthan gum to replace all-purpose flour.


1 In a 2-quart saucepan with a shiny interior so you can judge the color of the butter as it browns, melt the butter over medium heat. Continue cooking, stirring or swirling frequently, until butter gets foamy and bubbly and just starts to turn light tan and smell nutty. You cannot take your eyes off it; it can go from brown to black in a flash! Let cool to room temperature. You can set the pan in the refrigerator for 30 to 60 minutes.

2 In a skillet over medium heat, toast the chopped nuts, stirring constantly, until you can smell their aroma, about 4 minutes. As with the brown butter, you cannot take your eyes off the nuts; they burn easily.

3 In a 1.5- to 2-quart bowl, whisk together the flour (or gluten-free ingredients), ground oats, soda and salt. Note: Measure the oats before grinding.

4 In a large bowl using a spoon or an electric hand mixer, cream the butter and sugars until combined. Beat in eggs, one at a time, Kahlua or strong coffee, vanilla extract, and vinegar. By hand, stir in flour mixture, chocolate chips, and toasted walnuts. Cover and refrigerate for 24 hours. Remove dough from refrigerator about half hour (or more) before you want to make the cookies, or else the dough will be too stiff to scoop.*

* Which is how I happened to come up with the 30-gram weight of the dough balls!

5 Preheat oven to 375F/190C/Gas5. Drop #40 scoops (0.8 ounces or approximately 1.5 tablespoons) of dough 3 inches apart onto ungreased parchment-lined cookie sheets (I use a heavy-duty half sheet pan). With your fingers or something (I used to use a 2 1/4-inch diameter flat-bottomed 1/3-cup from my stainless steel measuring cup sets), press each scoop into a 2 1/4-inch round.* 

* If you don't, you will get domed cookies. Baking times and how much cookies spread or dome are affected by the type of baking sheet you use and your oven.

6 Bake for 9 to 11 minutes (11 minutes is perfect with my oven for a lightly crisp cookie), until lightly  browned. For crisp cookies, bake a bit longer, watching carefully so that they don't burn; for chewy cookies, underbake a bit, but not too much. Cool on baking sheet for 1 minute, then remove to wire racks to cool completely.

Disclosure: We are a participant in the Amazon Services LLC Associates Program, an affiliate advertising program designed to provide a means for us to earn fees by linking to Amazon .com and affiliated sites. We are a ThermoWorks affiliate, earning a small commission at no cost to you on purchases made through our links. This helps cover some of the costs of running the blog. Thank you for your support. 

Jean

If you liked this post, please Pin it and share it!

03 March 2022

Chicken Biryani

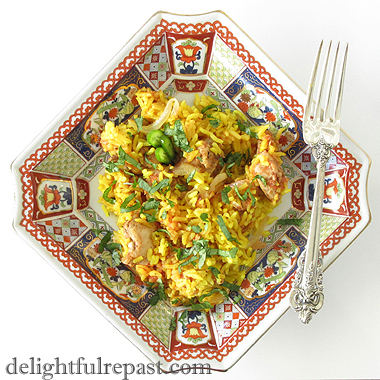
Chicken Biryani / www.delightfulrepast.com

Chicken Biryani is a popular dish of India and beyond that originated in Persia. Biryani is also made with other meats, but I prefer chicken thighs. It varies from region to region (and from cook to cook) in both ingredients and method, and (disclaimer here) I make no claims whatever to authenticity!

If you have made, or even had, biryani of any type, I'd love to hear about it. I have much to learn. There's a great long list of spices used in biryanis, but no one recipe includes them all. I checked my bottle of garam masala to remind myself which spices were included in that blend and then added two that were not in it and extra of a couple that were.


Chicken Biryani / www.delightfulrepast.com


Many people add garlic, but I am allergic. And many people add way too much garlic, which can easily overpower a dish. So if you do add garlic, use just one small clove or even less, so your finished dish will have some subtlety! But it is very flavorful without it, and I doubt that you would miss it.

The Naan - Classic Yeasted Flatbread of India and Beyond that I posted a month ago is the perfect accompaniment.

Have you tried any new dishes or cuisines lately? I think many of us have during the last two years!
 

Chicken Biryani / www.delightfulrepast.com

If you like it, please Pin it and share it!

Chicken Biryani

(Makes 4 servings)

The Chicken

1 1/2 to 2 teaspoons garam masala
1/2 teaspoon fennel seeds, toasted and crushed
1/2 teaspoon salt
1/4 teaspoon coarsely ground black pepper
1/4 teaspoon cumin
1/8 teaspoon cayenne
1/3 cup (2.88 ounces/82 grams) plain yogurt
1 teaspoon grated fresh ginger
1 small clove garlic, crushed, optional
1 1/4 pounds (20 ounces/567 grams) boneless skinless chicken thighs, cut into 1-inch pieces
3/4 cup tomato puree (fresh or half a 14.5-ounce can diced tomatoes, pureed)

The Rice

1 cup (6.625 ounces/188 grams) white basmati rice
1 1/2 cups (12 fluid ounces/355 ml) water
1 tablespoon unsalted butter
1/4 teaspoon salt
1 small bay leaf 
1/2 teaspoon turmeric

The Onion

1 tablespoon extra virgin olive oil
1 tablespoon unsalted butter
1 medium (12 ounces/340 grams) onion*, quartered and thinly sliced 

* I used a yellow onion, but red or white are fine.

The Garnish

2 packed tablespoons cilantro (fresh coriander)


1 In 1.5-quart mixing bowl, whisk together garam masala, fennel, salt, pepper, cumin, and cayenne. Gradually whisk in yogurt and grated ginger. Add chicken, coating well. Cover and refrigerate several hours or overnight.

2 In 2-quart saucepan, bring rice, water, butter, salt, bay leaf, and turmeric to a boil. Stir once and cover tightly with lid. Reduce heat to maintain a low simmer and cook for 15 minutes. Remove from heat, leave covered, and let stand for 10 minutes. Fluff with fork and remove bay leaf. Cover and set aside. 

3 In 12-inch skillet (that has a lid), heat oil and butter over medium-high heat and fry the onion slices until golden brown; this might take up to 20 minutes. Drain on paper towels. Set aside 1/3 of the prettiest fried onions for the garnish.

4 Add the chicken and marinade to the skillet and cook over medium to medium-high heat for about 7 minutes. Add the tomato puree and continue cooking for about 3 minutes. Stir in half of the remaining fried onions to the mix and continue cooking for 3 minutes.

5 Spread the rice over the chicken. Scatter the remaining onions (but not the 1/3 reserved for the garnish) over the rice. Cover with lid and cook over low heat for 15 minutes.

6 Stir lightly. Leave in skillet or transfer to serving dish. Garnish with reserved fried onions and chopped cilantro. The cilantro is not just a garnish, it is an important part of the dish, so don't skip it or substitute parsley (unless you're one of those people who really don't like cilantro).

Disclosure: We are a participant in the Amazon Services LLC Associates Program, an affiliate advertising program designed to provide a means for us to earn fees by linking to Amazon .com and affiliated sites. We are a ThermoWorks affiliate, earning a small commission at no cost to you on purchases made through our links. This helps cover some of the costs of running the blog. Thank you for your support. 

Jean

If you liked this post, please Pin it and share it!