22 February 2018

Faux Tuna Salad

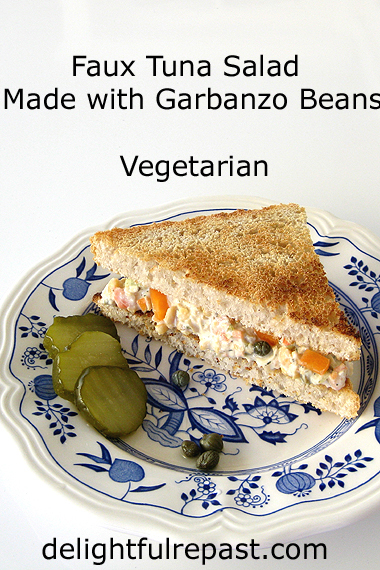
Faux Tuna Salad - Made with Garbanzo Beans - Vegetarian / www.delightfulrepast.com

I really like a good tuna salad sandwich, but the kind of tuna I like, the solid white albacore, has even more mercury (nearly three times as much, I recently read) than the light tuna from the smaller skipjack. And sometimes I just like to eat vegetarian. So I started looking through the pantry to see if it would spark an idea for a substitute.

First thing I spotted was a can of organic garbanzo beans (also called chickpeas), and I thought, hmm … chopped up and mixed with my favorite tuna salad ingredients … And, of course, it would make a delightful tea sandwich, especially when there’s a vegetarian on the afternoon tea party guest list.

Then I decided to google it. And shoooot! It’s already a “thing.” Anyway … I don’t mind. If something’s a good idea, it’s a good idea, even if somebody else already had it! And, no, it does not “taste just like tuna salad.” Similar, due to the other ingredients, but it’s not going to fool anyone. It tastes good, and that’s what counts.

But if, like Mr Delightful, you insist on the real, not faux, thing, here’s Tuna Salad. What do you think - are you ready for faux tuna salad? This sandwich was made with my Sourdough Sandwich Bread we always have on hand.


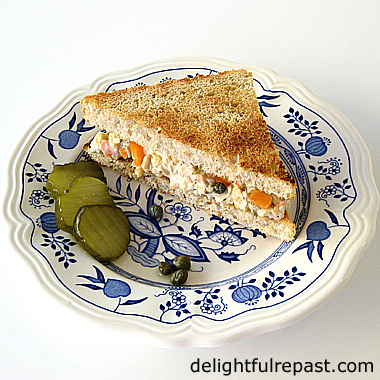
Faux Tuna Salad - Made with Garbanzo Beans - Vegetarian / www.delightfulrepast.com


Faux Tuna Salad


1 15-ounce can garbanzo beans, rinsed and drained
1/4 cup diced celery
1/4 cup diced carrot
1/4 cup diced red bell pepper
1/4 cup diced sweet pickle
2 teaspoons capers, drained and roughly chopped
1 tablespoon chopped lemon (juice is a bit too liquid for the salad)
1/2 teaspoon dried dill
1/2 teaspoon Worcestershire sauce (omit for vegetarian or vegan)
1/8 teaspoon coarsely ground black pepper
1/4 cup mayonnaise or vegan substitute
2 teaspoons country Dijon mustard

1 Turn your rinsed and drained garbanzo beans out onto a cutting board and chop them coarsely with a large knife. You’ll notice the skins coming off the beans. You don’t have to, of course, but I found myself unable to resist pulling the large pieces of skin out of the pile and discarding them. And I like to put a half cup or so of the beans into a small mixing bowl and mash them up before adding the chopped ones.

Note: How finely you need to chop the garbanzos and vegetables depends on whether you are making regular sandwiches or tea sandwiches.

2 Add remaining ingredients. Stir well. Taste and adjust seasoning. Cover and refrigerate.

15 February 2018

Blueberry Cornmeal Muffins

Blueberry Cornmeal Muffins ( this photo - 6 muffins on a white ceramic tray) / www.delightfulrepast.com

Blueberry Cornmeal Muffins should not, to my mind, have half flour and half cornmeal; that ratio is for cornbread muffins. I don’t want sweet cornbread with berries in it. I like just enough cornmeal to give the muffins a little something extra in the flavor and texture department.

So, while these muffins have some cornmeal, they retain the lightness a blueberry muffin should have. And my recipe has the maximum amount of sugar I like in muffins. Know what I call muffins with more sugar than this? Cupcakes!

If you want unsullied batter, you must use fresh blueberries. I’ve tried every trick in the book to keep frozen blueberries from turning the batter blue and, while some work better than others, none of them really work. But when blueberries aren’t in season, I use frozen but not thawed.


Blueberry Cornmeal Muffins / www.delightfulrepast.com


Not keen on blueberries? Or cornmeal? Here are a few other muffin recipes that might be more to your liking: Lemon Poppy Seed Muffins, Small-Batch Banana Muffins, Raspberry Muffins with Lemon Glaze.

I clearly like lemon, so why no lemon zest in the Blueberry Cornmeal Muffins, you might ask. The flavor of the small amount of cornmeal is very subtle and, I think, easily overwhelmed by the addition of lemon.

Muffins are always best while still warm from the oven, so I often make just 6 rather than 12. This recipe is super simple to cut in half even for those of us who aren't mathematics geniuses.

What's your favorite muffin? And favorite beverage to go with it?


Blueberry Cornmeal Muffins / www.delightfulrepast.com


Blueberry Cornmeal Muffins


(Makes 12 standard size muffins)

2 teaspoons cider vinegar or fresh lemon juice
Milk to make 3/4 cup (6 fluid ounces/177 ml) milk
1 1/3 dip-and-sweep cups (6.67 ounces/189 grams) unbleached all-purpose flour
1/2 dip-and-sweep cup (2.5 ounces/71 grams) fine stone ground yellow cornmeal
1/2 cup (3.5 ounces/99 grams) sugar
2 teaspoons non-GMO baking powder
1/2 teaspoon salt
1/4 teaspoon baking soda
1/4 teaspoon mace or nutmeg

6 tablespoons (3 ounces/85 grams) unsalted butter, coarsely shredded or cut into 1/2-inch cubes
2 large eggs, room temperature
1 1/2 teaspoons vanilla extract
1 1/4 cups* (6.25 ounces/177 grams) blueberries, fresh or frozen (do not thaw!)

* You don’t have to, but I like to set aside about 3 dozen berries to put on top after I’ve filled the muffin cups, just to make sure some pretty berry-ness shows.

1 Preheat oven to 400F/205C/Gas6. Grease a standard 12-muffin tin or line it with paper bake cups. 

2 In 2-cup glass measure, stir together vinegar or lemon juice and milk; set aside to thicken a bit.

3 In large bowl, whisk together flour, cornmeal, sugar, baking powder, baking soda, salt and mace or nutmeg. Take out 2 tablespoons of the flour mixture to coat the berries before adding them to the batter. Work in the butter with your fingertips until the flour mixture looks like coarse meal or rice.

4 Add eggs and vanilla extract to soured milk; whisk until combined. Add thoroughly whisked wet mixture to thoroughly whisked dry mixture. Stir as little as possible, just until dry ingredients are moistened. Using a silicone spatula, gently fold in the berries.

5 Using a 1/4-cup measuring cup, scoop the batter from the edge of the bowl so as not to further mix the batter and evenly fill the 12 muffin cups just about to the top. With spoon or spatula, get every drop of batter out of the bowl. I hate waste; so I calculate all my recipes so that there is no leftover batter. 

6 Bake for about 20 (with fresh berries) to 25 minutes (with frozen berries) or until lightly browned and a toothpick inserted in a center muffin comes out clean. Let stand in tin on wire rack for 5 minutes, then turn muffins out onto wire rack to cool for a few more minutes before serving. 

08 February 2018

Chocolate Shortbread

Chocolate Shortbread Hearts (but you can make any shape you want) / www.delightfulrepast.com

Why Chocolate Shortbread Hearts? Because this month is my 8th blogiversary here at Delightful Repast, and I was thinking how much I you, my dear readers.

I had no idea when I started out that I would be doing it for so long! Or that I would actually build a community of nice people who enjoy the same things I do. 

Like comfort food and tea and wine and the occasional sweet treat like this. I like things less sweet, so I prefer this recipe with 1/3 cup sugar, but you might like it with 1/2 cup. 

When I gave Mr Delightful a heart from Batch #1 with 1/2 cup sugar and asked him if he thought it was too sweet, he didn't. But when I gave him one from Batch #2 with 1/3 cup sugar, he said it was more chocolatey. 👍

(Sorry. Couldn't resist the thumbs-up emoji. Can you tell I only just learned how to insert "special characters" in a post?)

He's the chocolate fan in the family (and is currently enjoying some 86% cacao chocolate, which is pretty intense), so I defer to him in all matters chocolate, since I can take it or leave it myself.

I know, I know, that isn't natural. But hey, I hate shopping, too. I'm just a freak of nature!

If you think this is just a paltry amount of cookies, you can easily double or triple the recipe. 

Also, you can shape them lots of different ways. I have a small collection of 2-inch cookie stamps and used the teapot stamp for the cookies below.


Chocolate Shortbread - Stamped Cookies / www.delightfulrepast.com

The teapots show up much more clearly on pale, plain shortbread cookies, but still these are kind of cute, don't you think? I just used a 2-teaspoon measuring spoon of dough for each, rolled it in a ball, put it in the center of the stamp, then placed it on the parchment-lined baking sheet and pressed till the dough reached the edge of the stamp.

The coffee is optional. I don't use enough that you really taste the coffee, just enough to do that certain something that coffee does to perk up the chocolate flavor.

Thank you for visiting Delightful Repast here and, perhaps, on Pinterest and Twitter as well. I love your comments and am happy to take questions and requests!

Chocolate Shortbread Hearts (but you can make any shape you want) / www.delightfulrepast.com


Chocolate Shortbread


(Makes about 16 2.5-inch hearts)

1 dip-and-sweep cup (5 ounces/142 grams) unbleached all-purpose flour
1/4 dip-and-sweep cup (0.75 ounce/21 grams) unsweetened natural cocoa powder*
1/8 teaspoon salt
1 stick (4 ounces/113 grams) unsalted butter, room temperature
1/3 to 1/2 cup (2.33 to 3.5 ounces/66 to 99 grams) sugar
1 tablespoon very strong coffee (1.5 teaspoons coffee brewed in 1/4 cup hot water)
3/4 teaspoon vanilla extract

* I always buy organic and Fair Trade Certified coffee and cocoa products.

1 In small bowl, whisk together flour, cocoa and salt.

2 In medium bowl, cream the butter, sugar, coffee and vanilla extract just until smooth.

3 Add flour mixture to creamed mixture and mix well without beating a lot of air into it.

4 Roll out dough to 1/4-inch (6.35 mm) thickness between 2 squares of parchment paper. Place on baking sheet and refrigerate for at least 1 hour.

Note: If you want to use the same technique that I use for making the butter sheet for Croissants, it makes rolling out the dough evenly very easy. Fold a 24-inch length of parchment or wax paper in half widthwise and fold up the open sides to make a 10x7-inch package. Unfold it and place it on the work surface. Arrange the slab of dough in the middle of one end of the paper within the "package" area; flatten it a bit. Refold the package and turn it over so that folds are underneath. With a rolling pin, roll the dough in an even layer to fill the package. Place on baking sheet and refrigerate for at least 1 hour.

5 With heart-shaped cutter about 2.5 inches wide and 2.25 inches tall, cut out shortbread. Re-roll scraps and cut out more. Place on parchment-lined baking sheet and refrigerate for 15 minutes to 1 hour. Preheat oven to 325F/165C/Gas3.

Note: If you roll the dough into a 10x7-inch rectangle as in Note above, you can just cut the dough into 25 rectangles. 

6 Bake for 25 to 30* minutes, until quite firm. Cool on baking sheet for 5 minutes. Then transfer to wire rack to cool completely.

* I'm sure that depends on the size and thickness of the cookies, as well as your oven; so start checking at 20 minutes and don't walk away. If you make them the same every time, you can settle on a time.

Jean

01 February 2018

French Onion Soup - and How to Caramelize Onions

French Onion Soup - and How to Caramelize Onions - Soupe a l'Oignon Gratinee (this photo - soup in two-handled bowl on plate) / www.delightfulrepast.com

My favorite French Onion Soup came to mind recently when I read Caramelized Onions: The Controversy Continues at The Splendid Table. If you're a technique geek like me, you'll enjoy the article and/or podcast.

I can't always take the time to thoroughly caramelize the onions for a special version of my Vegetable Beef Soup, but it is a must for classic French onion soup. If you don't have the time, don't even make it.

Ever since my mother and I watched Julia Child make it on television when I was a child, I had intended to make it. Every time I had it in a French restaurant, I had intended to make it. Finally, five years ago I did. 

Naturally, I started with Julia's version in Mastering the Art of French Cooking - Volume One. And, just as naturally, I couldn't help making a few additions and subtractions as well as streamlining the directions.


French Onion Soup - and How to Caramelize Onions - Soupe a l'Oignon Gratinee (this photo - soup in Le Creuset enameled cast iron mini cocotte) / www.delightfulrepast.com


The photo above shows a serving of soup in the Le Creuset enameled cast iron mini cocotte.

There's nothing difficult about it. It just takes a little patience and some good broth or stock. If you don't want to take at least 45 minutes to properly caramelize the onions, don't make this soup.

There was a time when I would have said, if you don't want to make homemade beef stock, don't make this soup. But there are some really good lower sodium organic beef stocks and broths on the market now. 

Good, flavorful, not-too-salty broth or stock, along with the properly caramelized onions, is key to this soup. There are plenty of recipes out there shortcutting the cooking of the onions. Don't you believe them!

If your eyes are as sensitive to onions as mine are, you need to get these fabulous onion goggles -- they have changed my life! And they're kind of cute, too. Unfortunately, no one was around to take a picture of me modeling them!

We have many weeks of Soup Weather ahead - tell me about your favorite soups. (And next time you're in the mood for a dip, use this same technique for homemade French Onion Dip.)


French Onion Soup - and How to Caramelize Onions - Soupe a l'Oignon Gratinee / www.delightfulrepast.com


French Onion Soup - Soupe a l'Oignon Gratinee


(Makes about 7 cups / about 6 servings)

1 1/2 pounds (24 ounces/680 grams) yellow onions, quartered and thinly (about 1/8 inch or so) sliced
2 tablespoons (1 ounce/28 grams) unsalted butter
1 tablespoon (0.5 fluid ounce/15 ml) extra virgin olive oil
1 teaspoon salt
1/2 teaspoon sugar
3 tablespoons unbleached all-purpose flour
1/4 cup (2 fluid ounces/59 ml) dry sherry
1 quart (about 1 litre) very good beef broth or stock
1 quart (about 1 litre) water
1/4 teaspoon dried thyme leaves
1/4 teaspoon dried marjoram
1/4 teaspoon coarsely ground black pepper
3 tablespoons (1.5 fluid ounces/44 ml) brandy, optional
6 rounds of hard-toasted French bread
1 1/4 cups (5 ounces/142 grams) grated gruyere or Swiss cheese
6 tablespoons grated Parmesan

1 In heavy-bottomed large pot (a 4-quart is fine, but I used my Le Creuset 5.5-Quart French Oven), cook the onions in butter and oil over low heat, covered, for 15 minutes. No need to watch them, just set the timer and walk away.

2 Stir in the salt and sugar (helps with browning). Cook, uncovered, over moderate heat (onions should be sizzling), stirring occasionally,* for about 45 minutes, or until onions are well caramelized, evenly golden brown. It might even take an hour or more, depending on the onions, your pan, your stove.

* I checked the onions every 5 minutes but did not stir them until they were sticking to the pan a bit. You need to let the onions stick a little to brown, then stir and scrape the pan. Just do not let it burn, or it's all over! You can add up to a tablespoon of additional olive oil, if needed.

3 During the last 15 minutes of cooking the onions, bring the stock and water to a boil in a 3-quart saucepan.

4 When the onions are thoroughly caramelized, turn the heat down to low. Sprinkle flour over the caramelized onions. Cook, stirring, for 2 minutes. Stir in the sherry, and cook for 1 minute.

5 Off heat, stir the boiling liquid (gradually at first) into the onions. Stir in the thyme, marjoram and black pepper (and the brandy, if you're using it). Simmer, partially covered, for 30 minutes. Taste and adjust seasoning (at this point, I added another 1/4 teaspoon each salt and pepper). May be made ahead to this point, cooled and then refrigerated until ready to use. While soup is simmering, cut slices of French bread to fit your broiler-proof* soup bowls and toast them on a baking sheet in the oven until they are hard as well as toasted.

6 About 10 minutes before serving, preheat broiler. Bring the soup to a boil, then ladle into broiler-proof soup bowls. Place toast rounds on top, and spread cheeses over each. Place on a large, foil-lined baking sheet and put under the broiler for about 2 minutes to melt cheese and brown the tops.

* If your bowls are not broiler-proof, just broil the cheese-topped toasts and float them on top of the soup. I used slices of my Sourdough Sandwich Bread because you want to use a sturdy bread. After toasting the bread, I cut out 3.5-inch rounds with a cookie cutter, placed them on a foil-covered baking sheet, topped each with a tablespoon of grated Parmesan and about 3 tablespoons of coarsely shredded Swiss. Pop them under the broiler until cheese is bubbling and browning (in this case that was about 4 1/2 minutes), then float them on the bowls of soup.

Note: If you're a Julia Child fan, you might enjoy reading my Vegetable Quiche post about one of my conversations with her.

Disclosure: We are a participant in the Amazon Services LLC Associates Program, an affiliate advertising program designed to provide a means for us to earn fees by linking to Amazon .com and affiliated sites.

25 January 2018

Perfect Pumpkin Pie - Without Canned Milk

Perfect Pumpkin Pie - Without Canned Milk (this photo - slice of pie with whipped cream) / www.delightfulrepast.com

Pumpkin pie is one of my favorite autumn and winter desserts. You may be pumpkined-out, but I’m not. And neither are our friends, apparently.

A couple we know likes to drop off little surprises for us from time to time. This time it was a can of organic pumpkin (a broad hint, if ever there was one).

When they drop off ice cream, they always call after they drive away just to make sure we bring it in before it melts!

I've posted Pumpkin Pie before, one made with canned evaporated milk. But I can't buy organic evaporated milk just anywhere, so I worked on a recipe I can make with readily available organic milk and cream.

Sometimes, when my Southern genes are coming out, I make Sweet Potato Pie instead. But I make pumpkin when the Pilgrim genes are coming out (several of my paternal grandfather's ancestors came over on the Mayflower).

And, besides, our friends had requested pumpkin. I mean, if they had wanted sweet potato pie, they would have dropped off sweet potatoes, right?

When I make pumpkin pie for just us, I only use 1/4 cup of sugar. I know, I know, it sounds extreme; but we love it. However, I know other people might not, so I “go crazy” with the sugar and use 2/3 cup when making the pie for guests.

Most pumpkin pie recipes call for two eggs, but I make mine with three for added protein. And since I wanted to par-bake the crust before filling it (no soggy bottoms!), I added an egg yolk to help keep the all-butter crust tender through its double baking.


Perfect Pumpkin Pie - Without Canned Milk - secrets to perfectly smooth custard and perfectly flaky--no soggy bottoms!--crust (this photo - slice of pie and a teapot) / www.delightfulrepast.com


Pumpkin Pie


(Makes one 9-inch pie, 8 servings)


The Pastry (or my Gluten-Free Pie Crust)


1 1/3 dip-and-sweep cups (6.67 ounces/189 grams) unbleached all-purpose flour
1/2 teaspoon salt
1 1/4 sticks (5 ounces/142 grams) unsalted butter, well chilled

1 large egg yolk
3 tablespoons ice water
Additional ice water, a teaspoon at a time, if needed

The Filling


2/3 cup (4.67 ounces/132 grams) sugar
1 tablespoon non-GMO cornstarch
1 teaspoon cinnamon
1/2 teaspoon ginger
1/4 teaspoon salt
1/8 teaspoon allspice
1/8 teaspoon nutmeg
1/8 teaspoon ground cloves
3 large eggs
1 15-ounce (425 grams) can pumpkin (not pumpkin pie filling) or 1 3/4 cups pumpkin puree
1/2 cup (4 fluid ounces/118 ml) heavy cream
1/2 cup (4 fluid ounces/118
ml) milk

1 In medium bowl, whisk together flour and salt. With coarse grater, grate about 3/4 of the stick of butter into flour bowl. Cut the remaining butter into 1/2-inch cubes. With fingers, quickly work the grated butter into the flour until it looks like coarse crumbs. Add the cubed butter and work it into the crumbs, leaving some pieces the size of small peas.

2 In small bowl, beat together egg yolk and 3 tablespoons ice water. Sprinkle over flour mixture while stirring with large fork. Add a little more water, a teaspoon at a time, if needed.

3 Turn dough out onto a piece of plastic wrap and flatten slightly into a 5-inch round disk with smooth edges; double wrap; refrigerate for one hour or up to four days. May be frozen for up to a month; defrost, wrapped, in the refrigerator.

4 If dough is thoroughly chilled, let it stand at room temperature for 15 minutes before rolling. Very lightly butter a 9-inch glass pie plate; I usually just run the butter wrapper over it. On lightly floured surface, roll out disk to a 13-inch circle about 1/8 inch thick. Place pastry in pie plate, being careful to not stretch the dough. Leave a 1-inch overhang of dough. Crimp the edge. (Sometimes you need to chill the pastry a bit before crimping.) Flute the edge higher than usual to contain the filling. Cover loosely and place in freezer for 15 minutes. Preheat oven to 375F/190C/Gas5.

Pumpkin Pie - Without Canned Milk (this photo - unbaked pie shell) / www.delightfulrepast.com


5 Fit a square of aluminum foil in the shell and fill with ceramic pie weights (baking beans). Set on a rimmed baking sheet (to catch butter drips). Bake the thoroughly chilled crust for 20 minutes, the remove the foil and pie weights and bake for another 10 minutes.


Perfect Pumpkin Pie (this photo - unbaked pie shell filled with pie weights) / www.delightfulrepast.com


Note: I use two boxes of the ceramic pie weights, and they just fit nicely into a 200-gram tea tin!

6 Remove par-baked pie shell from the oven; leave the oven at 375F/190C/Gas5. While pie shell is cooling on a wire rack for 30 minutes, prepare filling.

7 In medium bowl (using a 2-quart glass measure makes it easy to pour the filling into the crust), whisk together sugar, cornstarch, salt and spices. Whisk in the eggs, then the pumpkin and then the milk and cream. Let the filling stand at room temperature until the pie shell is cool. 

8 Pour the filling into the par-baked shell. Put on a pie crust shield to prevent the edge of the crust from over-browning.  As soon as you put the pie in the oven, reduce temperature to 350F/180C/Gas4. Bake for about 60 to 70 minutes or until knife inserted midway between edge and center comes out clean or until it registers 185F/85C on an instant-read thermometer.

Note: After you've made pumpkin pie a few times, you can tell just by looking whether or not it's done. It will look darker and shinier and will have puffed up a bit and then fallen, and it should be fairly firm but still have a little jiggle left in the center.

9 Cool on wire rack for 2 hours, then lay a square of wax paper over the top and refrigerate for at least 3 hours. Serve with softly whipped cream. I sweetened and flavored 1 cup of heavy whipping cream with 4 teaspoons of real maple syrup and 1 teaspoon of vanilla extract.

Note: Leftovers can be stored in the refrigerator for up to 3 or 4 days. As if!

Disclosure: We are a participant in the Amazon Services LLC Associates Program, an affiliate advertising program designed to provide a means for us to earn fees by linking to Amazon .com and affiliated sites.
Jean