Showing posts with label food processor recipes. Show all posts

13 April 2023

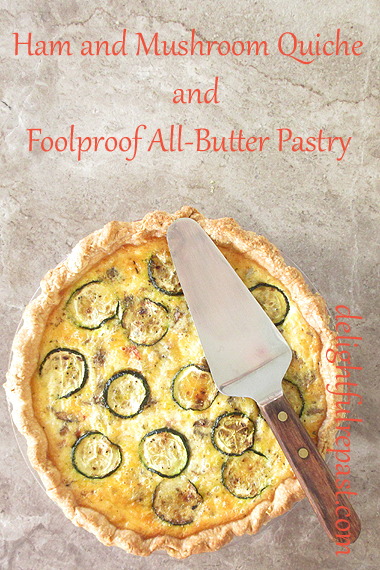
Ham and Mushroom Quiche - Foolproof All-Butter Pastry Tutorial

Ham and Mushroom Quiche - Foolproof All-Butter Pastry / www.delightfulrepast.com

Pie crust is my "thing," and I make it by all sorts of methods, depending on my mood: food processor, stand mixer, by hand in a bowl, by hand on the worktop, with a pastry blender, with a bench scraper, with my fingers, you name it. Sometimes with water, sometimes milk or soured milk or buttermilk, sometimes egg, sometimes baking powder, vinegar or lemon juice. But always with unsalted butter. I love an all-butter pie crust. 

At one time or another I've made pie crust with shortening, part shortening and part butter, lard, part lard and part butter, even oil. But nothing is better than butter. I've been on a pie kick lately and decided my fingers needed a break, so I'd use the food processor. But I was itching to try something different, and I remembered that I'd heard years ago of a different food processor method but never got around to trying it. So, I adapted my usual (well, most usual) two-crust recipe to that method. And ...

I liked it! So, we've been eating lots of pies around here. Then I decided it had been far too long since I'd made a quiche and, working with what I had on hand, came up with my favorite quiche yet! Ham, onion, red bell pepper, zucchini, mushrooms, cheddar cheese. You can make substitutions, as long as you keep the total add-ins to not more than 2 cups of cooked items. Otherwise, you won't be able to use all the custard filling, no matter how high you fluted your pie shell; and you know how much I hate food waste!

Rather than tell you here what is so different about this flour-butter paste method, I'll invite you to read the directions for it below. And let me know what you think. Have you tried this method? If not, do! And make the quiche while you're at it. Don't know why, but springtime always seems like the right time for quiche!


Ham and Mushroom Quiche - Foolproof All-Butter Pastry / www.delightfulrepast.com

If you like it, please Pin it and share it!


Ham and Mushroom Quiche & Foolproof All-Butter Pastry


The Pastry

(for two pie shells or one double-crust pie)

2 1/2 dip-and-sweep cups (12.5 ounces/354 grams) unbleached all-purpose flour, divided
1 tablespoon sugar
1 teaspoon salt
2 sticks (8 ounces/227 grams) unsalted butter, cut into 1/4-inch slices
5 tablespoons (2.5 fluid ounces/74 ml) ice water plus 1 tablespoon (0.5 fluid ounces/15 ml) apple cider vinegar

The Quiche

(makes one 9-inch quiche)

1 to 2 tablespoons extra virgin olive oil, divided
8-ounce package (227 grams) mushrooms, chopped 
3/4 cup (4 ounces/113 grams) julienned ham
1/4 cup (1.25 ounces/38 grams) chopped onion
1/4 cup (1.25 ounces/38 grams) chopped red bell pepper
1/2 medium zucchini (3 ounces/85 grams) sliced
3 large eggs
1/2 + 1/8 cup (5 fluid ounces/148 ml) heavy cream
1/2 + 1/8 cup (5 fluid ounces/148 ml) milk
1/4 teaspoon salt, divided
1/4 teaspoon coarsely ground pepper, divided
1/4 teaspoon marjoram
1/8 teaspoon nutmeg
1/8 teaspoon crushed red pepper flakes
1 packed cup (4 ounces/113 grams) cheddar (or ...) cheese, shredded


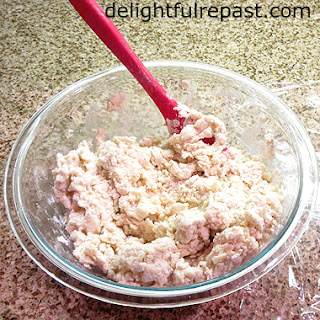
1 Weigh (my kitchen scale) and measure flour, sugar, and salt in 2- to 2.5-quart mixing bowl. Whisk vigorously for about 30 seconds to "sift." With food processor's metal blade in place, scoop out half (1 1/4 cups) the flour mixture into the work bowl of the food processor (another 11-cup food processor). Spread the butter slices evenly over the fairly even flour mixture. Pulse until no dry flour remains and mixture is starting to form clumps of dough, about 25 to 30 one-second pulses. Don't get hung up on counting the number of pulses, just watch for the clumping to begin. With a silicone spatula, spread dough evenly around the work bowl. Sprinkle with the remaining flour and pulse until the dough is just barely broken up, about 5 1-second pulses.

Foolproof All-Butter Pie Crust Flour-Butter Paste Method (Step 1) / www.delightfulrepast.com

 
2 Transfer the dough back to the 2- to 2.5-quart mixing bowl. Cover and refrigerate for 10 minutes or so before proceeding. Sprinkle the dough with the water-vinegar mixture and use the spatula to fold and press the dough until it comes together into a ball.

Foolproof All-Butter Pie Crust Flour-Butter Paste Method (Step 2) / www.delightfulrepast.com


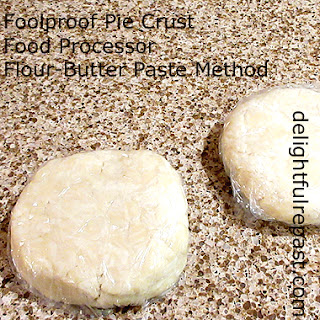
3 Turn the dough out, dividing onto two pieces of plastic wrap and flatten each slightly into a 4- to 5-inch round disk. Wrap and refrigerate for at least 2 hours or up to 3 days. You can even freeze the dough, wrapped well, for up to a month. To defrost the dough, move it from freezer to refrigerator for one day before using it. Let thoroughly chilled dough stand at room temperature for 10 to 15 minutes for easier rolling.

Foolproof All-Butter Pie Crust Flour-Butter Paste Method (Step 3) / www.delightfulrepast.com


Note: If you're making two pie shells, make the disks the same size. If you're making a double-crust pie, make one disk a little larger for the bottom crust. For a 9-inch double-crust pie (I always use the classic 9-inch Pyrex pie plate), I roll the bottom crust into a 13-inch circle and the top crust into an 11-inch circle. 

Foolproof All-Butter Pie Crust Flour-Butter Paste Method (Step 4) / www.delightfulrepast.com


4 For single-crust pie: On lightly floured surface with lightly floured rolling pin, roll out the dough to 13 inches in diameter and 1/8 inch or so thick. Transfer the dough to the pie plate, pressing the dough (but not stretching it) to fit the pie plate, getting down into the corners, with a half- to one-inch overhang (trim with knife or scissors, and save in case you need to patch a little hole after the blind baking). Cover with the reserved piece of plastic wrap and chill for 10 minutes before fluting the edge. Cover and return to refrigerator while the oven heats up. Preheat oven to 375F/190C/Gas5. Line chilled pie shell with a square of foil and fill with pie weights (baking beans, in UK). I use two boxes of ceramic pie weights that store neatly in a 200-gram Twinings tea tin. Bake for 25 minutes. Remove pie weights. Prick the pastry bottom all over with a fork. Bake for another 15 minutes until golden brown. 

Foolproof All-Butter Pie Crust Flour-Butter Paste Method (Step 4) / www.delightfulrepast.com


For double-crust pie: On lightly floured surface with lightly floured rolling pin, roll out the bottom crust dough to 13 inches in diameter and 1/8 inch or so thick. Transfer the dough to the pie plate, pressing the dough (but not stretching it) to fit the pie plate with a half- to one-inch overhang (trim with knife or scissors). Cover with the reserved piece of plastic wrap and refrigerate. Roll out top crust dough to 11 inches in diameter and 1/8 inch or so thick and place it on a rimless baking sheet; cover with reserved plastic wrap and refrigerate. Make pie filling. Then assemble pie and bake as directed. 

And now, to the quiche!

5 In a large skillet, heat a tablespoon of olive oil and cook the mushrooms, ham, onion, and bell pepper, adding more olive oil as needed. Use 1/8 teaspoon of the salt, 1/8 teaspoon of the pepper, and all the marjoram. Be sure all the liquid has evaporated. Cook the zucchini slices separately. Let cool a bit.

6 Preheat oven to 350F/180C/Gas4. Into the fully baked pie shell, put a third of the cheese, half of the ham and vegetables (except the sliced zucchini), a third of the cheese, other half of the ham and vegetables. Pour in the filling. Top with the remaining cheese and the zucchini slices. Set on a parchment-lined 15x10x1-inch baking sheet. Bake for about 50 to 70 minutes, or until it tests done. A slight wobble in the center is fine, but it should not be wet. The reason there's quite a time range given is because of the variables: your oven, how well cooked (moisture removed) the vegetables were, and so on. 

Note: It's always good to keep an aluminum pie crust shield handy in case your edges are overbrowning.

7 Let quiche stand for 20 to 25 minutes before slicing and serving.

Disclosure: We are a participant in the Amazon Services LLC Associates Program, an affiliate advertising program designed to provide a means for us to earn fees at no cost to you by linking to Amazon .com and affiliated sites. This helps cover some of the costs of running the blog. Thank you for your support. 

Jean

If you liked this post, please Pin it and share it!

01 August 2019

Tomato Galette

Tomato Galette / www.delightfulrepast.com

Tomato Galette is a great way to use some of my bumper crop of tomatoes. My kitchen garden got a miss for a few years, and I thought I'd go easy on myself this first year reviving it and so planted just two tomato plants. Well, my organic soil must have been dynamite because those two plants took off immediately and grew so fast you could practically see it happening!


Tomato Galette / www.delightfulrepast.com
Thought a homegrown tomato deserved to have it's portrait painted!


For this recipe I used the regular tomato, a medium-sized round variety. For my Tomato Tart (you really must try it!) I'll be using the cherry, actually grape, tomato this year. Both of these recipes make even bland store-bought tomatoes taste the way they should, so don't feel you needn't bother if you're not a gardener.

Tomato Galette / www.delightfulrepast.com


Don't even think about taking a shortcut and skipping step four of the directions. Salting and draining the tomatoes is essential. If you don't, all the excess water in them will dilute the tomato flavor and make the crust soggy instead of crisp and flaky. And stick with the tablespoon of minced shallot; it's all you need to add plenty of flavor without it overtaking the tomatoes.

Also resist the urge to add herbs and spices. Anything more than a sprinkling of chopped parsley or chiffonade of fresh basil when the galette comes out of the oven only detracts from the tomatoes, which are the stars of the show.

What do you do with a bumper crop of tomatoes? 

Tomato Galette / www.delightfulrepast.com

Tomato Galette


(Makes one 11-inch tart)

The Pastry (food processor* method)

1 1/2 dip-and-sweep cups (7.5 ounces/213 grams) unbleached all-purpose flour 
3/4 teaspoon salt 
1/8 teaspoon baking powder 
1 stick (4 ounces/113 grams) unsalted butter, cut into 1/2-inch cubes and frozen for 10 minutes
1/4 cup (2 fluid ounces/59 ml) ice water plus 1 tablespoon, only if needed
1 tablespoon apple cider vinegar

The Tomatoes

1 1/2 pounds (24 ounces/680 grams) tomatoes, sliced 1/4 inch thick
1/2 teaspoon salt
1 tablespoon extra virgin olive oil
1 tablespoon finely minced shallot
1 cup (4 ounces/113 grams) finely shredded medium cheddar or mozzarella or provolone or a combination
1/2 cup (1.75 ounces/50 grams) finely grated parmesan
About a tablespoon of beaten egg, cream or milk
1/4 teaspoon coarsely ground black pepper
Pinch of salt

Garnish: chopped flat-leaf parsley or chiffonade of fresh basil


1 With metal blade in place, add flour, salt and baking powder to work bowl of food processor. Turn on for three seconds to combine. Add half the frozen butter and process for 10 seconds or until mixture has the consistency of coarse meal. Add remaining butter and pulse for six 1-second pulses, or until the frozen butter is the size of small peas. 

2 Pour ice water and apple cider vinegar over all of flour mixture; pulse for six to twelve 1-second pulses or just until dough forms large clumps; do not over-process. (The amount of water you will need depends on your climate and the moisture content of your flour. You may need to use a bit more or less water than I do.) 

3 Wrap dough in a piece of plastic wrap and flatten slightly into a 5-inch round disk; double wrap; refrigerate for at least 30 minutes or up to three days. (Let thoroughly chilled dough stand at room temperature for 15 minutes before rolling.) 

4 Preheat oven to 400F/20C/Gas6. Toss together the tomato slices and salt; let stand 10 minutes. Drain off liquid and place tomato slices on paper towels or an impeccably clean kitchen towel; pat dry. In small pan, heat olive oil and saute shallot; cool.

5 On lightly floured 14-inch square of baking parchment paper (love my dispenser with slide cutter), roll out pastry to 14-inch circle (it will be about 1/8 inch thick). Irregular edges are fine; a galette is supposed to be rustic. Transfer pastry on parchment to an ungreased 18x13x1-inch half sheet pan or a 14x16-inch rimless baking sheet.

Tomato Galette - easy way to handle the pastry / www.delightfulrepast.com


6 Scatter cheese over pastry, leaving a 1.5-inch (4 cm) border. Arrange tomatoes and cooked shallots over the cheese. Bring edges of dough up over the filling, sort of pleating as you go, about every 3 inches. Brush dough with about a tablespoon of beaten egg (or cream, even milk, if you don't have another use coming up for the leftover egg!). Sprinkle tomatoes with pepper and a pinch of salt if you think the previously salted tomatoes could use a bit more. Place in freezer for 10 minutes.


7 Bake for about 55 to 60 minutes, or until crust is golden. Cool slightly on baking sheet for about 10 minutes before cutting and serving. Cut into 4 pieces for a lunch serving, 8 for a first course serving, or into 12 to 16 skinny wedges for an hors d'oeuvre or afternoon tea savory. Serve warm or at room temperature.

* I've used the OXO Good Grips Pizza Wheel for Non-Stick Pans for years on galettes as well as pizza, and it cuts like a dream!

Disclosure: We are a participant in the Amazon Services LLC Associates Program, an affiliate advertising program designed to provide a means for us to earn fees by linking to Amazon .com and affiliated sites. We are a ThermoWorks affiliate, earning a small commission at no cost to you on purchases made through our links. This helps cover some of the costs of running the blog. Thank you for your support. 

Jean

25 July 2019

Peach Pie with Lattice Crust

Peach Pie with Lattice Crust (food processor or by hand pastry method) / www.delightfulrepast.com

Peach pie with a lattice crust is my all-time favorite pie. I know, I know, I just blogged about peaches last week. Can't help myself--this is peach headquarters during peach season! I may be blogging about them next week as well.

A couple we know lives next door to the non-peach-loving owners of a fabulous peach tree and have been dropping off lovely organic peaches for us nearly every day. One day I was getting behind on my peach baking and froze a batch.


Peach Pie with Lattice Crust / www.delightfulrepast.com
Couldn't resist doing a quick watercolor sketch
before cutting up the peaches!


My trick for getting good peaches every time at the store or farmers market is to go by smell. If you can't smell the peaches, you might as well buy a bag of fuzzy styrofoam balls! Also, beware of "green shoulders" around the stem end, an indicator that the peaches were picked too soon.

Yellow-fleshed freestone peaches, with the perfect balance of sugar and acid, are the very best for pie-making. White-fleshed peaches are too delicate and subtle for pies. Peach season will be over before we know it, so bake this pie as soon as you can.

Are you a "pie person" or a "cake person?" 


Peach Pie with Lattice Crust / www.delightfulrepast.com
Please Pin it and share it!


Peach Pie


(Makes one 9-inch/23 cm pie, 8 servings)

The Pastry

2 1/2 dip-and-sweep cups (12.5 ounces/354 grams) unbleached all-purpose flour
1 teaspoon salt
1/4 teaspoon baking powder
2 sticks (8 ounces/227 grams) unsalted butter, cut into 1/2-inch cubes and frozen for 10 minutes
2 tablespoons (1 fluid ounce/30 ml) apple cider vinegar or fresh lemon juice

Ice water to make 3/4 cup (6 fluid ounces/177 ml) liquid

The Peach Pie Filling


2 1/2 pounds (1.13 kg/about 5 large) perfectly ripe yellow peaches
1/2 to 2/3 cup (3.5 to 4.67 ounces/99 to 132 grams) sugar
1/4 cup (1 ounce/28 grams) tapioca flour or cornstarch (but tapioca flour is better)
1/8 teaspoon salt
1/4 teaspoon cinnamon

1/8 teaspoon mace or nutmeg


Note: No food processor? See How to Make an All-Butter Pie Crust by Hand - Pie Crust Unplugged. Food processor method below. 


1 With metal blade in place, add flour, salt and baking powder to work bowl of food processor. Turn on for three seconds to combine. Add half the frozen butter and process for 10 seconds or until mixture has the consistency of coarse meal. Add remaining butter and pulse for six 1-second pulses, or until the frozen butter is the size of small peas. 

2 In 3/4-cup measure, combine vinegar or lemon juice and ice water. Pour over all of flour mixture; pulse for six 1-second pulses or just until dough forms large clumps; do not over-process. (The amount of water you will need depends on your climate and the moisture content of your flour. You may not need to use quite as much water as I do.) 

3 Turn dough out onto work surface. Divide dough into two balls. Place each ball on a piece of plastic wrap and flatten slightly into a 5-inch round disk; double wrap; refrigerate for at least 30 minutes or up to three days. (Let thoroughly chilled dough stand at room temperature for 15 minutes before rolling.) 

4 Preheat oven to 425F/220C/Gas7. On lightly floured surface, roll out dough to a 13-inch (33 cm) circle about 1/8 inch (3 mm) thick. Line 9-inch glass pie plate with pastry, trimming overhang to about 3/4 inch. Place in refrigerator.

5 On a piece of parchment, roll out second disk of dough just like the first. With a straight edge and a knife or pizza cutter, cut the dough into 10 even strips about 3/4 inch wide. Transfer, on the parchment, to a rimless baking sheet, cover with plastic or parchment, and refrigerate while preparing filling. All-butter pastry is fussy about being kept cold!

6 Peel peaches (or not, if they're thin-skinned and smooth like these) and slice into a large bowl (I use a 2-quart glass measure). You'll have about 6 cups of sliced peaches. (I slice large peaches like this: Quarter peach, cut each quarter into 4 wedges, cut wedges in half or thirds.) In a small bowl, whisk together sugar, cornstarch tapioca flour (vastly superior to cornstarch or any other thickener for fruit pies), salt and spices; add to peaches and mix gently but well. Pour into pie shell.

Note: I almost never peel organic peaches. I just wash them very well and rub off the fuzz. The colorful skin adds nutrition and a beautiful color to whatever you're making.


7 Working from the center, lay 5 strips of dough across the pie in one direction. Fold back every other strip halfway. Place a long strip of dough in the center going the other way. Unfold the folded strips over the crossing strip. Repeat with remaining 4 strips. Trim the overhanging strips even with the bottom crust and crimp the edge.

8 Place a foil-lined rimmed baking sheet in the middle of the oven to catch any drips, and place the pie on the baking sheet. Bake at 425F/220C/Gas7 for 30 minutes. Lower temperature to 350F/180C/Gas4, and bake for an additional 35 minutes (juices should be bubbling). Cool on wire rack for at least 2 to 4 hours before serving.

Disclosure: We are a participant in the Amazon Services LLC Associates Program, an affiliate advertising program designed to provide a means for us to earn fees by linking to Amazon .com and affiliated sites. We are a ThermoWorks affiliate, earning a small commission at no cost to you on purchases made through our links. This helps cover some of the costs of running the blog. Thank you for your support. 

Jean

11 April 2019

Grated Carrot Salad - Salade de Carottes Rapees

Grated Carrot Salad - Salade de Carottes Rapees - French Bistro Classic My Way / www.delightfulrepast.com

A simple grated carrot salad, Salade de Carottes Râpées, is one of the classics of modern French cuisine, found on every bistro menu, or so I’m told. Of course, I’ve put my own spin on it, so I should probably delete that French name.

Lemon juice is the acid for the classic version, but I think sweet carrots are just calling out for a good red wine vinegar. And I’ve skipped the chopped flat-leaf parsley and added chopped capers (I love capers). Les câpres.


Grated Carrot Salad - Salade de Carottes Rapees - French Bistro Classic My Way / www.delightfulrepast.com


It’s a salad that’s not supposed to be swimming in dressing, and this small amount of dressing is perfect for this amount of carrots. Doing a pound and a half of carrots? Just up the oil and vinegar to 3 tablespoons each.

This is one of those dishes that is so fast and so easy, you can’t quite believe it could possibly be so good. Are you a carrot salad fan?


Grated Carrot Salad - Salade de Carottes Rapees - French Bistro Classic My Way / www.delightfulrepast.com


Grated Carrot Salad - 

Salade de Carottes Râpées


(Makes 4 to 6 servings)

1 pound (16 ounces/454 grams) carrots
2 teaspoons capers, rinsed and drained, chopped
2 tablespoons (1 fluid ounce/30 ml) extra virgin olive oil
2 tablespoons (1 fluid ounce/30 ml) red wine vinegar
1/8 teaspoon salt
1/8 teaspoon coarsely ground black pepper

1 Scrub, peel and grate the carrots. 

Note: For long shreds, I cut the carrots into about 4.5-inch lengths to fit the big feed tube and use the medium shredding disc on my Cuisinart DLC-2011CHBY food processor.

2 Put the carrots in a 1.5-quart bowl and add the capers.

3 In 1-cup glass measure, whisk together the olive oil, vinegar, salt and pepper. Add to the carrots and toss to mix well. This small amount of dressing is exactly the amount needed for this amount of carrots. Taste and adjust seasoning.

Disclosure: We are a participant in the Amazon Services LLC Associates Program, an affiliate advertising program designed to provide a means for us to earn fees by linking to Amazon .com and affiliated sites. We are a ThermoWorks affiliate, earning a small commission at no cost to you on purchases made through our links. This helps cover some of the costs of running the blog. Thank you for your support. 

Jean

07 March 2019

Mini Fruit Tartlets - Tartelettes aux Fruits

Mini Fruit Tartlets - Tartelettes aux Fruits / www.delightfulrepast.com

Mini fruit tartlets are the one sweet thing I’m happy to see on the three-tiered stand at afternoon tea. You know I’m all about the sandwiches and scones at tea, but I’m not averse to a well-made mini fruit tartlet or two.

They’re the perfect little dessert to bring out to cap off any kind of “finger foods” occasion. They always get rave reviews. One group declared my little tarts “bakery quality, no, even better than bakery quality!” 


Mini Fruit Tartlets - Tartelettes aux Fruits / www.delightfulrepast.com


They’re quick and easy to assemble on the day you want to serve them if you make your pastry and pastry cream a day or two ahead. You can even bake the pastry shells ahead and store at room temperature in an airtight container. 

I can bake a double batch at one time because I have two pans, but my newest tartelette pan is vastly superior. It’s the Nordic Ware heavy cast aluminum tartelette pan which bakes very evenly and makes very sharp fluting.

If you’re a fan of individual-serving and mini foods, I know you’ll enjoy making, and eating, these little tartlets. What kind of fruits will you use?


Mini Fruit Tartlets - Tartelettes aux Fruits / www.delightfulrepast.com


Mini Fruit Tartlets – Tartelettes aux Fruits 


(Makes 12 2.5-inch/6.35 cm mini tarts)

The Pastry Cream - Crème Pâtissière

(Makes about 1 1/4 cups)

1 cup (8 fluid ounces/237 ml) milk
1/4 cup (1.75 ounces/50 grams) sugar
1/4 cup (1.25 ounces/grams) unbleached all-purpose flour
1/16 teaspoon salt
1 large egg
1 large egg yolk (white reserved for pastry)
1 tablespoon cold unsalted butter

1 teaspoon vanilla extract

The Pastry - Pâte Sucrée 


1 dip-and-sweep cup (5 ounces/142 grams) unbleached all-purpose flour
1/8 packed cup (0.5 ounce/14 grams) unsifted powdered sugar
1/4 teaspoon salt
6 tablespoons (3 ounces/85 grams) cold unsalted butter, cut into 1/2-inch cubes
1 large egg white (yolk used in pastry cream)


The Fruit and Glaze


About 1 1/2 cups assorted berries and sliced fruits such as kiwi
2 tablespoons jam plus 2 teaspoons water, melted and strained

1 In heavy-bottomed saucepan (I use the Le Creuset Stainless Steel 2-Quart Saucier), heat milk to just below a simmer. You'll see a skin forming and the milk wiggling under the surface.

2 In 1- to 1.5-quart mixing bowl, whisk together sugar, flour, cornstarch and salt. Whisk in egg and yolk. Gradually whisk in the hot milk. Use an electric hand mixer if you like.

3 Pour the mixture back into the saucepan (or saucier) and cook over medium-low heat, whisking constantly (slowly at first, then speeding up as the custard thickens), until the custard gets very, very thick and holds the whisk marks. Pay close attention; if you get distracted for a second, you can end up with bits of scrambled egg in your custard.

4 Remove from heat, and stir in butter and vanilla extract. If you have any lumps of egg, place a fine-mesh strainer over a small bowl, and press pastry cream through it to ensure a perfectly smooth custard. Cover surface of custard with a round of parchment paper cut to fit the bowl. Cool to room temperature, then refrigerate to chill.

5 Add flour, powdered sugar and salt to work bowl of food processor; turn on for about 3 or 4 seconds to combine. Add chunks of butter; pulse to a crumb texture. Add egg; pulse until the dough starts clumping together. This is to be a crisp, more cookie-like crust, rather than a flaky pastry; so there's not quite the concern about over-processing. Flatten slightly into a 4- to 6-inch round disc, wrap and refrigerate for 30 to 60 minutes. 

6 Prepare a 12-well tartelette pan by brushing each well with very soft butter. On lightly floured surface or square of parchment paper, roll out the pastry to about a 10-inch/25.5 cm square; pastry should be very thin, about 1/8-inch thick. With a 3-inch/7.5 cm cutter, cut out 9 circles; reroll the dough to 1/8-inch thickness and cut out 3 circles. Fit the pastry circles firmly into the tin, but do not stretch the dough. With a fork, poke holes all over bottom of the pastry. Place in freezer for 15 minutes while preheating the oven to 400F/205C/Gas6. 

7 Bake tart shells until light golden brown, about 12 to 13 minutes (though it might be different for your oven, your pan, etc). Let cool in pan for 5 minutes before taking pastry shells out to continue cooling on wire rack. 

8 To assemble tartelettes, whisk the pastry cream to loosen it. Fill each completely cooled pastry shell with a tablespoon or so of pastry cream. Smooth the tops. Place fruit on top. Brush with melted jam glaze. Keep refrigerated until serving time. 

Disclosure: We are a participant in the Amazon Services LLC Associates Program, an affiliate advertising program designed to provide a means for us to earn fees by linking to Amazon .com and affiliated sites. We are a ThermoWorks affiliate, earning a small commission at no cost to you on purchases made through our links. This helps cover some of the costs of running the blog. Thank you for your support.

Jean

14 February 2019

Cherry Swirl Cheesecake - Instant Pot

Cherry Swirl Cheesecake - Instant Pot (or other electric pressure cooker) / www.delightfulrepast.com

I decided a Cherry Swirl Cheesecake would be my first Instant Pot pressure cooker cheesecake. Four years ago I got on a kick developing slow cooker cheesecake recipes, such as my Chocolate Swirl Cheesecake

A cheesecake takes 3 hours in the slow cooker. Not bad. But it takes just about 40 minutes in the Instant Pot, including coming up to pressure and pressure release.

Not a big deal for those of us who work at home; but for someone who wants to fit in making a homemade cheesecake before or after work, that speed makes all the difference. 

Cherry cheesecake was the first cheesecake I tasted when I was a young girl. I liked the flavor, but it was sickeningly sweet and full of red dye. But this is organic and natural all the way. 

I had some cherry puree left over because I forgot to put half the filling in the pan, spoon on half the puree, add the remaining filling and spoon on the remaining puree. So I just used what should have gone into the middle as sauce.  


Cherry Swirl Cheesecake - Instant Pot (or other electric pressure cooker) / www.delightfulrepast.com


Cheesecake doesn't have to be a big production. It's just about foolproof in the Instant Pot or slow cooker. Just bring a few simple ingredients to room temperature, mix them up, assemble, pop it in and forget about it. 

The main thing is to make sure all the ingredients are at room temperature to ensure a perfectly smooth and silky cheesecake. I brought everything out of the refrigerator an hour ahead.


You might be celebrating something else today, but
I'm celebrating my Ninth Blogiversary of Delightful Repast!

The 7-inch diameter makes for the perfect size servings of something so rich as cheesecake. The more typical 9- to 10-inch size pans make either huge servings or very skinny, long wedges that aren't very attractive. 

If you don’t already have a 7-inch springform pan, you might try Fat Daddio’s 7-inch removeable bottom pan instead. And I just might get one anyway because I love my Fat Daddio’s cake pans.

Are you a cheesecake fan? Mr Delightful loves cheesecake, so I figure even if I never make anything but cheesecakes in the Instant Pot it will be worth it!


Cherry Swirl Cheesecake - Instant Pot (or other electric pressure cooker) / www.delightfulrepast.com
Don't forget to Pin it and share it!


Cherry Swirl Cheesecake


(Makes one 7-inch/18 cm cheesecake, 8 servings)

The Crust

1 tablespoon unsalted butter, room temperature (for pan)
1 cup graham cracker crumbs (6 whole crackers, 3.25 ounces/92 grams)
1 tablespoon sugar
3 tablespoons (1.5 ounces/43 grams) unsalted butter, melted and cooled

The Swirl

3/4 cup or so (5 ounces/142 grams) frozen whole pitted sweet cherries, thawed and drained
2 teaspoons non-GMO cornstarch

The Filling

2 8-ounce packages (454 grams total) cream cheese, room temperature
1/2 cup (3.5 ounces/99 grams) sugar
2 large eggs, room temperature
1/2 cup (4 ounces/113 grams) sour cream, room temperature
2 teaspoons vanilla extract

1 Butter bottom and sides of a 7-inch springform pan with the softened butter. Cut a circle of parchment paper to fit the buttered bottom of the pan, then butter the top of the paper as well. Combine crumbs, sugar and melted butter until the mixture comes together. If you used a food processor to make the crumbs, you can mix the crust in it as well. If you used the rolling pin/plastic bag method to make the crumbs, you can mix the crust with a fork in a small bowl. Press the crumb mixture over the bottom and one inch up the sides of the springform pan. Place in freezer while proceeding with the recipe.

Note: I use the Progressive International 3-Inch-Deep 7-Inch Nonstick Springform Pan, which I didn't find on Amazon except in this Set of 3 Springform Pans.

2 Using a 20-inch length of aluminum foil, make a “sling” by folding it in thirds lengthwise. This will help you get the hot pan out of the pot. Save it to reuse.

3 In food processor or blender, puree cherries; measure 1/2 cup. Stir in the cornstarch; let stand.

4 With electric mixer on medium speed, mix cream cheese and sugar until perfectly smooth, about 2 minutes. Scrape the bowl and beaters/paddle. Add eggs, one at a time, mixing well on low for 20 seconds after each addition. On low speed, mix in sour cream and vanilla extract just until well combined, about 20 seconds. 

5 Pour half the cheesecake filling into prepared pan. Drop teaspoonfuls of the cherry puree on top of the filling in the pan, using not more than half the puree. Pour the remaining filling in the pan, and drop teaspoonfuls of remaining puree on top. Using a thin, pointed knife, gently cut through the batter several times in a figure-8 motion to make swirls, being careful to not disturb the crust. 

6 Place rack (with its handles down) in bottom of the Instant Pot cooking pot, and add 1 cup of water to the pot. Carefully set the cheesecake, centered on its foil sling, on the rack. 

Cherry Swirl Cheesecake - Instant Pot (or other electric pressure cooker) - this photo shows foil sling used to lift hot pan out of the pot / www.delightfulrepast.com


7 Put the lid in place and turn the steam valve to Sealing. Attach the condensation cup to the back of the unit. Plug in the Instant Pot. Press the Pressure Cook key. Leave the indicator on High Pressure and change the cooking time to 25 minutes.

Note: It took just a few minutes to reach working pressure. This varies with the amount and temperature of the ingredients in the pot. 

8 When the beep sounds, turn it off by pressing Cancel. Allow the pressure to release naturally for 10 minutes, then do a quick release by turning the steam valve to Venting.

9 When the float valve drops down, carefully remove the lid. With a paper towel, gently blot any moisture that collected on top of the cheesecake. Using the foil sling, carefully lift out the cheesecake. An instant-read thermometer* inserted in the center should register 150F/66C.

* I have the ThermoWorks Thermapen Mk-4.

10 Cool on wire rack for 1 hour. Carefully run a knife around the edge of the cheesecake. Release the spring and remove the sides of the pan. Cover and chill for at least 6 hours before serving.

Disclosure: We are a participant in the Amazon Services LLC Associates Program, an affiliate advertising program designed to provide a means for us to earn fees by linking to Amazon .com and affiliated sites. We are a ThermoWorks affiliate, earning a small commission at no cost to you on purchases made through our links. This helps cover some of the costs of running the blog. Thank you for your support. 

Jean

24 January 2019

Dal Makhani - An Indian Dish

Dal Makhani - An Indian Dish / www.delightfulrepast.com

Dal Makhani (pronounced doll mock-NEE), a buttery lentil curry, is a popular Indian (Punjabi, to be precise) dish introduced to me by Tony of the delightful blog London Calling after his autumn trip to northern India. 

Tony was part of a group of six whose guide organized a cooking experience for them in the home of a family in Old Delhi. This recipe is my adaptation of one he learned.

Dal Makhani is only the second Indian dish I’ve ever made, the first being Chicken Tikka Masala. With copious amounts of butter and cream, this is a very rich vegetarian, though not vegan, dish often reserved for special occasions.

It can be the main dish or an accompaniment. For me, a 1-cup (8 fluid ounces/237 ml) portion makes a perfect lunch all on its own, but it’s strictly a side dish for Mr Delightful.

The recipe Tony got from his hostess/instructor in Old Delhi called for cooking it in a pressure cooker. But I thought, since I’m brand new to pressure cooking, I’d adapt it to stovetop.

Lentils require no soaking and have quite a short cook time, and by using canned red kidney beans instead of dried, which take a long time, it really comes together rather quickly.

Dal Makhani requires no special equipment, just a 3-quart saucepan and a 2-quart saucepan and a food processor or blender to puree the fresh tomatoes. I’ve converted the difficult-to-find-here spices, such as black and green cardamom pods, to available ground spices.

Though I make no claims to authenticity, I think my adaptation captures the flavors quite well. But feel free to play with the spice amounts to suit your own palate.


Dal Makhani - An Indian Dish / www.delightfulrepast.com

Dal Makhani


(Makes seven 1-cup servings)

3 cups (24 fluid ounces/710 ml) water
1 1/8 cup (8 ounces/227 grams) lentils (I could not find the whole black gram lentils/urad dal called for)
1 15-ounce (425 grams) can red kidney beans, drained
3/4 cup* (6 fluid ounces/177 ml) heavy cream, divided
3/4 teaspoon salt
1/2 teaspoon paprika, divided
1/4 teaspoon ground ginger or 1-inch piece of fresh ginger, grated
1/4 teaspoon ground cloves or 4 whole cloves
1/8 teaspoon cinnamon or 1/2-inch piece of cinnamon stick
1/8 teaspoon ground cardamom
1/8 teaspoon cayenne
6 tablespoons (3 ounces/85 grams) unsalted butter
1 1/2 teaspoons ground coriander
1 1/4 teaspoons cumin or 1 teaspoon cumin seeds
1 pound (16 ounces/454 grams) tomatoes, pureed in food processor
1 4-ounce (113 grams) can diced green chiles (hot or mild, I used the hot) or 2 to 3 green chiles, minced
Garnish: cilantro (also known as fresh coriander leaves)

* That is a very generous amount of cream. I think next time I make it I'll use half the amount.

1 In 3-quart saucepan, bring water just to the boil. Stir in lentils that have been rinsed and picked over for debris. Bring the water to a rapid boil, then reduce heat and gently simmer for about 45 to 60 minutes, or until tender.

Note: If you use urad dal, whole black gram lentils, they will require soaking and longer cooking.

2 Stir in the kidney beans, half the cream (3 ounces), salt, half the paprika (1/4 teaspoon), ginger, cloves, cinnamon, cardamom and cayenne. Leave it simmer for 15 minutes or so while you proceed with the tomato mixture.

3 In 2-quart saucepan, melt the butter. Stir in the coriander, cumin, remaining 1/4 teaspoon paprika, tomato puree and green chiles. Cook for 5 to 6 minutes “or till the butter leaves the gravy.” (If you don’t know what that last bit means, don’t ask me; just cook it for about 6 minutes and let that be that!)

4 Stir the sauce into the lentil mixture and cook for another 10 minutes over low heat. Stir in the remaining cream and continue cooking for 5 minutes. Taste and adjust seasoning. Garnish with cilantro and serve with rice and naan or roti.

Jean